VyHub
VyHub, the comprehensive solution to build, manage and monetize Minecraft stores and communities. Easy integration of your Minecraft server and store. It’s the all-in-one management platform designed for your gaming community. VyHub offers a webshop, website, a donation store and bans and warnings.
Design and manage your Minecraft community through VyHub. We acknowledge that community management is hard work and takes a lot of time. With VyHub we automate your donation webstore fully. Furthermore, you can also save time on banning and warning players.
Create a professional community website and webstore in 5 minutes!
And there is more: VyHub provides you with an all-in-one solution to manage your community and gain valuable insights. Communicate, warn and ban players while maintaining good oversight of your community and its rules. With this resource you can make the best out of your community and server monetization.
The all-in-one system includes many features:
Ban and Warnings system (quick community management)
Sync groups/ranks (assign ranks through LuckPerms)
Ticketing system
Forums system
Shop system (unlimited categories, servers and packets)
Buy for a friend
Over 20 payment options (through: PayPal, Paysafecard, Stripe)
Multi language support
Discord roles and notifications
Quick support
Full API
And much more…
For more information and direct contact to the developers and the VyHub community visit our Discord (https://discord.gg/QZxQHtZnSB)
Pricing: VyHub can be used for free.
We take a small commission of 3 to 5% on purchases made through your VyHub store.
So you only pay when you make money.
Not yet convinced?
Check out the free VyHub Demo here: https://demo.vyhub.net/
Try out the different views, dashboards and customization options with VyHubs unique look and fell.
Lets go!
Create your account for FREE on https://vyhub.net, create your VyHub instance and add a Minecraft server.
Download addon for FREE and drag and drop the latest VyHub Plugin folder into your Gmod serveraddonsdirectory.
Restart your server and set your api-key through a simple command displayed in the setup process.
Congratulations your server is now connected! You can start selling products on your server!
For guides and further information visit: https://docs.vyhub.net
Velocity to Discord
**このプラグインの開発は終了しました。
別のプラグインにて、これらの機能を実装するかもしれません。**
**Development of this plugin has been completed.
Another plugin may implement these features.**
—
**より詳細なBotセットアップ方法については、[Discordの公式サイト](https://discord.com/developers/docs/getting-started)を参照してください。**
**For more detailed information on how to set up a bot, see the [official Discord website.](https://discord.com/developers/docs/getting-started)**
—
# 🤖 Bot設定ガイド
このガイドでは、ボットの基本的な設定方法を説明します。以下の2つの主要なステップに従って設定を行ってください。
## 1️⃣ ボットトークンの設定
ボットを操作するためには、正しいトークンが必要です。このトークンはボットの識別子として機能し、APIアクセスの際に使用されます。
**手順**:
1. [Discord Developer Portal](https://discord.com/developers/applications) にアクセスします。
2. 作成したボットを選択し、`TOKEN` セクションに移動します。
3. `Copy` ボタンをクリックしてトークンをコピーし、適切な場所にペーストします。
## 2️⃣ チャンネルIDの設定
チャンネルIDは、特定のDiscordチャンネルを識別するためのものです。
**手順**:
1. Discordクライアントを開きます。
2. `設定 > トピックの詳細` を選択して、特定のチャンネルのIDを表示します。
3. 表示されたIDをコピーし、必要な場所にペーストします。
—
# 🤖 Bot Configuration Guide
This guide will walk you through the basic steps of setting up your bot. Please follow the two main steps outlined below.
## 1️⃣ Setting Up Your Bot Token
The bot token acts as an identifier for your bot and is used for API access.
**Steps**:
1. Go to the [Discord Developer Portal](https://discord.com/developers/applications).
2. Select your created bot and navigate to the `TOKEN` section.
3. Click the `Copy` button to copy the token and paste it in the appropriate place.
## 2️⃣ Configuring Channel ID
The Channel ID serves as an identifier for a specific Discord channel.
**Steps**:
1. Open your Discord client.
2. Select `Settings > Advanced` to view the ID of a specific channel.
3. Copy the displayed ID and paste it wherever necessary.
—
# 📄config.yml-設定項目
“`yml
# Velocity to Discordを導入してくれてありがとう!
# わたしはあなたに感謝します!
# Bugやフィードバックの報告については下記URLから。
# Thanks for introducing “Velocity to Discord”!
# Thanks for you!
# Please use the following URL to report bugs and provide feedback.
# Discord:https://discord.gg/5sqbsmqd6K
# Github:https://github.com/Elysium-7/Velocity-to-Discord
# ここは絶対に書き換えないでください。
# Never rewrite this section.
configuration-version: 1.2
# BotTokenを入力。
# Please insert a BotToken.
token: “”
# BOTのスタータスを設定できます。「ONLINE,IDLE,DO_NOT_DISTURB」
# You can set the bot online status “ONLINE,IDLE,DO_NOT_DISTURB”
online_status: ONLINE
# ログを送信するチャンネルのIDを入力してね。
# Enter the ID of the channel you want to send the log to.
channel_id: 0
# サーバースタート・ストップ時のメッセージを編集できます。
# You can edit messages at server start/stop.
start_message_text: “Server has started.”
stop_message_text: “Server has stopped.”
“`
vSudo
# vSudo
Make players send chat messages and run proxy commands from the velocity proxy.
# Requirements
* Velocity Proxy
* Chat signing disabled on backed server.
* You must have chat signing disabled on the backend server for the chat function to work.
* To easily do this, add a plugin such as [AntiPopup](https://www.spigotmc.org/resources/%E2%9C%A8-antipopup-no-chat-reports-and-popup-%E2%9C%A8.103782/) or [NoEncryption](https://www.spigotmc.org/resources/noencryption.102902/) to your backed server and the plugin should work as intended.
* You must also set `enforce-secure-profiles` in `server.properties` to `false`
# Commands
* `/vsudo reload`
* Reloads the vSudo config
* `/vsudo [message:/command]`
* Sudo a player to send a chat message or run a proxy command.
* This command can be run by console or another player in game
* `/vsudo * `
* Sudo all players on a specific server to send a message or run a proxy command
* This command can be run by console or another player in game
* This command can be disabled in the config under `sudo-all.enabled`
# Permissions
* `vsudo.sudo`
* Access to the `/vsudo` command
* `vsudo.sudo.all`
* Access to the `/vsudo *` command
# Support & Contact
To report bugs, suggest a feature, or anything else, contact me via discord
– Direct Contact
* -> [ajmac](http://discord.com/users/643604666634076179)
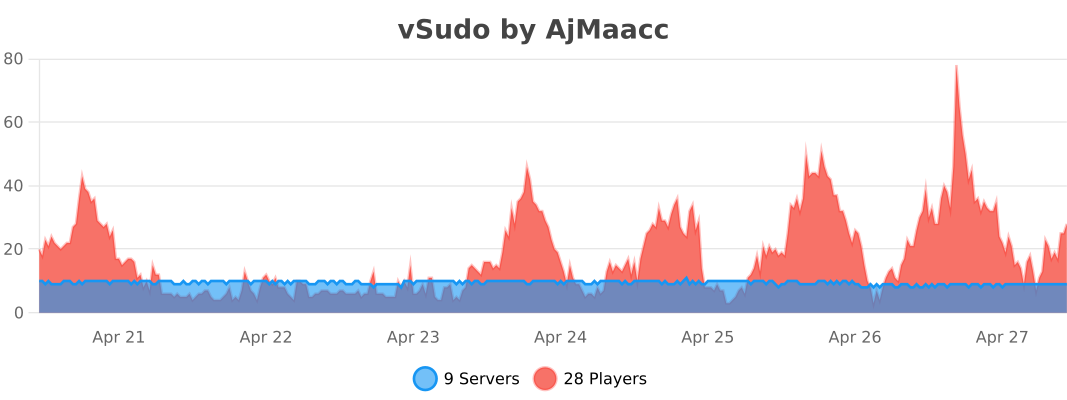
# bStats
vSLS
# vSLS
**vSLS** is a Velocity plugin that integrates your network with the **[SLS (Server Launch System)](https://docs.protoxon.com/)**.
It allows you to dynamically create and manage server instances directly in game using simple commands. vSLS automatically registers new servers with your Velocity proxy, routes players, and provides a lightweight matchmaking and queue system. Server instances are created and scaled based on demand, ensuring efficient resource usage and fast response times.
For installation and configuration instructions visit: [vSLS Docs](https://protoxon.github.io/sls-docs/guide/vsls/)
Discord: [](https://discord.com/invite/BrH8GtyGSh)
[](https://github.com/jessefaler/SLS)
—
## Requirements
* A properly configured SLS environment
* Velocity proxy
## Demo
A live demo **Minecraft** network is available if you want to try vSLS in action.
* **Server address:** `demo.protoxon.com`
This demo showcases how servers can be dynamically created and managed for minigames.
## About SLS
SLS is an open-source system for automating the deployment and scaling of containerized game servers. It is designed for networks that require fast, consistent, and reproducible server instances.
For full documentation and setup instructions, visit: [SLS Docs](https://docs.protoxon.com/)
VServerInfo
# VServerInfo [](https://github.com/4drian3d/VServerInfo/actions/workflows/maven.yml) [](https://discord.gg/5NMMzK5mAn)
Get the information of each server in your Velocity network
[](https://www.bisecthosting.com/4drian3d?r=ModVServerInfo)
## Requirements
– Velocity 3.3.0
– Java 17+
## Commands
#### Permission `vserverinfo.command`
### /vserverinfo
This command will give you information about all the servers you have in your Velocity network.
### /vserverinfo
Get the information about a single server
## How does this plugin differ from the Velocity(/glist) integrated command?
This plugin allows you to check the online/offline status of each of your servers, as well as to obtain additional information such as their MOTD and allows a complete customization of the plugin formats.
All messages are fully customizable from the configuration (config.conf)

## Tutorial
**Spanish**
VRealmsConnector
# VRealms Connector
This is a simple server connector I made for Velocity, because I couldn’t find one that suited my needs. Currently, you can only register and unregister Servers through a Command, later it’s also planned to do so through a Rest API.
For now, this is how to use the Commands:
– `/addserver
[port]`
– `/removeserver `
The port uses 25565 by default
## THIS PROJECTS SOURCE CODE WILL NOT BE MADE PUBLIC (FOR NOW)
If you need the Source, decompile it, or just make it yourself
VPlayerLimit
# VPlayerLimit
[](https://discord.gg/5NMMzK5mAn)
Limit how many players can join your server.
This is not a plugin to set the maximum number of players in motd, it simply limits the number of connected players.
[](https://www.bisecthosting.com/4drian3d)
## Installation
– Download VPlayerLimit from Modrinth
– Drag and drop on your plugins folder
– Start the server
– Configure the player limit and the expulsion message
VPingHost
# VPingHost
[](https://discord.gg/5NMMzK5mAn)
[](https://t.me/Adrian3dUpdates)
[](https://t.me/Adrian3dSupport)
A simple Velocity plugin that allows you to get information about other servers instantly.
This plugin was born as a test from this [Velocity pull request](https://github.com/PaperMC/Velocity/pull/1180),
but I thought to make it a public test plugin to check the proxy server or backend servers connectivity or MOTD response.
[](https://www.bisecthosting.com/4drian3d)
## Installation
– Download VPingHost from Modrinth
– Drag and drop on your plugins folder
– Start the server
## Features
– Send a ping to any Minecraft server and get its corresponding motd
– Specifies the version to ping with
– Specifies the version with which to ping the server
## Command
`/pinghost [host] (protocol version)`
Permission: `pinghost.command`
Example: `/pinghost my.server.net 765`
If you need to specify a specific port, you can add it with the syntax `host:port`.
### Differences between this plugin and VServerInfo
VServerInfo allows you to display information about your servers that you have in your own network.
VPingHost allows you to display information about the motd of any available server.
VPacketLogger
# VPacketLogger
[](https://github.com/4drian3d/VPacketLogger/actions)

[](https://discord.gg/5NMMzK5mAn)


Simple Velocity plugin to log Packet executions
[](https://www.bisecthosting.com/4drian3d?r=ModVPacketLogger)
## Installation
– Install [VPacketEvents](https://modrinth.com/plugin/vpacketevents)
– Download VPacketLogger from [Modrinth](https://modrinth.com/plugin/vpacketlogger)
– Drag and drop on your plugins folder
– Start the server
## How it works
VPacketLogger simply logs every packet sent or received between the proxy and the player.
It can only intercept packets that are handled by Velocity, whether they are native or logged by other plugins.
In the configuration you can set which placeholders to use, MiniMessage format is supported.
VPacketEvents
# VPacketEvents
[](https://discord.gg/5NMMzK5mAn)


Manage and register packets through Velocity’s native events
[](https://www.bisecthosting.com/4drian3d?r=ModVPacketEvents)
“`java
class PacketListener {
@Subscribe
public void onPacketReceive(PacketReceiveEvent event) {
final MinecraftPacket packet = event.getPacket();
if (packet instanceof KeyedPlayerCommand commandPacket) {
event.setResult(GenericResult.denied());
}
}
@Subscribe
public void onPacketSend(PacketSendEvent event) {
// some stuff
}
public void registerPacket() {
// UpdateTeamsPacket registration
PacketRegistration.of(UpdateTeamsPacket.class)
.direction(Direction.CLIENTBOUND)
.packetSupplier(UpdateTeamsPacket::new)
.stateRegistry(StateRegistry.PLAY)
.mapping(0x47, MINECRAFT_1_13, false)
.mapping(0x4B, MINECRAFT_1_14, false)
.mapping(0x4C, MINECRAFT_1_15, false)
.mapping(0x55, MINECRAFT_1_17, false)
.mapping(0x58, MINECRAFT_1_19_1, false)
.mapping(0x56, MINECRAFT_1_19_3, false)
.mapping(0x5A, MINECRAFT_1_19_4, false)
.register();
}
}
“`
## Installation
– Download VPacketEvents from Modrinth
– Drag and drop on your plugins folder
– Start the server
## Dev Setup
### Gradle
“`kotlin
repositories {
mavenCentral()
}
dependencies {
compileOnly(“io.github.4drian3d:vpacketevents-api:1.1.0”)
}
“`
## Javadocs
https://javadoc.io/doc/io.github.4drian3d/vpacketevents-api