Reverie
Reverie is a minecraft shader with a semi-realistic, dreamy style. It features a physically based atmosphere and advanced indirect lighting techniques.
Support for both **Distant Horizons** and **Voxy** is available, with more mods coming in the future.
### Dynamic weather system
Weather elements such as cloud cover, fog, and wind direction adapt dynamically based on biome, season, and altitude. Still, having every location always look the same would feel repetitive. To keep things fresh, these parameters are slightly randomized every time the shader loads, so each day looks unique, much like in the real world!
### Powerful & Customizable
Reverie has a streamlined customization system. Most light colors are customizable (with more to come). If you’re performance constrained, then rest assured. Set the profile to ‘Toaster’ and enjoy good performance (60fps on my laptop’s integrated graphics) with minimal visual compromises.
### Beautiful screenshots
The built-in screenshot mode freezes the weather, so you can get your shots lined up just right! Enable cinematic effects like depth of field, lens flare or chromatic aberration, to get the vibe you want exactly. Reverie also has advanced color balancing options, as well as several tonemappers to choose from.
### Requirements
– Iris 1.8 or higher.
– Minecraft 1.21+ (older versions might work)
### Hardware compatibility
– Nvidia: works
– AMD (windows): works
– Intel (windows): unkown
– Mesa: works
– Mac: broken, and cannot be fixed
### Issue reporting
If you’re running into problems, head over to [GitHub](https://github.com/thecmk/reverie-shader) and report them.
Retro Pixel Shader – NES Style

🎮 Retro Pixel Shader – NES Style Minecraft
Turn Minecraft into a retro 8-bit adventure inspired by the Nintendo Entertainment System.
This shaderpack transforms the game into a pixelated retro world while keeping the classic Minecraft colors and atmosphere.
Perfect for players who love retro graphics, pixel art, and nostalgic games.
⚡ Lightweight
🎮 Retro aesthetic
🧩 Fully customizable
✨ Features
🟩 NES-Style Pixel Graphics
Large retro pixels that recreate the look of classic 8-bit games.
🌈 Vanilla Minecraft Colors
The shader keeps the original Minecraft color palette.
⚡ Lightweight Performance
Designed to run smoothly on most computers.
📺 Optional CRT Effects
Scanlines
Dithering
Retro screen look
🔧 Adjustable Shader Settings
You can customize the shader directly in the shader menu:

Pixel Size
Blur Strength
Brightness
Saturation
Contrast
Scanlines
Dithering
🎥 What It Looks Like
Your Minecraft world becomes:
Pixelated landscapes
Retro-style lighting
Classic 8-bit visuals
It feels like playing Minecraft on an NES console.
⚙️ Recommended Settings
For the best retro look:
Pixel Size → 8 – 10
Blur → 0.25 – 0.35
Scanlines → Low
📦 Requirements
Minecraft Java Edition
Iris Shader Loader
Sodium (recommended)
📥 Installation
Install Iris + Sodium
Download the shaderpack
Place it inside:
.minecraft/shaderpacks
Enable it in:
Options → Video Settings → Shaders
🎬 YouTubers & Streamers Welcome
You are free to use this shaderpack in videos or streams. If you do, please consider linking the project page!
⭐ Seen this shader in a video? Download it here and try it yourself!
Rethinking Voxels
# Rethinking Voxels
This shader is an edit of [Complementary Reimagined](https://www.complementary.dev/reimagined) that aims to be decently fast (when compared to path tracing shaders) while having block lights cast sharp shadows.
### Notes
The lighting system is not perfect. Occasional sudden brightness changes are a side-effect of the way it works and cannot be completely removed without hurting performance or removing sharp shadows from light sources. To do the latter, disable `Per-Pixel Lighting` in the `Rethinking Voxels Settings`.
This shader is developed on Iris, using an AMD graphics card on linux, and it is also tested on an NVidia graphics card on linux. While it usually works on other platforms, bugs that appear only there are not caught by my testing and hence they take longer to fix. To use this shader pack, the Iris shader loader is required. Beta 18d and older versions also work on OptiFine.
### Contact
If you need support, please join the [shaderLabs discord server](https://discord.gg/8wT5KxF4TZ), where this shader has a channel (#rethinking-voxels-gri573).
### Partnership
I have entered a partnership with Ember, a Minecraft server hosting provider. This is because Ember hosts the complementary SMP server and has provided a better hosting experience / customer support than the previous hosting service, and because they reached out asking about it. If you need to host a Minecraft server and wish to support Rethinking Voxels’ development at the same time, do check them out! Using the promotional code `RETHINKING` in a first-time purchase will redirect 70% of the first month’s fee to me as well as give you a 10% discount.
[](https://billing.ember.host/aff.php?aff=13)
### Media
Video by youtube user iambeen that showcases rethinking voxels beta 18d (with custom settings), compared to the original reimagined:
RenderPearl
# Modern, lightweight shaders for Iris
RenderPearl is an incredibly lightweight shader pack using the latest Iris features and optional extensions on various graphics drivers, aiming to deliver pleasant visuals with excellent performance on modern hardware.
If you want to report a bug or give feedback/suggestions, the best way to do so is by opening an issue on the [GitHub issue tracker](https://github.com/Luracasmus/renderpearl/issues). I rely heavily on user feedback in bug fixing and design.
Trivia
This project started as a continuation of “Luracasmus Shaders” (which is why you might have seen it called “LS RenderPearl”), but modern versions share little to no code with the original project. The question remains as to whether the same shader pack remains throughout, when all parts are replaced.
The name “RenderPearl” is inspired by the Bedrock Edition [RenderDragon](https://minecraft.fandom.com/wiki/RenderDragon) engine.
## Features
LabPBR 1.3 compliance & material data
“Yes” indicates support for per-texel data.
| LabPBR 1.3 required component | From resource pack | Configurable nonstandard channels | Included/procedural |
| —————————– | —————————————– | ——————————— | ———————– |
| Albedo | Yes | No | No |
| Smoothness | Yes, or as linear or perceptual roughness | Yes | Yes |
| f0/reflectance | No | | Constant |
| Normal | Yes | No | Yes |
| LabPBR 1.3 optional component | From resource pack | Included/procedural |
| —————————– | —————————— | ————————————– |
| Hardcoded metal | No | No |
| Porosity | No | No |
| Subsurface scattering | No | Constant, only on translucent geometry |
| Emmissiveness | No | Yes |
| Ambient occlusion | Binary, per-block (from model) | Yes |
| Height | No | No |
* Smooth, colored real-time shadows and volumetric light using distorted shadow mapping.
* Colored block light with physically based reflections using a light list combined with vanilla lighting and average texture color.
* Ray traced, per-hand hand light.
* A wide range of highly optimized post-processing effects, including compute shader implementations of [FidelityFX Contrast Adaptive Sharpening](https://gpuopen.com/fidelityfx-cas/), [SMAA](https://www.iryoku.com/smaa/) 1x from [SMAA-MC](https://modrinth.com/shader/smaa-mc), automatic exposure and a variety of tone mapping operators.
* Customizable waves and water opacity.
* Built-in utility features such as light level visualization and a compass overlay.
## Mod & Resource Pack Compatibility
Most built-in PBR information, including light colors, material normals and roughness, are almost entirely procedurally generated and should therefore work perfectly with most resource packs and mods.
Integration with Distant Horizons and Voxy is supported on the latest Minecraft version, but experimental and very basic. Complete support is planned for a future update.
Support for mods that modify the Iris shader pipeline, such as Chunks Fade In, is experimental and may have issues, such as the shader pack failing to compile.
## Requirements
> If you have a decently modern non-macOS device it probably supports everything you need, but you might have to update your Iris and graphics drivers.
* **Iris** with support for features:
* `BLOCK_EMISSION_ATTRIBUTE`
* `COMPUTE_SHADERS`
* `CUSTOM_IMAGES`
* `ENTITY_TRANSLUCENT`
* `PER_BUFFER_BLENDING`
* `SEPARATE_HARDWARE_SAMPLERS`
* `SSBO`
* **Graphics drivers** with support for **GLSL 4.60.8+**.
* **Minecraft** of a version that is listed as supported by the RenderPearl release. The latest supported version is usually the most stable.
Driver Support
| OS | Drivers | Support |
| ——- | —————– | ——— |
| Linux | Mesa RadeonSI | Perfect |
| Linux | Nvidia | Very Good |
| Linux | Mesa Zink/RADV | Good |
| Linux | Mesa Zink/Nvidia | Unstable |
| Windows | AMD Adrenalin | Good |
| Windows | Nvidia Game Ready | Very Good |
Only the latest stable versions are tested. All other drivers are untested. Please report any issues that occur.
## Tuning & The Compatibility Menu
The default configuration and all values selectable with profiles are intended to work on all systems that meet the shader pack’s **Requirements**, though you may be able to achieve higher performance and quality by changing some of these options. Beware that some values may cause the shader pack to not compile, in which case you simply have to reset the option. These are usually marked with a red ⚠.
Implementation-Limited Options
> The usable values and effects of these options depend on your graphics drivers.
* **Light List Capacity** is limited by the amount of Local Data Share memory usable per work group on your GPU. Depending on your GPU and graphics drivers, and the features enabled by the 16/8-Bit Types option, you may be able to set this significantly higher than the maximum value selectable with profiles (though there is no reason to do so if the light list isn’t being filled completely, usually indicated by lights flickering, as it impacts performance negatively).
* **16/8-Bit Types** uses optional OpenGL/GLSL extension-provided half- and/or quarter-sized data types to reduce register, LDS and VRAM usage. Performance impact varies depending on hardware and drivers, as conversion between types has a cost, but operations with smaller types can be significantly faster.
* **Trinary Min/Max** performs trinary minimum and maximum operations in singular function calls using the optional `AMD_shader_trinary_minmax` OpenGL/GLSL extension, which may allow generation of more optimal instruction sequences. It’s recommended to use this whenever possible.
* **32×16-Bit Multiplication** performs multiplication between 32-bit integers and integers in the 16-bit-representable range using special functions provided by the optional `INTEL_shader_integer_functions` OpenGL/GLSL extension, that may be faster than regular 32-bit multiplication operators. It’s recommended to use this whenever possible.
* **Immutable Constants** marks all shader variables that can be immutable as constant, possibly enabling better optimizations. This feature is required by the GLSL specification, but still unsupported on some graphics drivers. It’s recommended to use it whenever possible.
## Design & Modding RenderPearl
RenderPearl’s source code is intended to be modifiable and re-usable. It’s written according to best practice to the best of my ability, but prioritizing performance over readability. If you have any questions about how it works, feel free to contact me on any platform.
Technical information can be found in [the GitHub repository](https://github.com/Luracasmus/renderpearl/blob/main/DEV.md).
—
**These are the only RenderPearl project pages made by me:**
* [Modrinth](https://modrinth.com/shader/renderpearl)
* [CurseForge](https://www.curseforge.com/minecraft/shaders/renderpearl)
* [Planet Minecraft](https://www.planetminecraft.com/mod/luracasmus-s-shaders/)
* [GitHub](https://github.com/Luracasmus/renderpearl)
If you want to distribute RenderPearl, or just spread the word of it, I would greatly appreciate if you would link to at least one of them, Modrinth being the most important one.
Reflectify RT

Reflectify RT is designed to elevate your visual experience with advanced reflection techniques and cinematic lighting. It focuses on how surfaces and water interact with the world, transforming your gameplay into a vivid and realistic experience without unnecessary complexity.


💧 **SSR Reflections**: High-quality reflections on ice and smooth surfaces.
🌧️ **Wet Effects**: Realistic ground reflections that appear during rainfall.
🌊 **Underwater**: Crystal-clear water with natural light scattering and distortion.
☀️ **God Rays**: Soft, warm light shafts piercing through trees and buildings.
🌿 **Nature**: Smooth waving animations for leaves, grass, and plants.

You can easily customize your experience by toggling features or adjusting reflection strength in the settings. This shader is highly optimized and runs smoothly even on low-end hardware like the GT 1030 or equivalent.

**Developer**: [in2bubble](https://modrinth.com/user/in2bubble)
**License**: All Rights Reserved
RedHat Shaders
– About
RedHat is a shaderpack that for Iris and Optifine.
It is an edit of an old version of Chocapic13, and has many features.
RedHat’s main features are lighting effects such as Godrays (3D, or 2D, if you have a low-end machine), Shadows, Underwater Light Absorption, and many more.
The shaderpack features reflections too, and reflects some light on all surfaces, to make everything look more similar to the Minecraft trailers style.
There are many cinematic options such as Lens Flares, Depth of Field (Chromatic Aberration included), Grain, Tilt Shift, and others.
The colors, which change depending on the time, make everything more realistic yet they keep the fantasy vibe.
There are many effects related to movement as well. All foliage or hanging things such as lanterns wave. Along those there are Waving Hand and Waving Camera options too, configurable as well.
If that wasn’t enough, RedHat supports all versions from 1.7.10 up to 1.21, and it supports custom skyboxes!
Lastly, there are many atmospherics effects such as Fog and Clouds, Round moon and sun, and other things like PBR support, Auto-Exposure, Stars, and many, many other things.
There are a lot of ways you can customize the shaderpack, and make it look like the way you want.
– Requirements
GPU: Must support OpenGL 3.2 and have at least 1GB of VRAM. AMD, NVIDIA and Intel are all supported (You’ll have to decrease some settings to play smoothly with Intel GPUs).
CPU: Must have a minimum clock speed of 1GHz
RAM: Must have located at least 1.5-2GB of RAM to your game
OS: Windows (7,8, 8.1, 10, 11), Linux (Mesa drivers might lead to issues)
Shadermod: Optifine or Iris
MC Version: 1.7.10, up to 1.21
> Light Settings Recommendation: i3/i5 3-4th Gen, 4GB DDR3 RAM, GT 1030 2GB GDDR5
> Balanced Settings Recommendation: i5/i7 8-9th Gen, 8GB DDR4 RAM, GTX 1050 Ti 4GB GDDR5
> Heavy Settings Recommendation: i5/i7/i9 10th+ Gen, 16GB DDR5 RAM, GTX 1660 Ti 6GB GDDR6
If you use RedHat without meeting these requirements, then keep in mind you’ll take a risk.
RedHat is a pretty heavy shaderpack, thus do not expect it to be FPS friendly on the default settings.
Recastional
# 🌊 Recastional Shader Pack
> **Elevate your Minecraft experience to a cinematic masterpiece.**
**Recastional** is a shader pack designed to transform your world into an exhilarating visual journey. It creates a unique atmosphere, enveloping the environment in a warm, caressing light that brings every pixel to life.
***
## ✨ Overview
As the sun rises and sets, its rays pierce through the clouds, casting a **soft golden glow** that enhances the natural beauty of the landscape. With **Recastional**, you don’t just play — you immerse yourself in a cinematic experience where every frame is a work of art.
* **Vibrant Textures:** Every rock, tree, and building feels detailed and alive.
* **Shimmering Waters:** Realistic water surfaces that sparkle as if kissed by sunlight.
* **Dynamic Shadows:** Stretching and shifting shadows that add profound depth to your surroundings.
* **Atmospheric Skies:** Volumetric clouds and glowing flora that invite exploration.
***
## 🛠 Complete Feature List
### 🎨 Advanced Rendering Systems
* **Enhanced Particle System** – Physics-based particle rendering with LOD support.
* **Volumetric Clouds** – High-precision ray-marching for realistic skyboxes.
* **Advanced Water System** – Real-time reflections, refractions, and caustics.
* **Parallax Terrain Mapping** – Height-based surface displacement with triplanar mapping.
* **Entity Glow Effects** – Dynamic rim lighting and emissive textures for special entities.
### 🔧 Post-Processing Pipeline
* **Enhanced Composite** – HDR tone mapping, professional color grading, and subtle film grain.
* **Bloom System** – Multi-pass bloom with Gaussian blur and granular intensity control.
* **Depth of Field** – Realistic camera focus with high-quality hexagonal bokeh.
* **Advanced Shadow Mapping** – PCF filtering with support for soft and colored shadows.
### 🚀 Performance & Optimization
* **GPU Optimizer** – Hardware-specific tweaks for **NVIDIA**, **AMD**, and **Intel**.
* **LOD Manager** – Automatic level-of-detail scaling based on distance.
* **Dynamic Quality Scaling** – Real-time performance adjustments to maintain stability.
### 🔄 Compatibility & Legacy
* **OpenGL Compatibility** – Stable fallback shaders for older graphics hardware.
* **Cross-Platform** – Full support for **Windows, macOS, and Linux**.
* **VR & Multi-Monitor** – Stereoscopic rendering and ultra-wide display configurations.
### 📚 Technical Foundation
* **PBR Shading Library** – Physically Based Rendering using the **Cook-Torrance BRDF**.
* **Next-Gen Lighting** – Volumetric lighting, SSAO, and Global Illumination (GI).
* **Weather Module** – Dynamic simulation of rain, snow, and atmospheric fog.
***
## 📋 Configuration & Presets
You can fine-tune your experience using our modular configuration files:
* `advanced.properties` – Toggle high-end rendering features.
* `performance.properties` – Hardware-specific optimization toggles.
* `debug.properties` – Tools for development and analysis.
### ⚠️ Important Note on Performance
To achieve the **ULTRA** and **HIGH** graphics shown in screenshots, **Iris Shaders** is highly recommended.
> **Note:** High settings are hardware-intensive. If you experience low FPS, please adjust your preset in the shader options.
***
## 🎮 Version Support
* **Compatibility:** Fully optimized for **Minecraft 1.21.11**.
* **Engine:** Works best with **Iris** or **OptiFine**.
***
_Created with passion for the Minecraft community._
Also available on CurseForge: [CurseForge](https://www.curseforge.com/minecraft/shaders/recastional)

Quanta Shader
# Quanta Shader
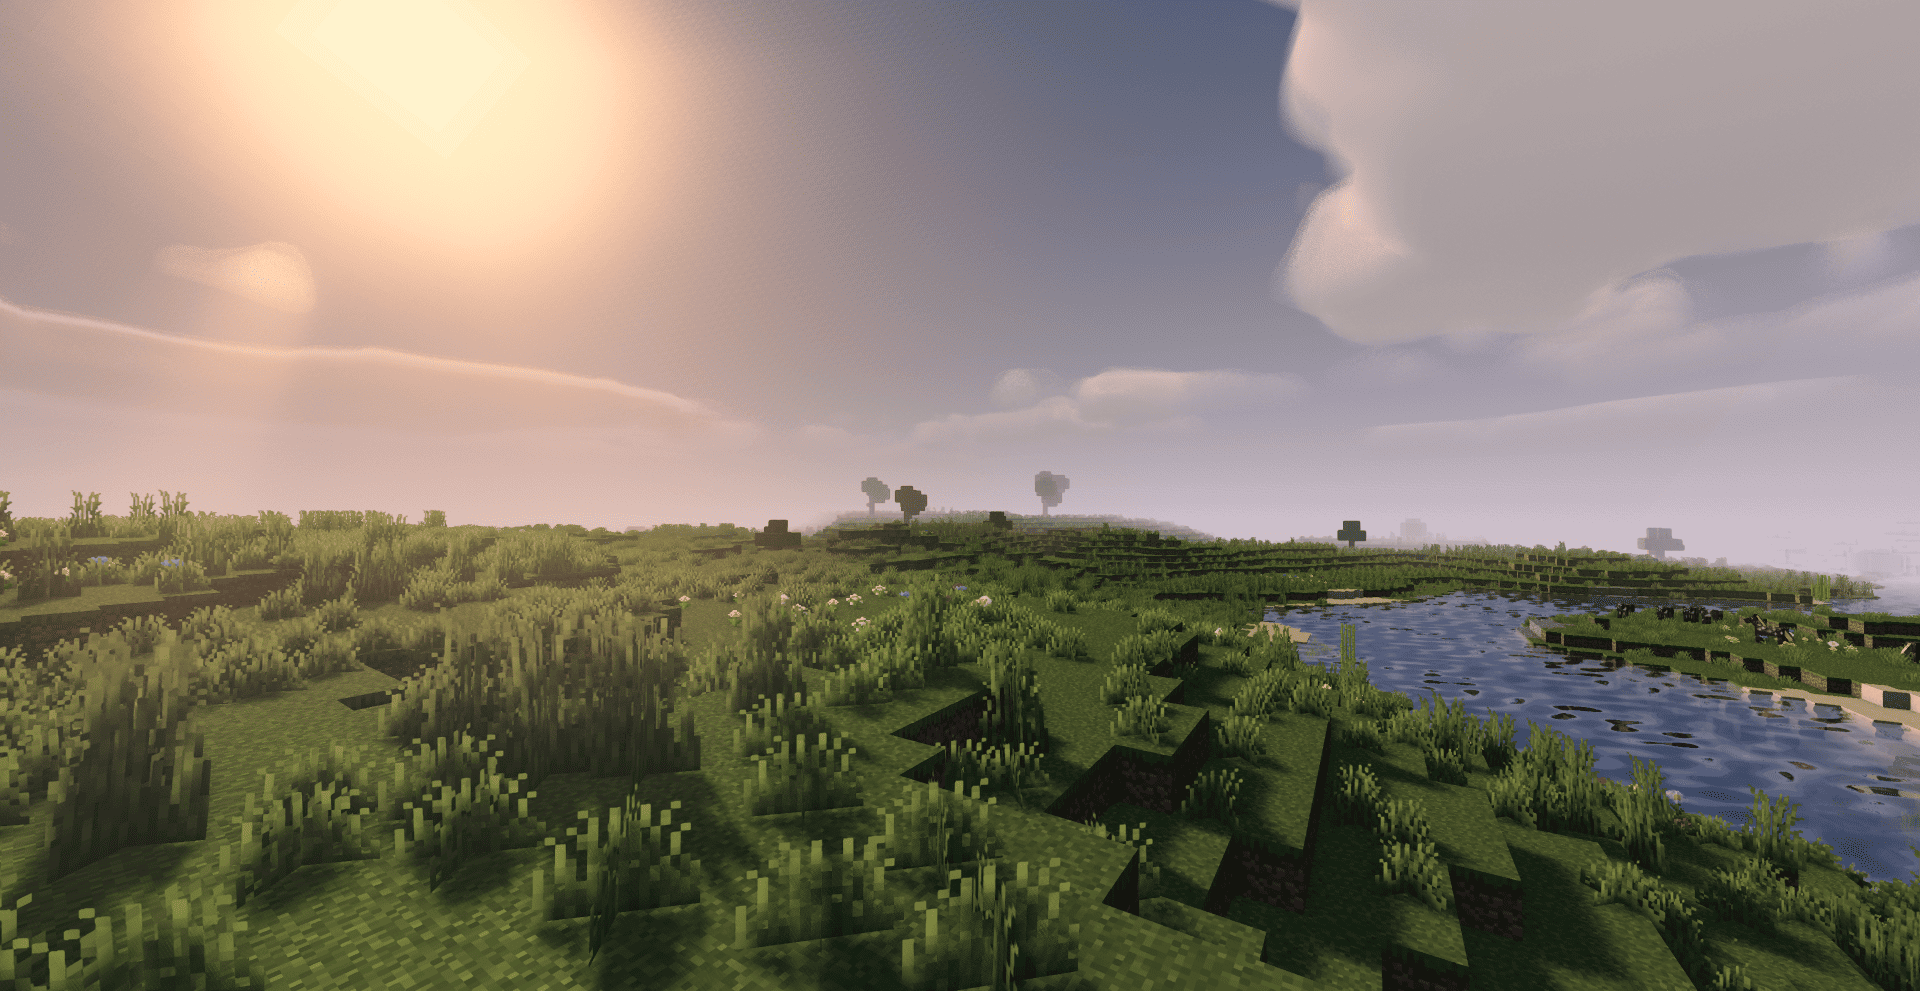
> A simple, fast and beautiful Minecraft shader for Iris/OptiFine.
> Soft sunlight, gentle bloom, real shadows, dynamic clouds and lively
> water — tuned to look great while staying smooth on modest hardware.
—
A huge thank you 🙏
Quanta Shader exists only thanks to **Javier G. Cimarras (`javiergcim`)**
and his amazing project **[MakeUp Ultra Fast]**.
All the heavy lifting — the lighting model, the shadows, the water,
the sky, the clouds, every clever optimization that makes this shader
fast — is his work. This project is just a small, respectful fork:
renamed, cleaned up, and slightly tweaked.
If you like Quanta Shader, please go and support the original author
first. He deserves all the credit. ❤️
* Original project:
* Original author: **javiergcim or KDXavier**
Pyvtron VX
## [Pyvtron VX](https://pyvton.pages.dev/minecraft-shaders/pyvtron-vx)
### Details
Features: Volumetric Fog, Water Caustics, Cumulus Clouds, Cirrus Clouds, High Resolution Graphics, ultra realistic rain and very much features that you will see in the game!
Performance Impact: High / Medium (Medium: If you have a good computer).
You can find older versions and the official release(s) of Pyvtron VX [here](https://pyvton.pages.dev/minecraft-shaders/pyvtron-vx) ([My Website](https://pyvton.pages.dev/))
### Requirements
AMD CPU (Recommended)
Nvidia GPU (Recommended)
A graphics card that supports OpenGL 4.6 or OpenGL 4
Note: I currently only have access to Nvidia GPUs for testing. I cannot make sure if Pyvtron VX works on Intel CPUs and AMD GPUs.
### Installation
Install it like other Minecraft Shaders or read this here if you don’t know how to install minecraft shaders:
1. First download the Iris Shaders Installer / Mod
2. Run the .jar and click on Install.
3. Download the latest version of Pyvtron VX
4. Open the Minecraft Launcher. You’ll see the Iris Shaders profile – select it and start Minecraft.
5. Go to Options → Video Settings → Shaders → Shaderpacks Folder.
6. Drag the downloaded shaderpack into the shaderpacks folder.
7. Select the shaderpack ingame.
8. Enjoy.
### Other Stuff
Before you modify or do something with this shaderpack, you must read the [license](https://pyvton.pages.dev/licenses/pccl)
Pyvtron VX is not path traced etc. VX means Version X
If you want to know, how to add support for modded dimensions (for new dimension mods) read this here on my [docs](https://pyvton.pages.dev/docs/minecraft-shaders/modding/how-to-add-mod-support-for-modded-dimensions)
Pyvtron Shaders
## [Pyvtron Shaders](https://pyvton.pages.dev/minecraft-shaders/pyvtron)
Pyvtron shader is a shader that tries to look realistic.
This shader has a extreme realistic 8k resolution sky and and a beautiful water color
Stuff: Light-Rays, Dirty Lens, Ambient Occlusion, Much Settings, Fog and More!
If you want to support me please make videos on youtube, tiktok or other platforms (so that Pyvtron Shaders becomes better known)
And don´t forget to download the newest version!
### Requirements
– AMD CPU. Intel is not compatible with this shader!
– Nvidia GPU Or AMD GPU.
– A graphics card that supports OpenGL 4.6 or OpenGL 4
– Iris Shaders Mod. Other Shaders Mods are **NOT SUPPORTED OR TESTED**
Installation
1. First download [Iris Shaders](https://www.irisshaders.dev/) (This is only the Installer or download [the mod](https://modrinth.com/mod/iris))
2. Run the .jar and click on Install.
3. Download the latest version of Pyvtron.
4. Open the Minecraft Launcher. You’ll see the Iris Shaders profile sellect you profile and Start Minecraft.
5. Go to Options → Video Settings → Shaders → Shaderpacks Folder.
6. Drag the downloaded shaderpack into the shaderpacks folder.
7. Select the shaderpack ingame.
8. Enjoy.
## Please Check Also My Other Shaders Out:
### [Pyvtron VX](https://pyvton.pages.dev/minecraft-shaders/pyvtron-vx) (Version X)
Pyvtron VX (Version X) Is realistic and has much much more detail and has much more realism than Pyvtron Shaders!
### Blacklist:
– KLauncher
– Xenolith
– Minecraftzw
– FoxyCraft
### Whitelist:
– 9Minecraft
– Zonacraft
– Feed The Mods
– Minecraft-France
## 1. Allowed Actions
You can upload it to a site but the download link must be one of CurseForge, Modrinth, Github or [My Website](https://pyvton.pages.dev/minecraft-shaders/pyvtron)
“Modify the project for personal use only, without sharing or publishing it.
Record and upload videos, screenshots, and streams showcasing Pyvton Shaders on platforms like YouTube, Twitch, TikTok, etc., including monetization, under these conditions:
## 2. Prohibited Actions
Uploading, rehosting, or distributing any version of Pyvton Shaders using your own links.
Using any ad-based or monetized link services (e.g., AdFly, Linkvertise, Boosters).
Bundling or embedding Pyvton Shaders into:
Modpacks, resource packs, launcher tools, or shader collections.
Minecraft servers or launchers, in any form—pre-installed, downloadable, or bundled.
Any third-party software or shader management tools.
Sharing modified versions unless:
You received explicit written permission from Pyvton.
The modified version contains significant original work.
It is licensed under the same license.
No monetization is involved unless approved by Pyvton.
Using parts of the project (e.g., code or textures) in other projects without permission.
Add a download link in the description