Derivative Shader is a graphic enhancement shader designed to transform your game with high-quality, vibrant, and realistic visuals. It elevates your gaming experience to a new level of beauty and realism through its array of powerful features and immersive elements.
### **What’s inside Derivative Shader?**
Derivative Shader offers three distinct presets: Default, Survival, and Film.
Default: The most popular choice. It delivers stunning graphics and beautiful effects without requiring high-end hardware.
Survival: Specially tuned to increase brightness, allowing players to navigate through the darkness with ease—no more getting lost in the shadows.
Film: The ultimate visual experience. This preset demands high performance to deliver ultra-detailed graphics. It includes Cinema mode and Motion Blur, making your game look as realistic as a live-action movie.
### **What sets Derivative apart from other Shaders?**
**Dynamic Weather: Rain now features realistic interaction effects on both ground surfaces and water bodies**

**The clouds change when Rain and Sun!** 
**Cinematic Experience: Integrated Cinematic bars and professional-grade Motion Blur for a smooth, realistic feel**

**Detailed Environments: Highly realistic and detailed underwater effects**

### **Is Derivative Shader demanding?**
Yes, it is. Since Derivative Shader prioritizes high-end graphics and extreme detail, it is very resource-intensive. It is not recommended for low-end devices or hardware that does not meet the necessary performance standards.
### **Best use cases for Derivative Shader?**
Derivative Shader is perfectly suited for worlds featuring massive structures or grand architecture. It is the ideal choice for players who want to fully experience the epic scale and magnificent atmosphere of their creations.
### **Disclaimer**
I am not the creator or owner of this Shader. I am simply sharing it for the Mondrith community to enjoy. If you encounter any bugs or issues, please contact the developer via this link :[https://texture-packs.com/shaders/derivative/](https://texture-packs.com/shaders/derivative/)
DERCODE
**RECODERS: DureXXX / M1zora / Sone4ka / Frs0n**
Shader Profile System Broken pls use High profile
# **About**
**DERCODE is a recode based on the Derivative shader that adds various effects and improvements**
**It also fixes various bugs from the original Derivative shader**
**At the moment, the shader has BAD-optimization due to poorly implemented PT functions**
**This project started development in late 2024 based on the Bliss shader, but was later moved to Derivative because older Bliss builds did not allow implementing the features that were achieved here**
**The shader will continue to receive updates in the future, and it may eventually be rewritten from scratch instead of being just a recode**
# ABOUT:
**Hi, I’m LoLip_p! I developed this shader to create a tense and eerie atmosphere, perfect for horror modpacks. I would be delighted if it were included in your projects. It features a CRT mask, various video artifacts, noise effects, and more. If any effects don’t match your preferences, all parameters are fully customizable, allowing you to easily toggle settings on or off. Support the author on [Patreon](https://patreon.com/lolip_p).**
## INSTALL THE SHADERS
– Download Client Which Supports Installing Shaders Such As Optifine And Iris
– Download The Shaders
– Copy Shaders to /.minecraft/shaderpacks
– Launch Minecraft, Go To Options –> Video Settings –> Shaders
– Choose **Cursed Fog**
## DEMO VIDEO
RU 🐻
# О:
**Привет, я LoLip_p! Я разработал этот шейдер, чтобы создать напряженную и жуткую атмосферу, идеально подходящую для модпаков в жанре хоррор. Я был бы рад, если бы он был включен в ваши проекты. Он включает в себя маску CRT, различные видеоартефакты, шумовые эффекты и многое другое. Если какие-либо эффекты не соответствуют вашим предпочтениям, все параметры полностью настраиваемы, что позволяет легко включать или отключать настройки. Поддержите автора на [Patreon](https://patreon.com/lolip_p).**
# ÜBER:
**Hallo, ich bin LoLip_p! Ich habe diesen Shader entwickelt, um eine spannende und unheimliche Atmosphäre zu schaffen, die perfekt für Horror-Modpacks geeignet ist. Ich würde mich sehr freuen, wenn er in Ihren Projekten verwendet würde. Er verfügt über eine CRT-Maske, verschiedene Videoartefakte, Rauscheffekte und vieles mehr. Wenn Ihnen bestimmte Effekte nicht gefallen, können Sie alle Parameter vollständig anpassen und die Einstellungen ganz einfach ein- oder ausschalten. Unterstützen Sie den Autor auf [Patreon](https://patreon.com/lolip_p).**
## INSTALLIEREN SIE DIE SHADER
– Client herunterladen, der die Installation von Shadern wie Optifine und Iris unterstützt
– Shader herunterladen
– Shader nach /.minecraft/shaderpacks kopieren
– Minecraft starten, zu Optionen –> Videoeinstellungen –> Shader gehen
– **Cursed Fog** auswählen
### About
Complementary Shaders is a shader pack for Minecraft Java Edition with exceptional attention to detail, high standards of quality, and top tier optimisation. It offers a ton of high quality effects, two default visual style choices, custom effects for almost every block in the game, profiles ranging from Potato to Ultra and it’s designed to never be obstructive during gameplay. It started as an edit of BSL Shaders in 2018, and it received countless major updates including a complete rewrite to meet the standards of our community. Complementary Shaders is dedicated to be shaped by user feedback over anything else, and it still receives regular updates to this day.
“Unbound” is one of the two default styles Complementary Shaders r5 comes with. It is the less restricted style of Complementary that aims for a more realistic image. [**Learn more about the two styles here.**](https://www.complementary.dev/shaders/#style-section)
### Choose Your Style
Complementary Shaders comes with two distinct visual style options. The only difference between these two styles is the default settings. The Unbound style is designed for people looking for a more realistic experience, while the Reimagined style is made to reimagine Minecraft while preserving its unique visual elements. Please note that you can still customize everything after you download either style. You can switch to blocky clouds on the Unbound style, or use realistic water on the Reimagined style. All settings are located in Shader Options.
### Installation
**New:** You can just download the [**Complementary Installer**](https://www.complementary.dev/shaders/#download-section) and click Install to automatically do all the steps below.
**-** First you need to install the [**Iris**](https://irisshaders.dev/download) mod to be able to load shaderpacks.
**-** Then you need to launch the game, and get to the Shaderpacks/Shaders menu in Video Settings.
**-** Open the shaderpacks folder by clicking the button in the menu.
**-** Download Complementary Shaders and put it in the shaderpacks folder. (Please don’t unzip the file)
**-** Get back in the game, and choose Complementary in the shaderpacks menu. (Refresh the menu if it doesn’t appear)
### Other
**-** Check out the [**Complementary Development Website**](https://www.complementary.dev/) for more information.
**-** Join the [**Complementary Discord**](https://discord.gg/ck5htDSQPv) community if you have any questions, or just want to talk.
**-** If you would like to support the development of Complementary, you can do so on [**Patreon**](https://www.patreon.com/emingt).
BVSF
EN 🌐
# ABOUT:
**Hi, I’m LoLip_p! I’m the developer of the [BVS](https://modrinth.com/shader/bvs) shader, which is a vanilla preserving shader for minecraft. It is quite productive, but still some users have even weaker computers, for this reason I created a new version of the shader: BVSF (F – Fast) is a faster, but less functional version of BVS. It lacks such effects as DoF, SSR, PBR and others. With this version you will be able to squeeze out many times more fps compared to the regular version!**
## INSTALL THE SHADERS
– Download Client Which Supports Installing Shaders Such As Optifine And Iris
– Download The Shaders
– Copy Shaders to /.minecraft/shaderpacks
– Launch Minecraft, Go To Options –> Video Settings –> Shaders
– Choose **BVSF – Best Vanilla Shader (FAST)**
RU 🐻
# О:
**Привет, я LoLip_p! Я разработчик шейдера [BVS](https://modrinth.com/shader/bvs), который является шейдером для Minecraft, сохраняющим ванильную версию игры. Он довольно производительный, но у некоторых пользователей компьютеры еще слабее, поэтому я создал новую версию шейдера: BVSF (F – Fast) — более быстрая, но менее функциональная версия BVS. В ней отсутствуют такие эффекты, как DoF, SSR, PBR и другие. С этой версией вы сможете выжать в разы больше fps по сравнению с обычной версией!**
## ССЫЛКИ:
– [Discord](https://discord.gg/Cz2sCWz5Wh) (обсуждения, сообщения об ошибках и т. д.)
– [Telegram](https://t.me/LoLip_p_Community)
– [YouTube](https://www.youtube.com/@lolip_p)
## УСТАНОВКА ШЕЙДЕРОВ
– Загрузите клиент, поддерживающий установку шейдеров, такой как Optifine и Iris.
– Загрузите шейдеры.
– Скопируйте шейдеры в /.minecraft/shaderpacks.
– Запустите Minecraft, перейдите в Настройки –> Настройки видео –> Шейдеры.
– Выберите **BVSF – Best Vanilla Shader (FAST)**.
# ABOUT:
**Hi, I’m LoLip_p! I created this shader by saving vanilla Minecraft. I also tried to make flexible settings so that you can disable or enable the available functions to your liking. Support the author on [Patreon](https://patreon.com/lolip_p).**
**A fast version of the shader is also available: [**BVSF**](https://modrinth.com/shader/bvsf)!**
## THE SHADER HAS:
– Support [Better Clouds](https://modrinth.com/mod/better-clouds)
– Support [Distant Horizons](https://modrinth.com/mod/distanthorizons)
– PBR support _(LabPBR)_
– Depth of Field
– Motion Blur
– Shading _(Shading the edges that do not fall under the sun’s rays)_
– Shadows
– FXAA _(anti-aliasing)_
– SSR _(Screen Space Reflection)_
– Auto Exposure
– Color Correction
– Support 7 language: _EN RU UA FR DE CH BR_
## INSTALL THE SHADERS
– Download Client Which Supports Installing Shaders Such As Optifine And Iris
– Download The Shaders
– Copy Shaders to /.minecraft/shaderpacks
– Launch Minecraft, Go To Options –> Video Settings –> Shaders
– Choose **BVS – Best Vanilla Shader**
## DEMO VIDEO
RU 🐻
# О:
**Привет, я LoLip_p! Я создал этот шейдер, сохранив классическую версию Minecraft. Я также постарался сделать настройки гибкими, чтобы вы могли отключать или включать доступные функции по своему усмотрению.**
**Также доступна быстрая версия шейдера: [**BVSF**](https://modrinth.com/shader/bvsf)!**
## ШЕЙДЕР ИМЕЕТ:
– Поддержка [Better Clouds](https://modrinth.com/mod/better-clouds)
– Поддержка [Distant Horizons](https://modrinth.com/mod/distanthorizons)
– Поддержка PBR _(LabPBR)_
– Глубина резкости
– Размытие движения
– Затенение _(Затенение краев, не попадающих под лучи солнца)_
– Тени
– FXAA _(сглаживание)_
– SSR _(Отражение в пространстве экрана)_
– Автоматическая экспозиция
– Коррекция цвета
– Поддержка 7 языков: _EN RU UA FR DE CH BR_
# ÜBER:
**Hallo, ich bin LoLip_p! Ich habe diesen Shader erstellt, indem ich Vanilla Minecraft gespeichert habe. Außerdem habe ich versucht, flexible Einstellungen zu erstellen, damit Sie die verfügbaren Funktionen nach Belieben deaktivieren oder aktivieren können.**
**Eine schnelle Version des Shaders ist ebenfalls verfügbar: [**BVSF**](https://modrinth.com/shader/bvsf)!**
## DER SHADER VERFÜGT ÜBER:
– Unterstützung für [Better Clouds](https://modrinth.com/mod/better-clouds)
– Unterstützung für [Distant Horizons](https://modrinth.com/mod/distanthorizons)
– PBR-Unterstützung _(LabPBR)_
– Tiefenschärfe
– Bewegungsunschärfe
– Schattierung _(Schattierung der Kanten, die nicht unter die Sonnenstrahlen fallen)_
– Schatten
– FXAA _(Anti-Aliasing)_
– SSR _(Screen Space Reflection)_
– Automatische Belichtung
– Farbkorrektur
– Unterstützung von 7 Sprachen: _EN RU UA FR DE CH BR_
## INSTALLIEREN SIE DIE SHADER
– Client herunterladen, der die Installation von Shadern wie Optifine und Iris unterstützt
– Shader herunterladen
– Shader nach /.minecraft/shaderpacks kopieren
– Minecraft starten, zu Optionen –> Videoeinstellungen –> Shader gehen
– **BVS – Best Vanilla Shader** auswählen
## DEMO VIDEO
BR 🎭
# SOBRE:
**Olá, sou o LoLip_p! Criei este shader salvando o Minecraft vanilla. Também tentei criar configurações flexíveis para que você possa desativar ou ativar as funções disponíveis de acordo com sua preferência.**
**Uma versão rápida do shader também está disponível: [**BVSF**](https://modrinth.com/shader/bvsf)!**
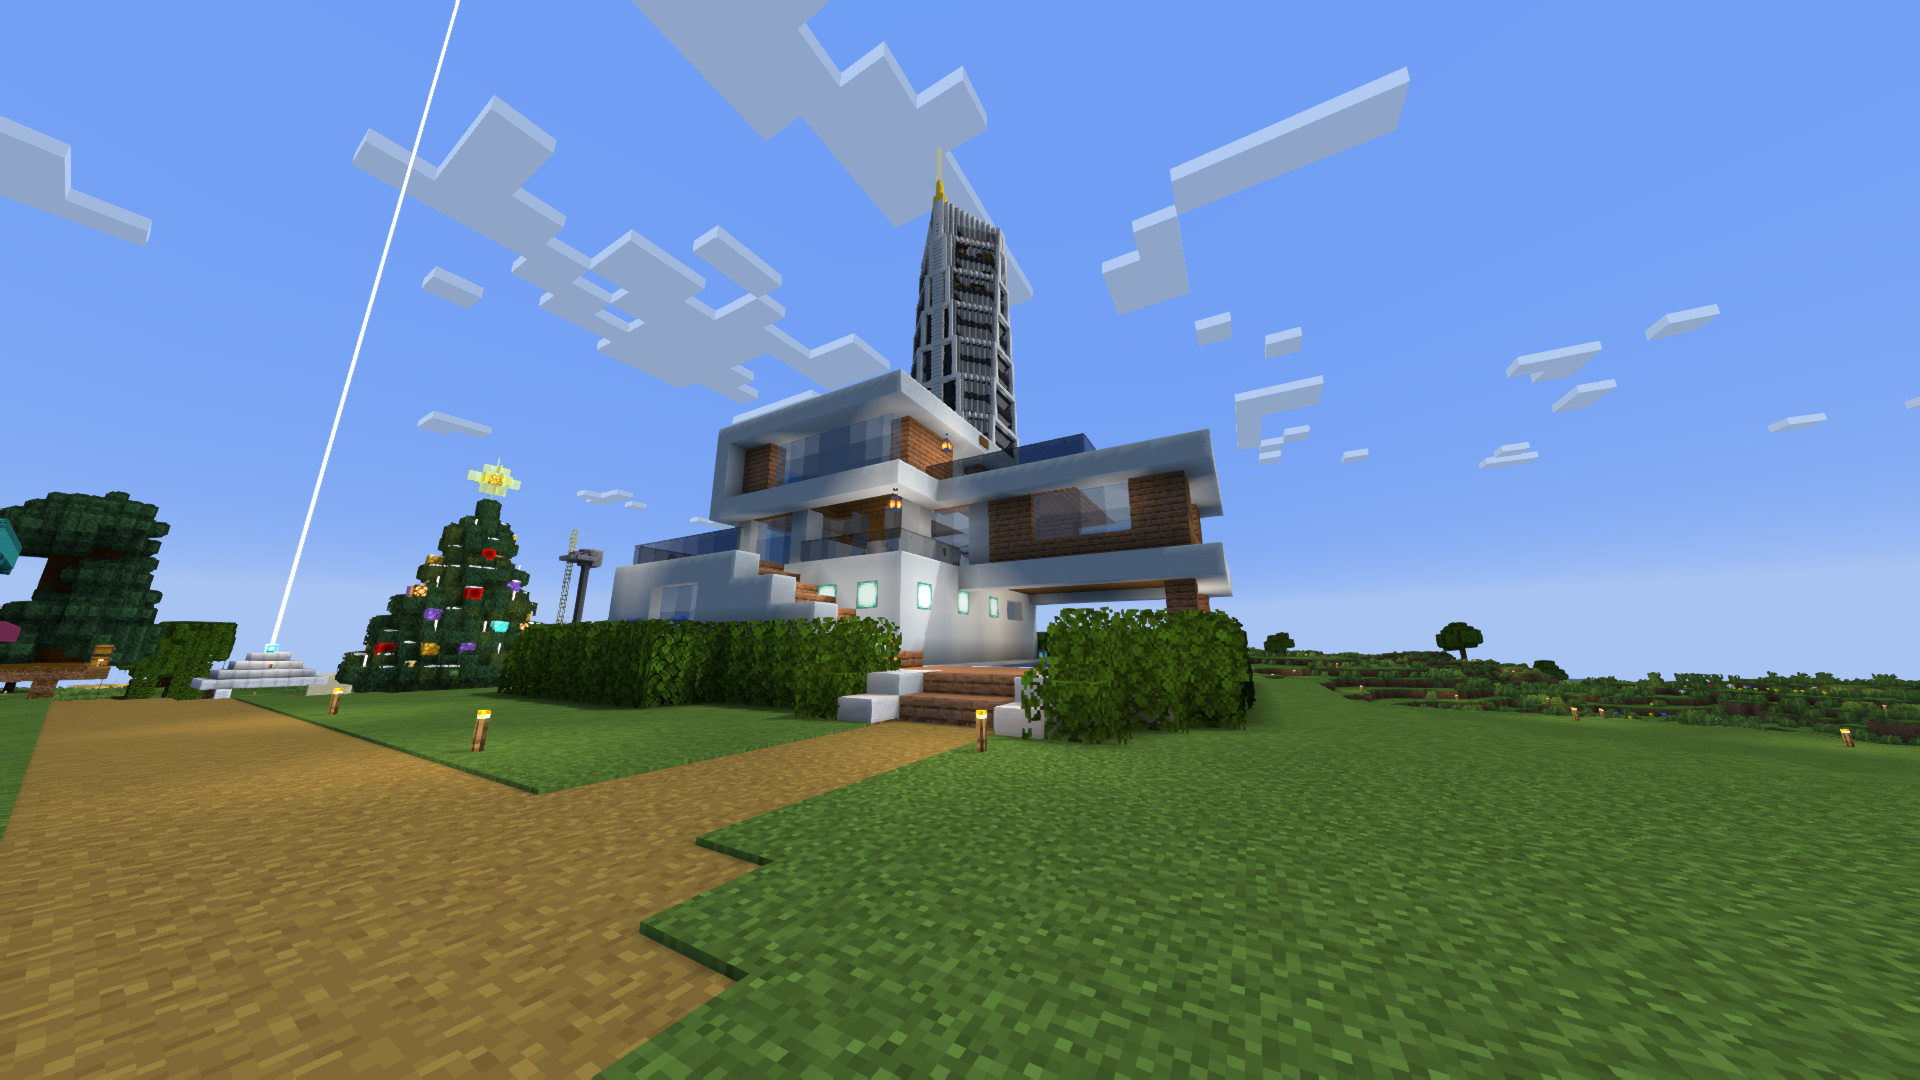
### CAPTURA DE TELA:
## O SHADER TEM:
– Suporte a [Better Clouds](https://modrinth.com/mod/better-clouds)
– Suporte a [Distant Horizons](https://modrinth.com/mod/distanthorizons)
– Suporte PBR _(LabPBR)_
– Profundidade de campo
– Desfoque de movimento
– Sombreamento _(Sombreamento das bordas que não são atingidas pelos raios solares)_
– Sombras
– FXAA _(anti-aliasing)_
– SSR _(Reflexão no espaço da tela)_
– Exposição automática
– Correção de cor
– Suporte a 7 idiomas: _EN RU UA FR DE CH BR_
## INSTALE OS SHADERS
– Baixe o cliente que suporta a instalação de shaders como Optifine e Iris
– Baixe os shaders
– Copie os shaders para /.minecraft/shaderpacks
– Inicie o Minecraft, vá para Opções –> Configurações de vídeo –> Shaders
– Escolha **BVS – Best Vanilla Shader**
## VÍDEO DE DEMONSTRAÇÃO
FR 🥐
# À PROPOS:
**Bonjour, je m’appelle LoLip_p ! J’ai créé ce shader en enregistrant Minecraft vanilla. J’ai également essayé de rendre les paramètres flexibles afin que vous puissiez désactiver ou activer les fonctions disponibles à votre guise.**
**Une version rapide du shader est également disponible : [**BVSF**](https://modrinth.com/shader/bvsf)!**
## LE SHADER DISPOSE DE:
– Prise en charge [Better Clouds](https://modrinth.com/mod/better-clouds)
– Prise en charge [Distant Horizons](https://modrinth.com/mod/distanthorizons)
– Prise en charge PBR _(LabPBR)_
– Profondeur de champ
– Flou de mouvement
– Ombrage _(Ombrage des bords qui ne sont pas exposés aux rayons du soleil)_
– Ombres
– FXAA _(anti-aliasing)_
– SSR _(Screen Space Reflection)_
– Exposition automatique
– Correction des couleurs
– Prise en charge de 7 langues : _EN RU UA FR DE CH BR_
## INSTALLER LES SHADERS
– Téléchargez le client qui prend en charge l’installation de shaders tels que Optifine et Iris
– Téléchargez les shaders
– Copiez les shaders dans /.minecraft/shaderpacks
– Lancez Minecraft, allez dans Options –> Paramètres vidéo –> Shaders
– Choisissez **BVS – Best Vanilla Shader**
## VIDÉO DE DÉMONSTRATION
UA 🕊️
# О:
**Привіт, я LoLip_p! Я створив цей шейдер, зберігши класичну версію Minecraft. Я також постарався зробити налаштування гнучкими, щоб ви могли відключати або вмикати доступні функції на свій розсуд.**
**Також доступна швидка версія шейдера: [**BVSF**](https://modrinth.com/shader/bvsf)!**
## ШЕЙДЕР МАЄ:
– Підтримка [Better Clouds](https://modrinth.com/mod/better-clouds)
– Підтримка [Distant Horizons](https://modrinth.com/mod/distanthorizons)
– Підтримка PBR _(LabPBR)_
– Глибина різкості
– Розмиття руху
– Затінення _(Затінення країв, що не потрапляють під промені сонця)_
– Тіні
– FXAA _(згладжування)_
– SSR _(Відбиття в просторі екрану)_
– Автоматична експозиція
– Корекція кольору
– Підтримка 7 мов: _EN RU UA FR DE CH BR_
## УСТАНОВКА ШЕЙДЕРА
– Завантажте клієнт, що підтримує встановлення шейдерів, таких як Optifine та Iris
– Завантажте шейдери
– Скопіюйте шейдери в /.minecraft/shaderpacks
– Запустіть Minecraft, перейдіть в «Налаштування» –> «Налаштування відео» –> «Шейдери»
– Виберіть **BVS – Best Vanilla Shader**
## ДЕМО ВІДЕО
Breeze Flow Shaders
BreezeFlow is a modified edition of Complementary Shaders for Minecraft Java Edition, created to preserve its exceptional attention to detail, quality, and optimization while pushing a more cinematic, realistic look at higher frame rates on weaker devices. Complementary Shaders began as an edit of BSL Shaders in 2018 and has since evolved through countless major updates, community feedback, and a full rewrite to meet modern standards; BreezeFlow is built on that legacy and gives full credit to the original project.
BreezeFlow’s mission is simple: keep the signature Complementary look and polish, but make it run smoother on integrated GPUs and lower-end systems without sacrificing atmosphere. It is designed to feel cinematic and immersive while remaining practical for everyday gameplay.
There are many optimizations done, too many to be listed. However most of the work was based on reducing the amount of calculations performed and a LOD system was implemented.

All credits go to the original shader [Complementary Shader](https://modrinth.com/shader/complementary-unbound)
This shader is simply a variant of Complementary with optimization changes and color grading changes alongside new features.
An example of a new feature (Meteor Showers):

Better Nebula:

I highly recommend checking out the gallery page to understand how the shader looks – many gallery pictures are only at low preset and will look better at higher presets.
——————————————————————————————–
Like all shaders, Sodium and Iris or Optifine is required. I recommend using the mods listed as well.
[Intellium](https://modrinth.com/mod/intellium-fps):
Improves CPU and GPU workload to further optimize performance on Intel GPU’s. Only works on Intel GPU’s and is made by me. The mod may not be published yet when you are viewing this page.
[C2ME](https://modrinth.com/mod/c2me-fabric):
Improves world generation and chunk loading by using multiple CPU threads, making terrain load faster and reducing lag.
[Cloth Config Api](https://modrinth.com/mod/cloth-config):
A library mod that provides config menus for other mods. Doesn’t do anything on its own.
[Entity Culling](https://modrinth.com/mod/entityculling):
Stops rendering entities you can’t see (like ones behind walls), improving FPS.
[Fabric Api](https://modrinth.com/mod/fabric-api):
Core library required for most Fabric mods. Adds hooks and systems mods depend on.
[FerriteCore](https://modrinth.com/mod/ferrite-core):
Reduces memory usage, especially RAM, helping performance and stability.
[ImmediatelyFast](https://modrinth.com/mod/immediatelyfast):
Speeds up UI and rendering performance, especially menus and HUD elements.
[Iris](https://modrinth.com/mod/iris):
Adds shader support to Fabric (lets you use shaders like OptiFine does).
[Lithium](https://modrinth.com/mod/lithium):
Optimizes game logic (AI, physics, ticking), improving overall performance.
[Mod Menu](https://modrinth.com/mod/modmenu):
Adds a menu to view and configure installed mods in-game.
[Nosium-Forked](https://modrinth.com/mod/noisiumforked):
Optimizes world generation noise calculations, improving chunk generation speed.
[RenderScale](https://modrinth.com/mod/renderscale):
Lets you render the game at a lower resolution and upscale it for better performance.
[Sodium](https://modrinth.com/mod/sodium):
Major rendering optimization mod that significantly boosts FPS and reduces lag.
——————————————————————————————–
If you are not getting similar fps it may be due to the resolution, use the mod Render Scale to reduce your resolution to get higher fps.
The Default is also Very Low, reduce it to Potato if you are not getting your target fps
——————————————————————————————–
Again huge thanks the original shader [Complementary Shader](https://modrinth.com/shader/complementary-unbound)
Without it this project wouldn’t exist.
Support Me or Complementary
– Me: https://ko-fi.com/slrrxx
– Complementary: https://www.patreon.com/emingt
– Complementary Website:
(https://www.complementary.dev/shaders/)
Body Camera
EN 🌐
# ABOUT:
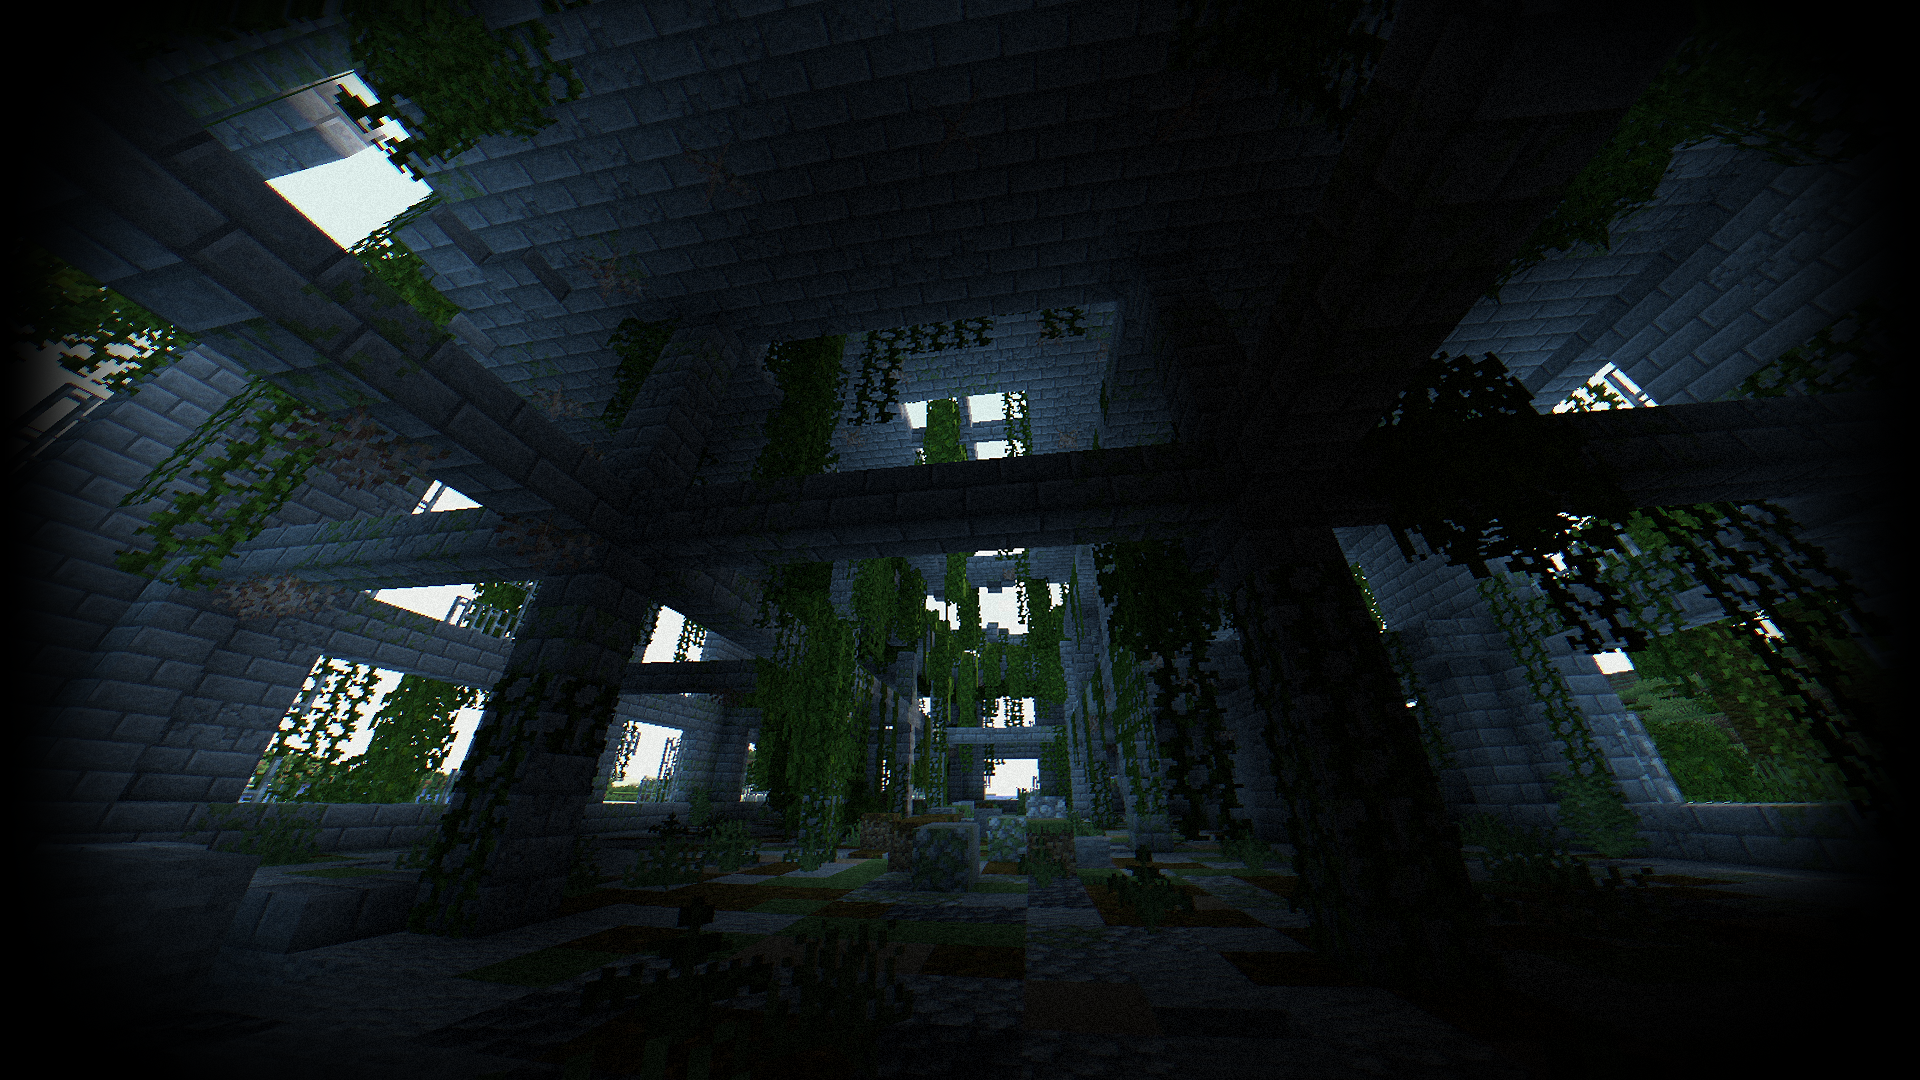
**Hi, I’m LoLip_p! This is a shader that simulates the effects of a body camera.**
### Looking for more realism?
I’ve released a **[Next-Gen](https://www.patreon.com/posts/body-camera-next-153571705)** version of this shader! It’s a complete overhaul based on Rethinking Voxels, bringing RTX lighting to the bodycam aesthetic.
Check it out on my [Patreon](https://patreon.com/lolip_p)!
# Base version:
### SCREENSHOT:
## INSTALL THE SHADERS
– Download Client Which Supports Installing Shaders Such As Optifine And Iris
– Download The Shaders
– Copy Shaders to /.minecraft/shaderpacks
– Launch Minecraft, Go To Options –> Video Settings –> Shaders
– Choose **Body Camera Shader**
## DEMO VIDEO
RU 🐻
# О:
**Привет, я LoLip_p! Это шейдер, который имитирует эффекты камеры, установленной на теле.**
### Ищете больше реализма?
Я выпустил **[Next-Gen](https://www.patreon.com/posts/body-camera-next-153571705)** версию этого шейдера! Это полностью переработанная версия, основанная на подходе «Rethinking Voxels», которая добавляет освещение RTX в стиле «bodycam».
Посмотрите его на моем [Patreon](https://patreon.com/lolip_p)!
## УСТАНОВКА ШЕЙДЕРА
– Скачать клиент, поддерживающий установку шейдеров, таких как Optifine и Iris
– Скачать шейдеры
– Копировать шейдеры в /.minecraft/shaderpacks
– Запустите Minecraft, перейдите в «Настройки» –> Видео Настройки –> Shaders
– Выбери **Body Camera Shader**
**Olá, sou o LoLip_p! Este é um shader que simula os efeitos de uma câmera corporal.**
### Quer mais realismo?
Lancei uma versão **[Next-Gen](https://www.patreon.com/posts/body-camera-next-153571705)** deste shader! Trata-se de uma reformulação completa baseada no Rethinking Voxels, que traz iluminação RTX para a estética das câmeras corporais.
Confira no meu [Patreon](https://patreon.com/lolip_p)!
# Base version:
### CAPTURA DE TELA:

## INSTALE OS SHADERS
– Baixe um cliente que suporte a instalação de shaders, como Optifine e Iris
– Baixe os shaders
– Copie os shaders para /.minecraft/shaderpacks
– Inicie o Minecraft, vá para Opções –> Configurações de vídeo –> Shaders
– Escolha **Body Camera Shader**
## VÍDEO DE DEMONSTRAÇÃO
DE 🍺
# ÜBER:
**Hallo, ich bin LoLip_p! Dies ist ein Shader, der die Effekte einer Körperkamera simuliert.**
### Lust auf noch mehr Realismus?
Ich habe eine **[Next-Gen](https://www.patreon.com/posts/body-camera-next-153571705)**-Version dieses Shaders veröffentlicht! Es handelt sich um eine komplette Überarbeitung auf Basis von „Rethinking Voxels“, die RTX-Beleuchtung in die Bodycam-Ästhetik integriert.
Schau sie dir auf meinem [Patreon](https://patreon.com/lolip_p) an!
# Base version:
### SCREENSHOT:

## INSTALLIEREN SIE DIE SHADER
– Client herunterladen, der die Installation von Shadern wie Optifine und Iris unterstützt
– Shader herunterladen
– Shader nach /.minecraft/shaderpacks kopieren
– Minecraft starten, zu Optionen –> Videoeinstellungen –> Shader gehen
– **Body Camera Shader** auswählen
## DEMO VIDEO
FR 🥐
# À PROPOS:
**Bonjour, je suis LoLip_p ! Voici un shader qui simule les effets d’une caméra corporelle.**
### Envie d’un rendu encore plus réaliste ?
J’ai publié une version **[Next-Gen](https://www.patreon.com/posts/body-camera-next-153571705)** de ce shader ! Il s’agit d’une refonte complète inspirée de « Rethinking Voxels », qui intègre l’éclairage RTX à l’esthétique des caméras corporelles.
Découvrez-la sur mon [Patreon](https://patreon.com/lolip_p) !
# Base version:
### CAPTURE D’ÉCRAN:

## INSTALLER LES SHADERS
– Téléchargez un client prenant en charge l’installation de shaders tels que Optifine et Iris
– Téléchargez les shaders
– Copiez les shaders dans /.minecraft/shaderpacks
– Lancez Minecraft, allez dans Options –> Paramètres vidéo –> Shaders
– Choisissez **Body Camera Shader**
## VIDÉO DE DÉMONSTRATION
Bloop Shaders
# ABOUT BLOOP
Bloop is a Minecraft shader designed to deliver excellent graphics while maximizing performance.
Perfectly scalable, it offers smooth gameplay on low-end PCs and higher graphics options for more powerful systems, from integrated graphics to an RTX 3090.
Enjoy an enhanced visual experience without compromising on frame rates.
– Performance oriented profiles and simple settings
– Realtime Shadows with simple and advanced shadow filtering
– Distant Horizons support, Including Shadows
– Physics Mod support
– Floodfill lighting
– Advanced and Simple AO
– Full LabPBR compatibility
– POM and Material SSR
– Volumetric Light and Mist
– cloud and contact shadows
– Bloom
– Depth of field
– Volumetric and vanilla cloud support
– Custom tonemapping
– TAA with support for anti ghosting on entities
– Support for various modded blocks
and a lot more
# Performance Comparison
Performance Table
Ryzen 9 7900X with Integrated Graphics at 1080p, Render distance 8
“`
┌──────────────────────────┬──────────────────────┬───────────┬───────────────┬───────────────────┬─────────┐
│ Shader │ Preset │ Shadows │ Shadow Range │ Shadow Resolution │ FPS │
├──────────────────────────┼──────────────────────┼───────────┼───────────────┼───────────────────┼─────────┤
│ No shaders │ NA │ NA │ NA │ NA │ 180 fps │
├──────────────────────────┼──────────────────────┼───────────┼───────────────┼───────────────────┼─────────┤
│ Bloop │ Lowest │ Yes │ 8 chunks │ 1024 px │ 45 fps │
│ │ Low │ Yes │ 8 chunks │ 1024 px │ 40 fps │
│ │ Med Low │ Yes │ 10 chunks │ 1024 px │ 30 fps │
│ │ Medium │ Yes │ 10 chunks │ 2048 px │ 20 fps │
│ │ Med High │ Yes │ 16 chunks │ 2048 px │ 15 fps │
│ │ High │ Yes │ 16 chunks │ 4096 px │ 10 fps │
│ │ Ultra │ Yes │ 16 chunks │ 4096 px │ 5 fps │
├──────────────────────────┼──────────────────────┼───────────┼───────────────┼───────────────────┼─────────┤
│ Makeup UltraFast │ shadowless low │ No │ NA │ NA │ 60 fps │
│ │ shadowless Medium │ No │ NA │ NA │ 40 fps │
│ │ shadowless High │ No │ NA │ NA │ 30 fps │
│ │ Low │ Yes │ NA │ NA │ 25 fps │
│ │ Medium │ Yes │ NA │ NA │ 23 fps │
│ │ High │ Yes │ NA │ NA │ 20 fps │
├──────────────────────────┼──────────────────────┼───────────┼───────────────┼───────────────────┼─────────┤
│ Bliss │ Default │ Yes │ 8 chunks │ 2084 px │ 10 fps │
├──────────────────────────┼──────────────────────┼───────────┼───────────────┼───────────────────┼─────────┤
│ Complementary reimagined │ Potato │ No │ NA │ NA │ 20 fps │
├──────────────────────────┼──────────────────────┼───────────┼───────────────┼───────────────────┼─────────┤
│ Potato Shaders │ NA │ No │ NA │ NA │ 25 fps │
├──────────────────────────┼──────────────────────┼───────────┼───────────────┼───────────────────┼─────────┤
│ RenderPearl │ Lowest │ Yes │ 2 chunks │ 512px │ 55 fps │
│ │ lower │ Yes │ 6 chunks │ 512px │ 40 fps │
│ │ Low │ Yes │ 8 chunks │ 1024 px │ 35 fps │
│ │ medium │ Yes │ 10 chunks │ 2048 px │ 20 fps │
│ │ high │ Yes │ 10 chunks │ 2048 px │ 15 fps │
├──────────────────────────┼──────────────────────┼───────────┼───────────────┼───────────────────┼─────────┤
│ Aurora │ Default │ No │ NA │ NA │ 20 fps │
├──────────────────────────┼──────────────────────┼───────────┼───────────────┼───────────────────┼─────────┤
│ Mellow │ Low │ No │ NA │ NA │ 100 fps │
│ │ fancy │ No │ NA │ NA │ 70 fps │
│ │ fabulous │ No │ NA │ NA │ 50 fps │
└──────────────────────────┴──────────────────────┴───────────┴───────────────┴───────────────────┴─────────┘
“`
Bliss Shaders
# About The Shader
_**Bliss is a big edit of Chocapic13’s V9.0 – V9.1; [The original shaders can be found here!](https://www.curseforge.com/minecraft/customization/chocapic13-shaders)**_
I liked chocapic13’s shaders, but i could not be satisfied. I decided i wanted to try and bring my own visual goals out in the shader while i learn how to develop shaders. So here i am, with a pretty sizeable edit that stands to be quite different from the original shader!
# Requirements
– The mod [“Iris”](https://www.irisshaders.dev/download). The mod [“Optifine”](https://optifine.net/downloads) might work as well.
– Designed for Minecraft versions 1.17.0+
– AMD, Intel, and NVidia graphics are supported
– Apple devices have limited support due to OpenGL version restrictions. [Please refer to this thread for more info](https://github.com/X0nk/Bliss-Shader/issues/181)
# Questions? Bugs? Want to help test unstable versions?
– [Contact me on my Discord server](https://discord.gg/8nVt56H9zH)
– [Alternatively, contact me on the ShaderLabs Discord](https://discord.gg/RpzWN9S)
– [Test the unstable github branch here (there is a download guide in the README)](https://github.com/X0nk/Bliss-Shader/tree/Unstable)
– [Report a bug, request a feature, or ask a question here](https://github.com/X0nk/Bliss-Shader/issues/new/choose)
– [Want to support me? Throw money at me here](https://ko-fi.com/xonkdev)