use SVGF to denoise,support bloom,Tyndall effect,auto exposure
**YOU NEED TO LOAD A PBR RESOURSEPACK AND USE VULKANITE 0.0.4 TO MAKE THE SHADER WORK CORRECTLY**
**WARNING:Make sure that your resourcepack fit your game version. Otherwise, you will get a black world!!!**
Cursed Shader pack
This Shader Pack makes things look Totally Cursed!! (SuperMJ767 I’m Looking at you) It looks SUUUPER cursed, as the name suggests. Check out the gallery if you want to know what it looks like. This pack needs Iris shaders to run.
Cursed Fog
EN 🌐
# ABOUT:
**Hi, I’m LoLip_p! I developed this shader to create a tense and eerie atmosphere, perfect for horror modpacks. I would be delighted if it were included in your projects. It features a CRT mask, various video artifacts, noise effects, and more. If any effects don’t match your preferences, all parameters are fully customizable, allowing you to easily toggle settings on or off. Support the author on [Patreon](https://patreon.com/lolip_p).**
## INSTALL THE SHADERS
– Download Client Which Supports Installing Shaders Such As Optifine And Iris
– Download The Shaders
– Copy Shaders to /.minecraft/shaderpacks
– Launch Minecraft, Go To Options –> Video Settings –> Shaders
– Choose **Cursed Fog**
## DEMO VIDEO
RU 🐻
# О:
**Привет, я LoLip_p! Я разработал этот шейдер, чтобы создать напряженную и жуткую атмосферу, идеально подходящую для модпаков в жанре хоррор. Я был бы рад, если бы он был включен в ваши проекты. Он включает в себя маску CRT, различные видеоартефакты, шумовые эффекты и многое другое. Если какие-либо эффекты не соответствуют вашим предпочтениям, все параметры полностью настраиваемы, что позволяет легко включать или отключать настройки. Поддержите автора на [Patreon](https://patreon.com/lolip_p).**
# ÜBER:
**Hallo, ich bin LoLip_p! Ich habe diesen Shader entwickelt, um eine spannende und unheimliche Atmosphäre zu schaffen, die perfekt für Horror-Modpacks geeignet ist. Ich würde mich sehr freuen, wenn er in Ihren Projekten verwendet würde. Er verfügt über eine CRT-Maske, verschiedene Videoartefakte, Rauscheffekte und vieles mehr. Wenn Ihnen bestimmte Effekte nicht gefallen, können Sie alle Parameter vollständig anpassen und die Einstellungen ganz einfach ein- oder ausschalten. Unterstützen Sie den Autor auf [Patreon](https://patreon.com/lolip_p).**
## INSTALLIEREN SIE DIE SHADER
– Client herunterladen, der die Installation von Shadern wie Optifine und Iris unterstützt
– Shader herunterladen
– Shader nach /.minecraft/shaderpacks kopieren
– Minecraft starten, zu Optionen –> Videoeinstellungen –> Shader gehen
– **Cursed Fog** auswählen
## DEMO VIDEO
CRT Monochrome Shaderpack
# CRT Monochrome Shaderpack
> *”End of Line.”*
**CRT Monochrome Shaderpack** is a lightweight GLSL shader pack for Minecraft Java Edition (Iris/OptiFine) that replicates the high-contrast, phosphor-display aesthetic of early 80s computing.
It replaces standard rendering with a strict two-tone wireframe/threshold visualization, simulating a monochromatic CRT monitor inside the game.
## 🖥️ Visual Style
### The “P1″ Phosphor Aesthetic
By default, the pack utilizes the **”P1 Apple Green” (#33FF33)** color scheme, mimicking the high-persistence green phosphor monitors of the Apple II era. The world is rendered as a stark contrast between illuminated geometry and a pure black void.
### CRT Emulation
The pack includes a fully procedural CRT post-processing stack:
– **Screen Curvature:** subtle geometric distortion to mimic a curved glass tube.
– **Scanlines:** Horizontal beam lines that scroll slowly with time.
– **Chromatic Aberration:** Slight RGB channel separation at the screen edges.
– **Vignette:** darkening at the corners to simulate tube depth.
## ⚙️ Technical Features
– **Depth-Based Rendering:** Uses Sobel Edge Detection and luminance thresholding on the depth buffer to generate outlines and solids.
– **Optimization Friendly:** Extremely low GPU overhead. Disables standard lighting, shadows, and PBR calculations.
– **”Hall of Mirrors” Fix:** Includes a custom Sky Shader module that forces a depth buffer clear. This prevents the “smearing” artifacts common when using optimization mods (like Radon/Sodium) that disable vanilla sky rendering.
– **Driver Support:** Compatible with both NVIDIA and AMD GPUs (OpenGL 3.0+).
## 🎛️ Configuration
While the default is Green, the pack is fully configurable via the **Shader Options** menu in-game.
### RGB Color Channels
You can manually mix the phosphor color using 0-255 sliders.
– **Classic Amber:** R: 255, G: 176, B: 0
– **Macintosh White:** R: 229, G: 251, B: 255
– **Neon Purple:** R: 214, G: 3, B: 220
### World Settings
– **Contrast Threshold:** Controls the sensitivity of the edge detector (higher = darker world, lower = more noise).
– **Void Distance:** Sets the strict cutoff distance where the grid fades into black.
– **CRT Effects:** Sliders to adjust or disable Curvature, Scanline Intensity, and Aberration.
## ⚠️ Known Issues & Troubleshooting
### The “Hall of Mirrors” (Smearing) Effect
If you see the screen “smearing” or trails following your movement, your Depth Buffer is not being cleared correctly.
– **The Cause:** This usually happens with high-performance custom clients or mods that disable the vanilla sky rendering to save FPS. Without the sky pass, the command to clear the previous frame’s depth data is never sent.
– **The Fix:**
1. Ensure **Sky Rendering** is enabled in your client settings.
2. If you are a developer using a custom rendering engine, ensure the depth buffer bit is cleared at the start of the frame.
### Items appear as “Blobs” or lack detail
If hand items look like solid blocks of color:
– Adjust the **Contrast Threshold** in the shader options.
– Lowering the threshold will make the detector more sensitive to smaller depth changes, revealing more detail on close-up objects.
## 📥 Installation
1. Download the `.zip` file.
2. Place it into your `.minecraft/shaderpacks` folder.
3. Launch the game using **Iris** or **OptiFine**.
4. Select **CRT Monochrome Shaderpack** from the Shader list.
*Note: For the best experience, ensure “Render Regions” is enabled if using OptiFine.*
## 📣 Streaming & Content Creation
If you feature this shader pack in a stream or video, please provide credit by linking to the official project page or mentioning **h1ggsk**. I’d love to see what you create with it!
## 📦 Modpack Policy
– **Permission Granted:** You are free to include the `CRT Monochrome Shaderpack` in modpacks hosted on **CurseForge** or **Modrinth**.
– **Requirement:** The modpack must use the official project dependency/link so that downloads are tracked through the original source.
– **Prohibited:** You may not re-upload the shader pack as a standalone file or host it on third-party “mirror” sites.
This software is the intellectual property of **h1ggsk**.
1. **Non-Redistribution:** You may not re-upload, mirror, or redistribute this shader pack as a standalone project.
2. **Modification:** You may modify the code for **personal use only**. You may not distribute modified versions of the code (“forks”) without explicit written permission from the author.
3. **Modpack Exception:** Use in curated modpacks is permitted under the conditions outlined in the “Modpack Policy” above.
Cozy Shader
(I know the video seems laggy, but the shader shouldnt have too much of an impact on your game’s performance. It’s just that the software I used to record it wasn’t too great)
**Features:**
– Warm golden sunlight with realistic sunrise and sunset color shifts
– Rich orange torchlight for a cozy indoor atmosphere
– Animated water with depth-based coloring
– Soft directional shadows with distortion for better quality
– Distance fog for atmosphere
– Subtle vignette for a cinematic feel
### About
Complementary Shaders is a shader pack for Minecraft Java Edition with exceptional attention to detail, high standards of quality, and top tier optimisation. It offers a ton of high quality effects, two default visual style choices, custom effects for almost every block in the game, profiles ranging from Potato to Ultra and it’s designed to never be obstructive during gameplay. It started as an edit of BSL Shaders in 2018, and it received countless major updates including a complete rewrite to meet the standards of our community. Complementary Shaders is dedicated to be shaped by user feedback over anything else, and it still receives regular updates to this day.
“Unbound” is one of the two default styles Complementary Shaders r5 comes with. It is the less restricted style of Complementary that aims for a more realistic image. [**Learn more about the two styles here.**](https://www.complementary.dev/shaders/#style-section)
### Choose Your Style
Complementary Shaders comes with two distinct visual style options. The only difference between these two styles is the default settings. The Unbound style is designed for people looking for a more realistic experience, while the Reimagined style is made to reimagine Minecraft while preserving its unique visual elements. Please note that you can still customize everything after you download either style. You can switch to blocky clouds on the Unbound style, or use realistic water on the Reimagined style. All settings are located in Shader Options.
### Installation
**New:** You can just download the [**Complementary Installer**](https://www.complementary.dev/shaders/#download-section) and click Install to automatically do all the steps below.
**-** First you need to install the [**Iris**](https://irisshaders.dev/download) mod to be able to load shaderpacks.
**-** Then you need to launch the game, and get to the Shaderpacks/Shaders menu in Video Settings.
**-** Open the shaderpacks folder by clicking the button in the menu.
**-** Download Complementary Shaders and put it in the shaderpacks folder. (Please don’t unzip the file)
**-** Get back in the game, and choose Complementary in the shaderpacks menu. (Refresh the menu if it doesn’t appear)
### Other
**-** Check out the [**Complementary Development Website**](https://www.complementary.dev/) for more information.
**-** Join the [**Complementary Discord**](https://discord.gg/ck5htDSQPv) community if you have any questions, or just want to talk.
**-** If you would like to support the development of Complementary, you can do so on [**Patreon**](https://www.patreon.com/emingt).
Colorless (Black and White)
With this lightweight shader you can turn your world black and white.
Important Notes:
-The colors are inverted when starting the Shader for the first time, please look into the shader settings
-for better results, turn the brightness down to 0%
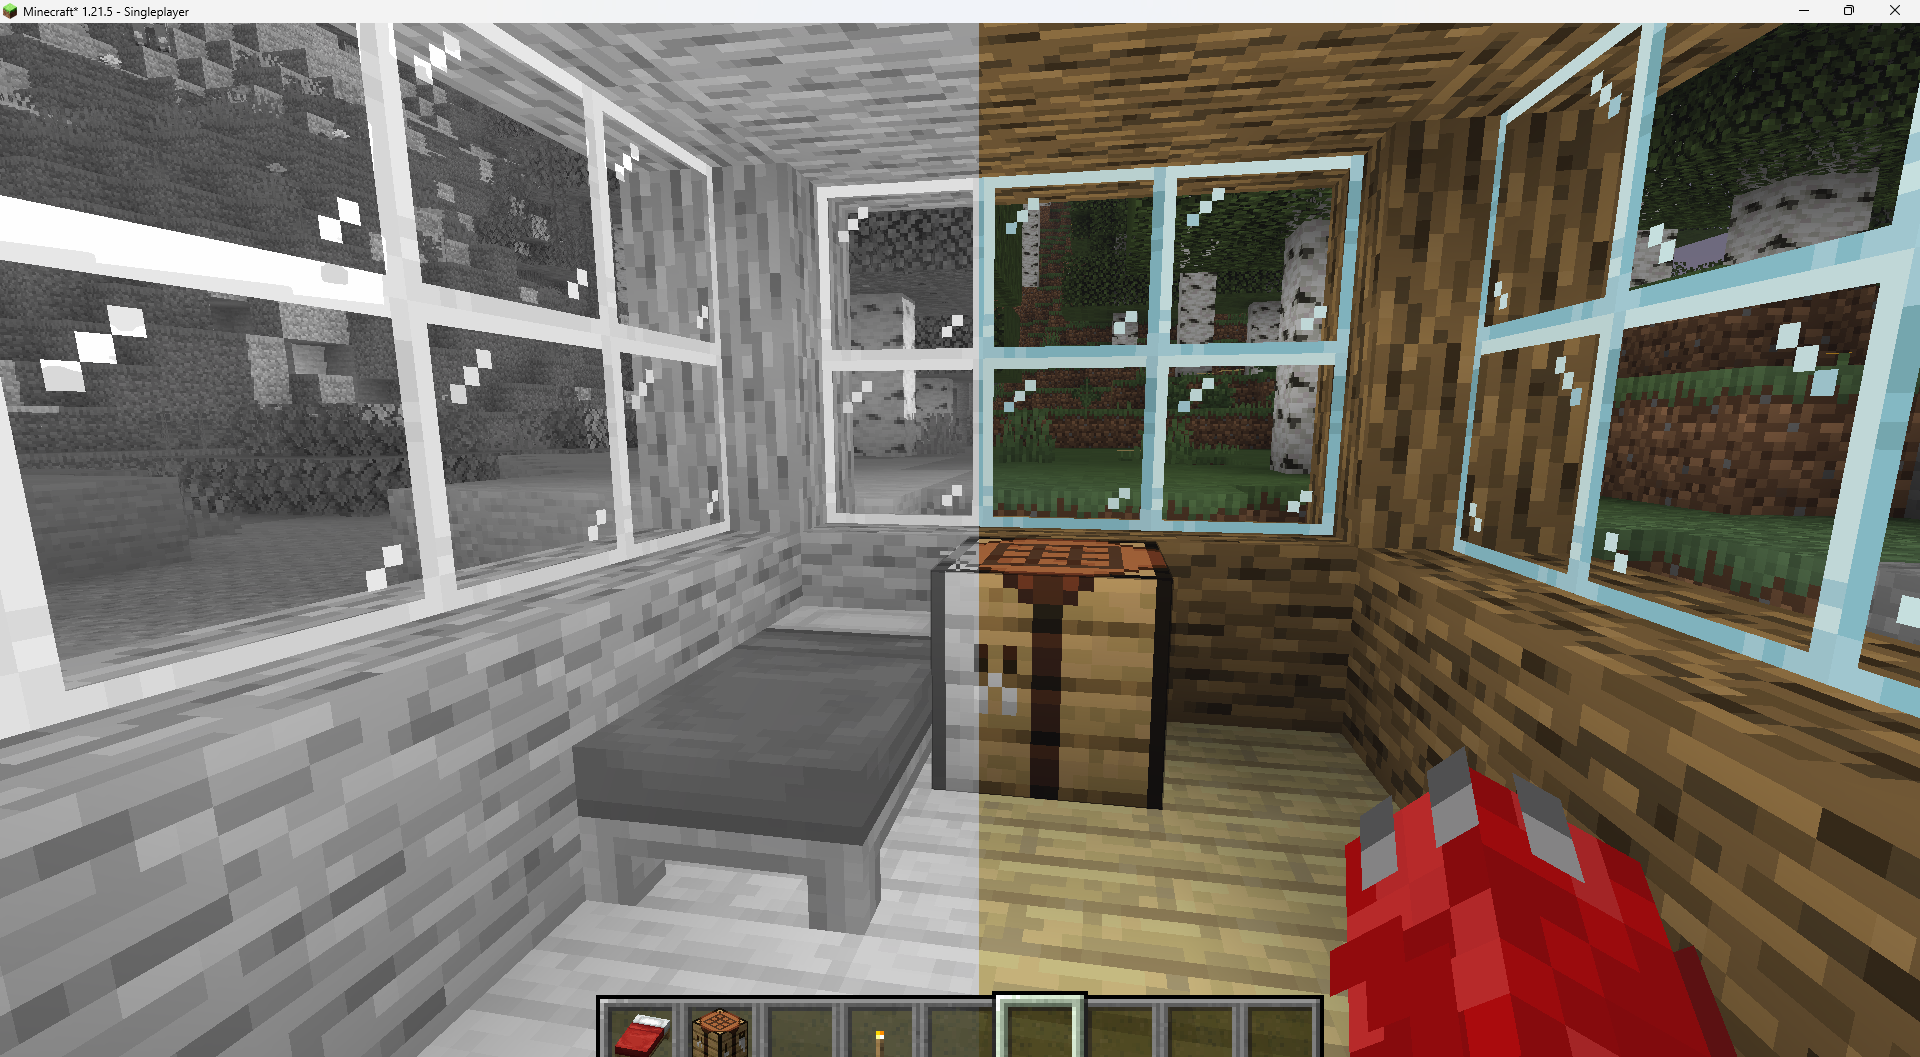
Features:
-turn world black and white
-optimised for PCs with a bad performance
-holding an item like a torch emmits light around the player
-shadows and fog
-colored lighting
-red light around player if hurt (can be deactivated)
Configurable Settings:
-inverted = if true, the colors are inverted
-coloredGlassShadows = if true, the shadows of colored glass are colored
-blacknwhite = if true, the world is black and white
-graytorchlight = if true, items like torches emmit a gray light, else, they give of a orange light
-redRadiusIfHurt = if true, red light appears around the player if hurt
ClearVision Shader
ClearVision Shader enhances Minecraft with crystal clear visibility similar to night vision in all dimensions (Overworld, Nether, End).
It is optimized for every device — from low-end (potato) to high-end — ensuring smooth and stable FPS.
Fully compatible with Minecraft 1.21 – 1.21.11 using OptiFine and Iris.
Chara’s Vibrant Shaders
Chara’s Vibrant Shaders feels like a world turned up too far—colors too bright, light too intense, everything just a little unstable. Greens glow almost unnaturally, water shimmers like liquid glass, and the sky bleeds vivid shades into the horizon. It’s beautiful in a loud, overwhelming way, like reality trying to outdo itself.
But it never quite settles. Light flickers when it shouldn’t, shadows shift unpredictably, and parts of the world seem to glitch or warp for a moment before snapping back. Sometimes it looks broken—other times, accidentally perfect.
It’s vibrant, messy, and unpredictable. Like something that wasn’t meant to work, but somehow does anyway.
It’s very buggy with contrast and night time but during the day it works out. the godrays are also very buggy.
Carmine
# Carmine Shaders
Carmine is a Minecraft shaderpack that pushes the world into an eerie crimson mood.
Familiar biomes, still unsettling, like everything is lit by a fading red sky.
## About the shaderpack
This pack provides:
– heavy red color grading
– darker shadows
– a more ominous atmosphere to the Minecraft we all love!
Designed for use with horror mods, maps, or just fun in general!
## Why I made this
Made for Lumen, Hack Club!
Carmine is stylized and mood-first.
## Installation
1. Install **Iris Shaders** (or **OptiFine**).
2. Download or clone this repository.
3. Put the shaderpack folder into `.minecraft/shaderpacks`.
4. Select **Carmine-Shaders** in your shader settings in-game.
## What I learnt
Working on Carmine taught me a lot about balancing style:
– strong color grading can look great in screenshots but still needs to keep gameplay readable
– small lighting tweaks can completely change the tone of a scene