LiDAR Visualizer
A shader that imitates LiDAR scan visualization software.
Crouching shoots hundreds rays each frame in a circular pattern from the crosshair, creating points where they land.
These points are persistent and allows for “mapping” of an area.
Reloading the shader will erase all points. There is a limit of 2048000 points at any given moment, replacing the oldest point when reaching the limit.
Lethal Shaders
# Lethal Shaders
Lethal Shaders is a simple shaderpack which aims to recreate the artstyle of [Lethal Company](https://store.steampowered.com/app/1966720/Lethal_Company/) in Minecraft.
This shaderpack looks best at moody brightness settings.
ink-wash-shaderpack
# 🎨 Ink Wash Painting Shader Pack
> *Transform your Minecraft world into a flowing Chinese ink wash painting.*
—
## ✨ Overview
**Ink Wash Shader Pack** is an Iris shader pack for Minecraft, inspired by traditional Chinese ink wash painting art. Using post-processing shader technology, it transforms the game’s visuals into a real-time ink painting style—featuring natural gradations of ink tones, varied brushstrokes, distant mountains fading into a dreamlike white space, and foliage swaying in the wind.
Unlike simple desaturation filters, this shader pack deeply simulates multiple traditional ink painting techniques:
– **Five Ink Tones (五墨法)** — Natural transitions between burnt, heavy, dark, light, and clear ink tones.
– **Brush Stroke Outlines (皴法)** — Multi-scale edge detection to simulate the texture of a traditional ink brush.
– **Negative Space (留白)** — Distant scenery and skies fade into large areas of preserved white space, mimicking the ethereal emptiness found in traditional landscapes.
– **Ink Diffusion (墨晕)** — A soft, natural bleeding effect simulating wet ink seeping into rice paper.
– **Rice Paper Texture (宣纸)** — Fractal noise reproduces the authentic fiber texture of traditional Xuan paper.
## 🖼️ Core Features
### 🖌️ Global Ink Tone Palette
All blocks are mapped to ink tones based on luminance. Nearby objects show texture details (like light ink sketches), while distant objects gradually dissolve into negative space.
### ✒️ Three-Tier Brush Outlines
| Brush Size | Detection Method | Visual Effect |
|————|——————|—————|
| **Thick** | Depth + Normal Edges (2x sample) | Major structure outlines (mountains, buildings) |
| **Medium** | Depth + Normal + Color (1x sample) | Block-level edges |
| **Fine** | Color Edges (0.5x sample) | Fine texture detail lines |
### 🌿 Wind Sway Animation
Grass and flowers sway dynamically with a 3-layer wind system (main gust + rustle + fine tremor). Leaf blocks sway gently like entire branches. The shader intelligently differentiates foliage using texture transparency so solid ground blocks will not animate.
### 🌫️ Distant Fading
A depth-based fading system: foregound ink is sharp and clear → midground lightens → background dissolves completely into paper white, much like distant mountains in traditional landscape paintings.
### 💧 Ink Diffusion
A dedicated post-processing pass simulates wet ink seeping into the paper. Light ink areas spread naturally, strong ink remains crisp, and ink flow is subtly influenced by micro-gravity.
### 📜 Rice Paper & Mounting
– **FBM Paper Texture** — Tri-scale fractional brownian motion noise with horizontal fiber bias to recreate authentic papermaking textures.
– **Scroll Border** — Adds a traditional mounted scroll frame around the screen.
– **Vermilion Seal (朱印)** — A toggleable traditional red stone seal stamp.
### 🌙 Time & Dimensions
– Ink tones automatically adapt to Minecraft time—light and elegant during the day, heavy and dark at night.
– Automatically detects the **Nether dimension** and applies a brightness boost and a subtle warm red tint perfectly fitting the lava atmosphere.
– Subtle “Ink Flow” animation brings a breathing, hand-painted feel to the entire display.
## ⚙️ Configurable Parameters (18 Settings)
All parameters can be tuned in real-time via the Iris Shader settings menu, featuring full English/Chinese translations. Options include:
– **Ink Contrast & Color Tints** (Subtle original color preservation up close)
– **Night Darkening & Nether Brightness**
– **Edge Strength** for all three brush tiers
– **Ink Flow & Wind Sway** animations
– **Distance Fade & Ink Diffusion**
– **Paper Grain Intensity**
– **Vignette, Scroll Border, and Seal Stamp** toggles
## 📦 Installation
1. Requires Minecraft with **Fabric** and **Iris Shaders**.
2. Place the downloaded `.zip` file into your `.minecraft/shaderpacks/` folder.
3. Enable the pack in-game: *Options → Video Settings → Shader Packs*.
4. Press `O` in-game to access shader settings and tweak the look to your liking!
Image Shader
# Image Shader
Only use a shader to display an image on your screen~
**Note: compiling the shader may take some time!**
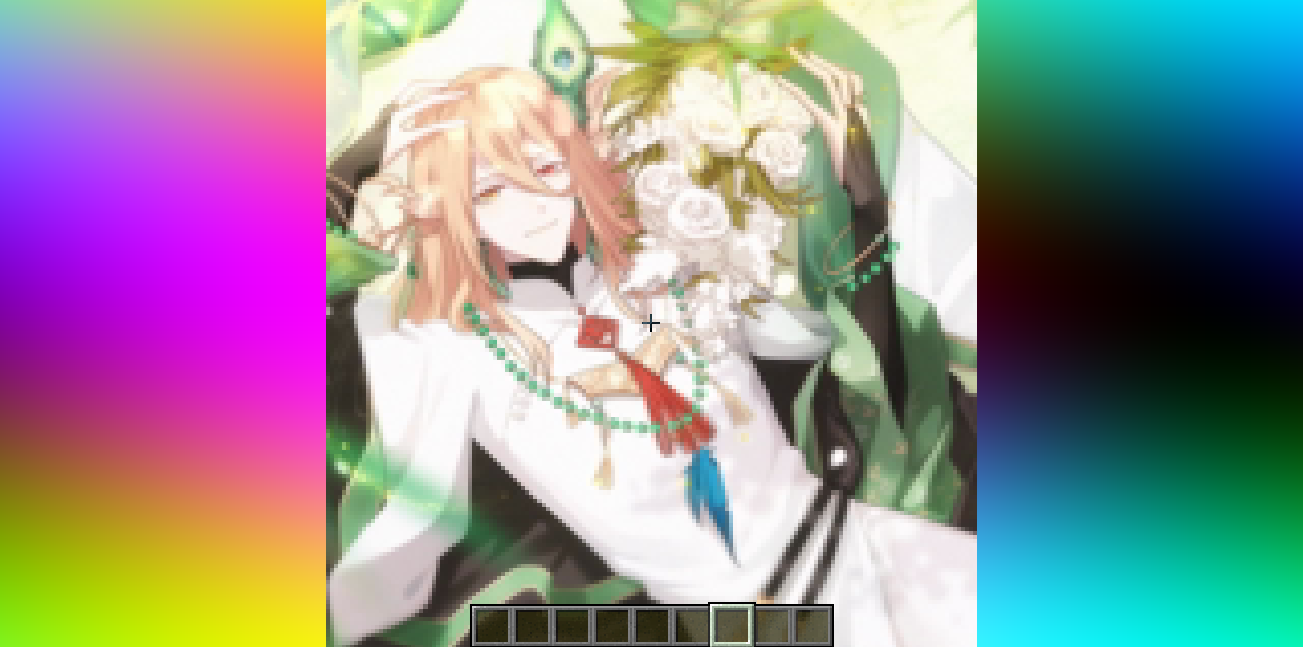
### How to prepare a custom image~
First, use ffmpeg (or any tool) to resize your image to **160×160 pixels**.
“`bash
Using ffmpeg:
ffmpeg -i Input.png -vf scale=160:160 image.png
“`
Then place the resized image in the same directory as the Python script below.
Run the script to produce an `image_chunks` folder, then copy the 16 **.glsl files** inside into `shaders/data/image_chunks` (you need to unpack the shader pack first).
Enter the game, enable the custom image option in the shader settings, and wait for the shader to finish compiling — Then it’s ok~
A Python Script
“`python
from PIL import Image
import os
def generate_glsl_chunks(image_path, output_dir=”image_chunks”):
try:
img = Image.open(image_path).convert(‘RGBA’)
except FileNotFoundError:
print(f”Error: Image file not found at {image_path}”)
return
width, height = img.size
if width != 160 or height != 160:
print(f”Error: Image must be 160×160 pixels, but it is {width}x{height}.”)
print(f”You can use:”)
print(f”ffmpeg -i image.png -vf scale=160:160 output.png”)
print(f”to adjust the image resolution.”)
return
os.makedirs(output_dir, exist_ok=True)
chunk_size = 40
num_chunks_x = width // chunk_size
num_chunks_y = height // chunk_size
for chunk_y in range(num_chunks_y):
for chunk_x in range(num_chunks_x):
left = chunk_x * chunk_size
upper = chunk_y * chunk_size
right = left + chunk_size
lower = upper + chunk_size
sub_img = img.crop((left, upper, right, lower))
pixel_data = list(sub_img.getdata())
array_name = f”image_data_{chunk_y}_{chunk_x}”
output_file_path = os.path.join(output_dir, f”{array_name}.glsl”)
glsl_array = f”vec4 {array_name}[{chunk_size * chunk_size}] = vec4[{chunk_size * chunk_size}](n”
for i, pixel in enumerate(pixel_data):
r, g, b, a = pixel
glsl_array += f” vec4({r/255.0}, {g/255.0}, {b/255.0}, {a/255.0})”
if i < len(pixel_data) - 1:
glsl_array += ","
if (i + 1) % 4 == 0:
glsl_array += "n"
glsl_array += ");n"
with open(output_file_path, 'w') as f:
f.write(glsl_array)
print(f"Generated file: {output_file_path}")
# --- Config ---
image_file = "image.png"
output_directory = "image_chunks"
generate_glsl_chunks(image_file, output_directory)
```
Gray&Black Shader
**English version:**
**Gray&Black Shader**
This shader turns your Minecraft world into stylish grayscale! Compatible with versions 1.7.2 to 1.21.5.
If you have any questions, join our Discord or follow for updates so you don’t miss anything!
Also check out my other mods! 😎✨
Enjoy the cinematic atmosphere!
**How to install:**
1. Install OptiFine or Iris for your Minecraft version.
2. Download the Gray&Black Shader zip file.
3. Put the zip file in your `shaderpacks` folder (found in your Minecraft directory).
4. Launch Minecraft, go to Options → Video Settings → Shaders, and select “Gray&Black Shader”.
5. Enjoy the black & white world!
**Русская версия:**
**Gray&Black Shader**
Этот шейдер превращает ваш мир Minecraft в стильное чёрно-белое кино! Работает с версиями от 1.7.2 до 1.21.5.
Если возникли вопросы — заходите в наш Discord или подпишитесь на обновления, чтобы ничего не пропустить!
Также посмотрите другие мои моды! 😎✨
Наслаждайтесь кинематографичной атмосферой!
**Как установить:**
1. Установите OptiFine или Iris для вашей версии Minecraft.
2. Скачайте архив Gray&Black Shader (zip-файл).
3. Поместите zip-файл в папку `shaderpacks` (в вашей директории Minecraft).
4. Запустите Minecraft, зайдите в Настройки → Графика → Шейдеры, выберите “Gray&Black Shader”.
5. Наслаждайтесь чёрно-белым миром!
Ghibli Shaders
### Ghibli Shaders
– **Ghibli Shaders gives Minecraft a cozy hand-painted look inspired by Ghibli-style visuals. It adds painting-style dots, soft outlines, and a warm atmosphere that makes every block, item, and world feel like it came straight out of an animated scene. With stylized shading and a unique overall visual feel, it transforms normal Minecraft into a peaceful and artistic experience while still keeping the game’s original charm.**
FlowestShaders
This shader is very good. It can make Minecraft look much more beautiful than before. The sky will be brighter and more realistic, the water will look clearer and nicer, and the lighting in the game will become softer and more natural. You can really feel the difference when you walk around in your world.
This shader works with both OptiFine and Iris, so no matter which mod loader you use, you can install it easily. It runs well on almost any computer, even if your device is not very powerful. You don’t have to worry about lag or slow performance while using it.
If you are tired of the normal Minecraft graphics and want to make your game look better, this shader is perfect for you. It is simple, clean, and works great for survival, building, or just exploring. Try it and you will see how good your Minecraft can look with this shader.
Fantasy.VT
Features:
Distant Horizons, Voxy, Colorwheel and other mods easily integrate with this shader!
The package includes several color schemes, the best one is VT Color, which is not available anywhere!
The fog system can be customized according to your preferences!
There are many cloud styles available!
Shadows can be created based on a light map or a shadow map!
An extensive color palette is available with the ability to adjust saturation, exposure, and balance!
Very easy to set up!
Compatibility:
At the moment, the software has been tested only for versions 1.17 and higher. Earlier versions may or may not work.
Modern Nvidia, AMD, and Intel GPUs are supported on both Windows and Linux. Macs may or may not work.
Please use the latest version of Iris. It should work with any version that supports custom uniforms. There are some bugs in Optifine, but in general it should also work.
Exposa Shaders
[Cinematic Showcase](https://youtu.be/itbCHGM3cJs)
(PSST, you should use this shaderpack while listening to this upcoming song, presave it its awesome and its also mine! Yes I am promoting my song… Yes I am desperate.) [Awesome Song To Listen 2 While using Exposa](http://tunelink.to/Jub5v)
# Description
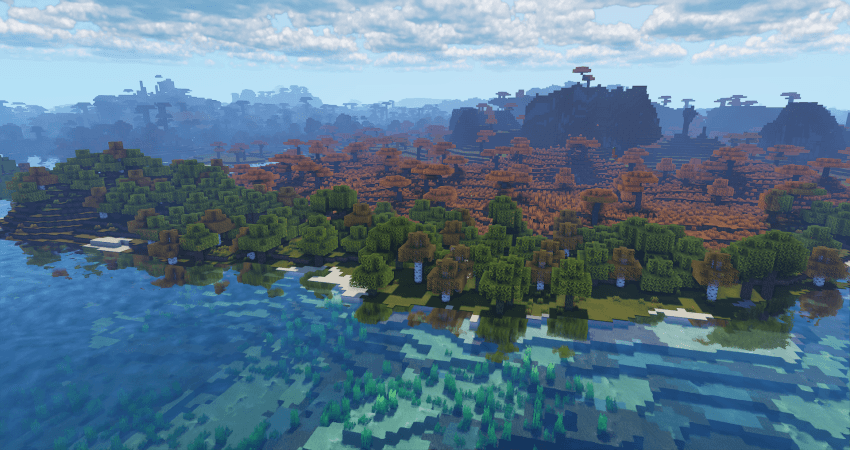
Hello! This is Exposa! Used to be known as Exposa Unique Shaders. This project is a shaderpack that aims for both a natural and a fantasy style.
# Compatibility
It is compatible with Optifine and Iris, unknown about other mods and clients. It is also recommended to be used for versions 1.17x and above. It works well with AMD and NVIDIA and INTEL .
**Nether and End support are full ATM. For custom dimensions support, please let me know what dimensions you would like to see supported.**
# License
For the most, I use the all rights reserved license, but I really wouldn’t recommend using my code (I did not intend it for the use of being edited). If you’d like to edit anyway, you can ask me here!
# Features
* rough reflections
* water reflections
* shadows
* motion blur
* depth of field
* puddles
* temporal anti aliasing
* HDR
* bloom
* tonemapping
* lightshafts
* volumetric clouds
* Seasonal Colors (Autumn, Winter, Spring, Summer)
* Shooting Stars
* Proper weather & translucent support
* Nether & End support
* Ambient SSS
* SSAO
* Directional Lightmaps
* VL Mist / Smokey Fog!
* Nether VL Swirly Fog
* Better TAA
* Better Puddles
# Some Credits
RRe36 ([https://www.curseforge.com/members/rre36](https://www.curseforge.com/members/rre36)) – Lots of help with clouds, volumetric fog, bloom and etc. Capt Tatsu ([https://www.curseforge.com/members/capttatsu](https://www.curseforge.com/members/capttatsu)) – Gave me permission to use the reflections functions and even helped me apply them, let me use and modify bloom, motion blur, dof, volumetric fog and etc.
Unicorn Blood ([https://www.curseforge.com/members/dakotah2468](https://www.curseforge.com/members/dakotah2468)) – Letting me use and modify fog.
Xenith – Help with shadows method.
Jesse/L – In my older versions, he gave me a tonemap to use.
Belmu – Has helped me set up some things like rough reflections, you can support him here! ([https://www.curseforge.com/minecraft/customization/noblert-shaders)](https://www.curseforge.com/minecraft/customization/noblert-shaders))
HardTop for the french translation: [https://hardtopnet.ovh](https://www.curseforge.com/linkout?remoteUrl=https%253a%252f%252fhardtopnet.ovh%252f)
Espen for many things (I only remember providing me with the minimum & maximum depth functions): [https://modrinth.com/shader/bloop-shaders/versions](https://www.curseforge.com/linkout?remoteUrl=https%253a%252f%252fmodrinth.com%252fshader%252fbloop-shaders%252fversions)
Xonk for many things (I only remember SSAO & SSS tricks and reflections LOD trick atm ;_;): [https://github.com/X0nk/Bliss-Shader](https://github.com/X0nk/Bliss-Shader)
Zombye for cool TAA tricks: [https://github.com/zombye/spectrum/tree/master/shaders/program](https://github.com/zombye/spectrum/tree/master/shaders/program)
Eldeston & Chocapic13 for previous coordinates transformation: [https://modrinth.com/user/Eldeston](https://www.curseforge.com/linkout?remoteUrl=https%253a%252f%252fmodrinth.com%252fuser%252fEldeston), [https://www.curseforge.com/minecraft/shaders/chocapic13-shaders](https://www.curseforge.com/minecraft/shaders/chocapic13-shaders)
Random Noise website: [https://www.pcg-random.org/](https://www.curseforge.com/linkout?remoteUrl=https%253a%252f%252fwww.pcg-random.org%252f)
sRGB & Linear color space conversions: [https://www.shadertoy.com/view/4tXcWr](https://www.curseforge.com/linkout?remoteUrl=https%253a%252f%252fwww.shadertoy.com%252fview%252f4tXcWr)
EclipseLite
[](https://fastclient.net/gamesofdev)
### ABOUT
**Eclipse Lite is a super lightweight Minecraft shader made for the absolute lowest-end PCs, laptops, and toasters that can’t handle even Sildur’s or Mellow shaders. It keeps the classic vanilla Minecraft look but adds subtle improvements — like glowing transparent water and cleaner, whiter clouds — all while running buttery-smooth on any system.**
[](https://www.youtube.com/@GlacierServicesMC)
### Features
**Eclipse Lite is made for ultra-low-end devices. It has no waving effects and avoids all heavy features like bloom, motion blur, and depth of field to ensure high FPS. The water uses the default Minecraft style but is transparent for a cleaner, more aesthetic look. This shader is in BETA, so minor bugs may be present. It’s perfect for players who can’t run shaders like Sildur’s Lite or Mellow but still want a subtle visual boost.
**
### BUGS
**Found a bug? You can report it by creating a ticket under the bug category in our Discord server. Your feedback helps us improve Eclipse Lite and fix issues faster. Every report means a lot to us and truly makes our day better!**
