Ears (+ Snouts/Muzzles, Tails, Horns, Wings, and More)

Faithful fancy fashion features for fuzzy folk.
Created due to a lack of the Tails mod for 1.16, Ears is a mod that adds ears, snouts, tails, horns, wings, and more to the player. Eventually, it also became a complete lightweight open source 1.9 skin backport for many old versions, which works even if you aren’t using its special features.
Ears has a more vanilla-faithful appearance than Tails, with a lot of 2D regions but a few 3D ones too. There are a wide variety of possible configurations and it can all be customized.

Why use Ears instead of Tails? Because Ears is easy to port to other versions, based on a multi-version abstraction allowing the mod to even run in web browsers. The Tails mod has wonderful 3D models and animations, but it’s a burden to update it to any version due to its large rendering system and all the data syncing code, causing it to be tightly coupled with the version of the game and mod loader it was designed for. Ears stores all data as pixels in the player’s skin.
However, Ears requires you to draw your own additions, and does not come with easy recolorable prefabs like Tails. Additionally, unlike CPM or Figura, Ears has a limited number of customization options. (Note that if you have a simple idea, I may add it. Open an issue on GitHub or hop in Discord.) Ears offers a good middle-ground that will work in almost any version you wish to play. It also does not and never will use external servers, just Mojang’s skin server, so there’s no concerns about a third-party server going down (be it temporarily or for good).
Why use Ears instead of other skin fixes? Ears provides a lot of new features to customize your skin, and is a much more lightweight patch with no usage of third-party servers and is completely open source. Additionally, Ears backports translucent secondary layer support to 1.8 and 1.7.
Come discuss this mod and any of my others on Discord or Matrix, or send me an email.
Detoxify
> I have opened a support discord, join now! https://discord.gg/uHm8EbfCFr
# Detoxify
**Detoxify** is a lightweight yet powerful AI chat moderation tool that classifies messages into multiple categories, allowing you to finely tune what gets caught by the filter. Despite its performance, it uses **less than 150MB of RAM**, making it extremely efficient for both server and client use.
—
### How It Works
Detoxify uses the **detoxify AI model** to classify chat messages. Each message is analyzed and assigned scores for categories such as:
* Toxicity
* Severe Toxicity
* Obscene content
* Threats
* Insults
* Identity Attacks
These scores allow you to configure thresholds and customize exactly which messages are filtered.
—
### Installation
#### Server
1. Download the correct server version of Detoxify.
2. Place the `.jar` file in your `plugins` or `mods` folder.
3. Start your server.
4. The configuration will be located in:
* Modded platforms: `config/Detoxify`
* Plugin platforms: `plugins/Detoxify`
#### Client
1. Download the correct client version of Detoxify.
2. Place the `.jar` file in your `mods` folder.
3. Any messages classified as toxic will be hidden in chat, but still logged for review.
4. The configuration will be located in:
`.minecraft/config/Detoxify`
—
### Permissions
> This is only on paper and spigot, on fabric and neoforge you need to be op
1. detoxify.notify -> Gives you permissions to receive notifications when a player is flagged.
2. detoxify.admin -> Gives you permission to receive update notifications
—
### Configuration Options
This configuration works for both client and server. It allows fine-tuning of message thresholds and debug options:
“`properties
####################################
# #
# Detoxify Configuration #
# #
####################################
# Whether or not there should be debug message
debug=false
############################
# Value Settings #
############################
toxicity=0.9
severe-toxicity=0.5
obscene=0.25
threat=-1.0
insult=-1.0
identity-attack=-1.0
############################
# Message Settings #
############################
player=§cYour message was removed for violating chat rules.
staff=§c%s’s message has been removed [%s]
console=§c%s’s message has been removed [%s]
“`
—
### Skript Support
> Note: Only available for Spigot and Paper platforms
Detoxify integrates with Skript for custom chat filtering. It provides a single expression that returns `true` or `false` depending on whether a message is considered toxic:
“`skript
is [the] %string% toxic
detoxify %string%
“`
#### Examples
“`skript
on chat:
if detoxify message is true:
cancel event
send “&cThat message was blocked for toxicity!” to player
“`
“`skript
on chat:
if is the message toxic is true:
cancel event
send “&cThat message was blocked for toxicity!” to player
“`
Customizable Player Models
## Customizable Player Models
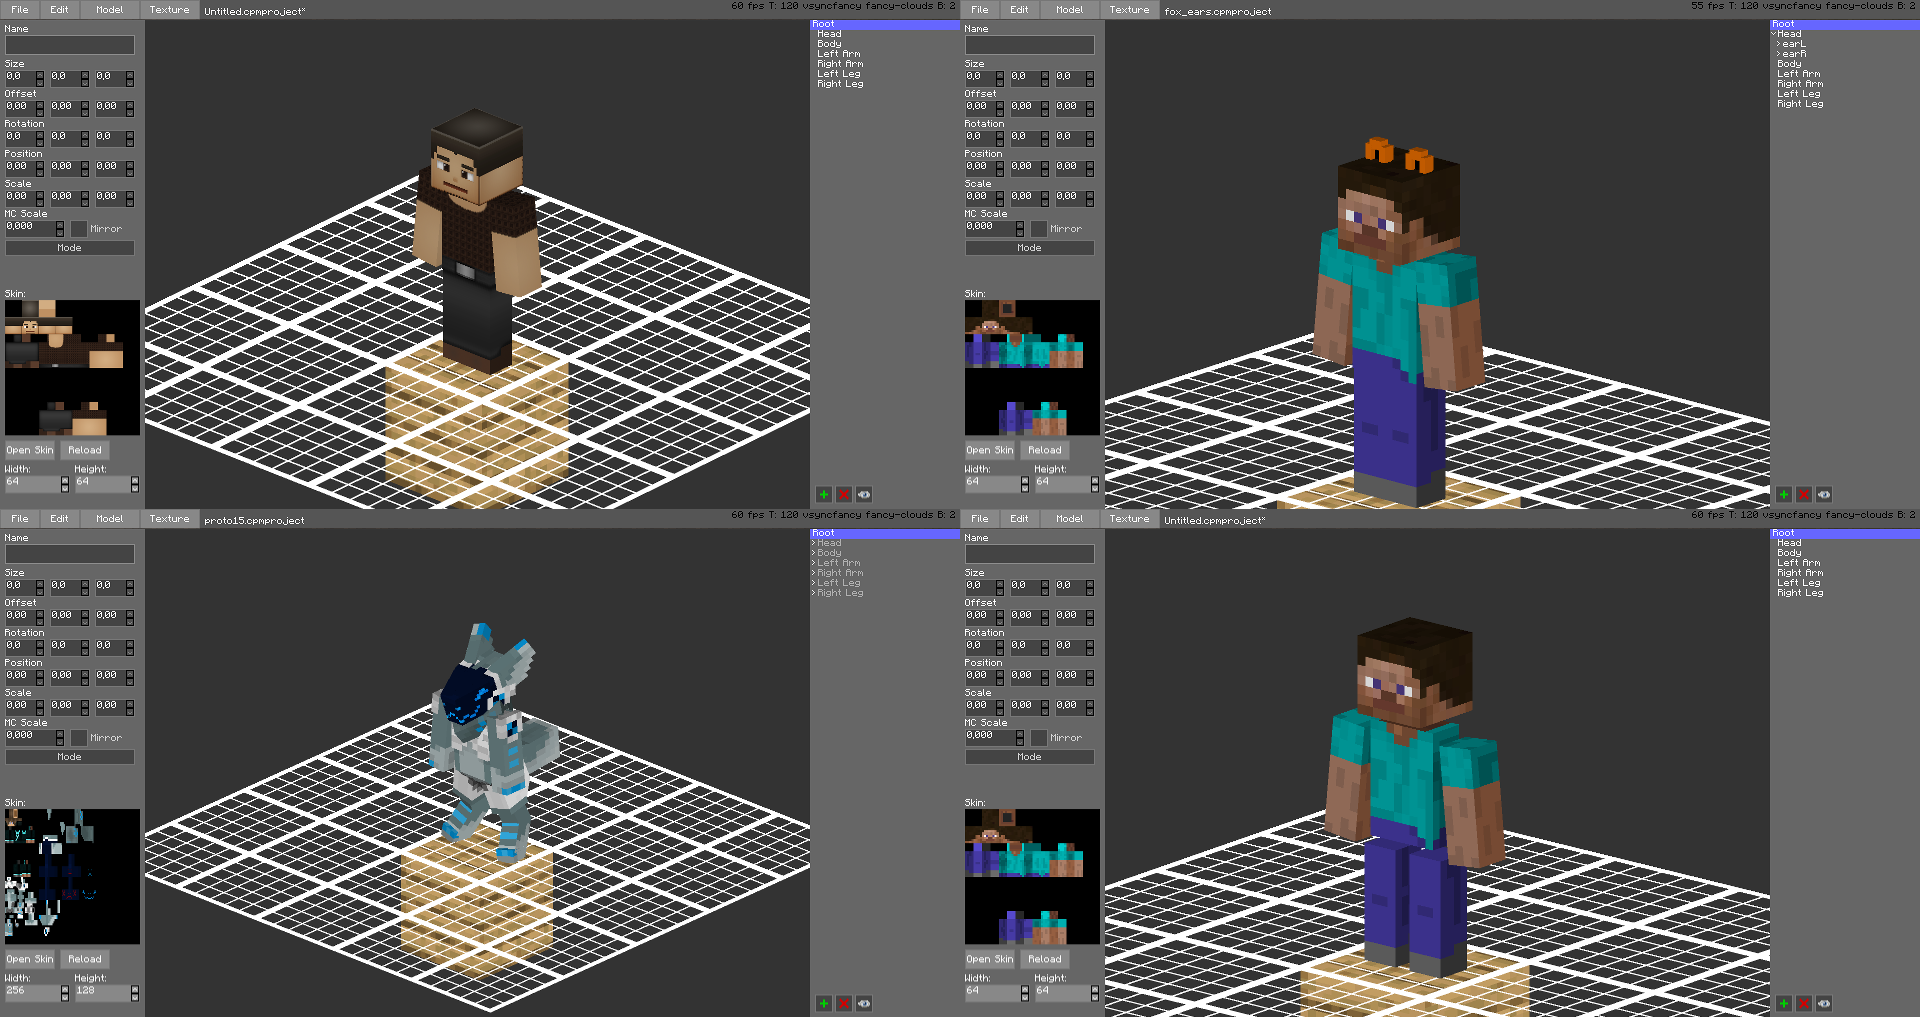
Create a custom avatar using the built-in editor.
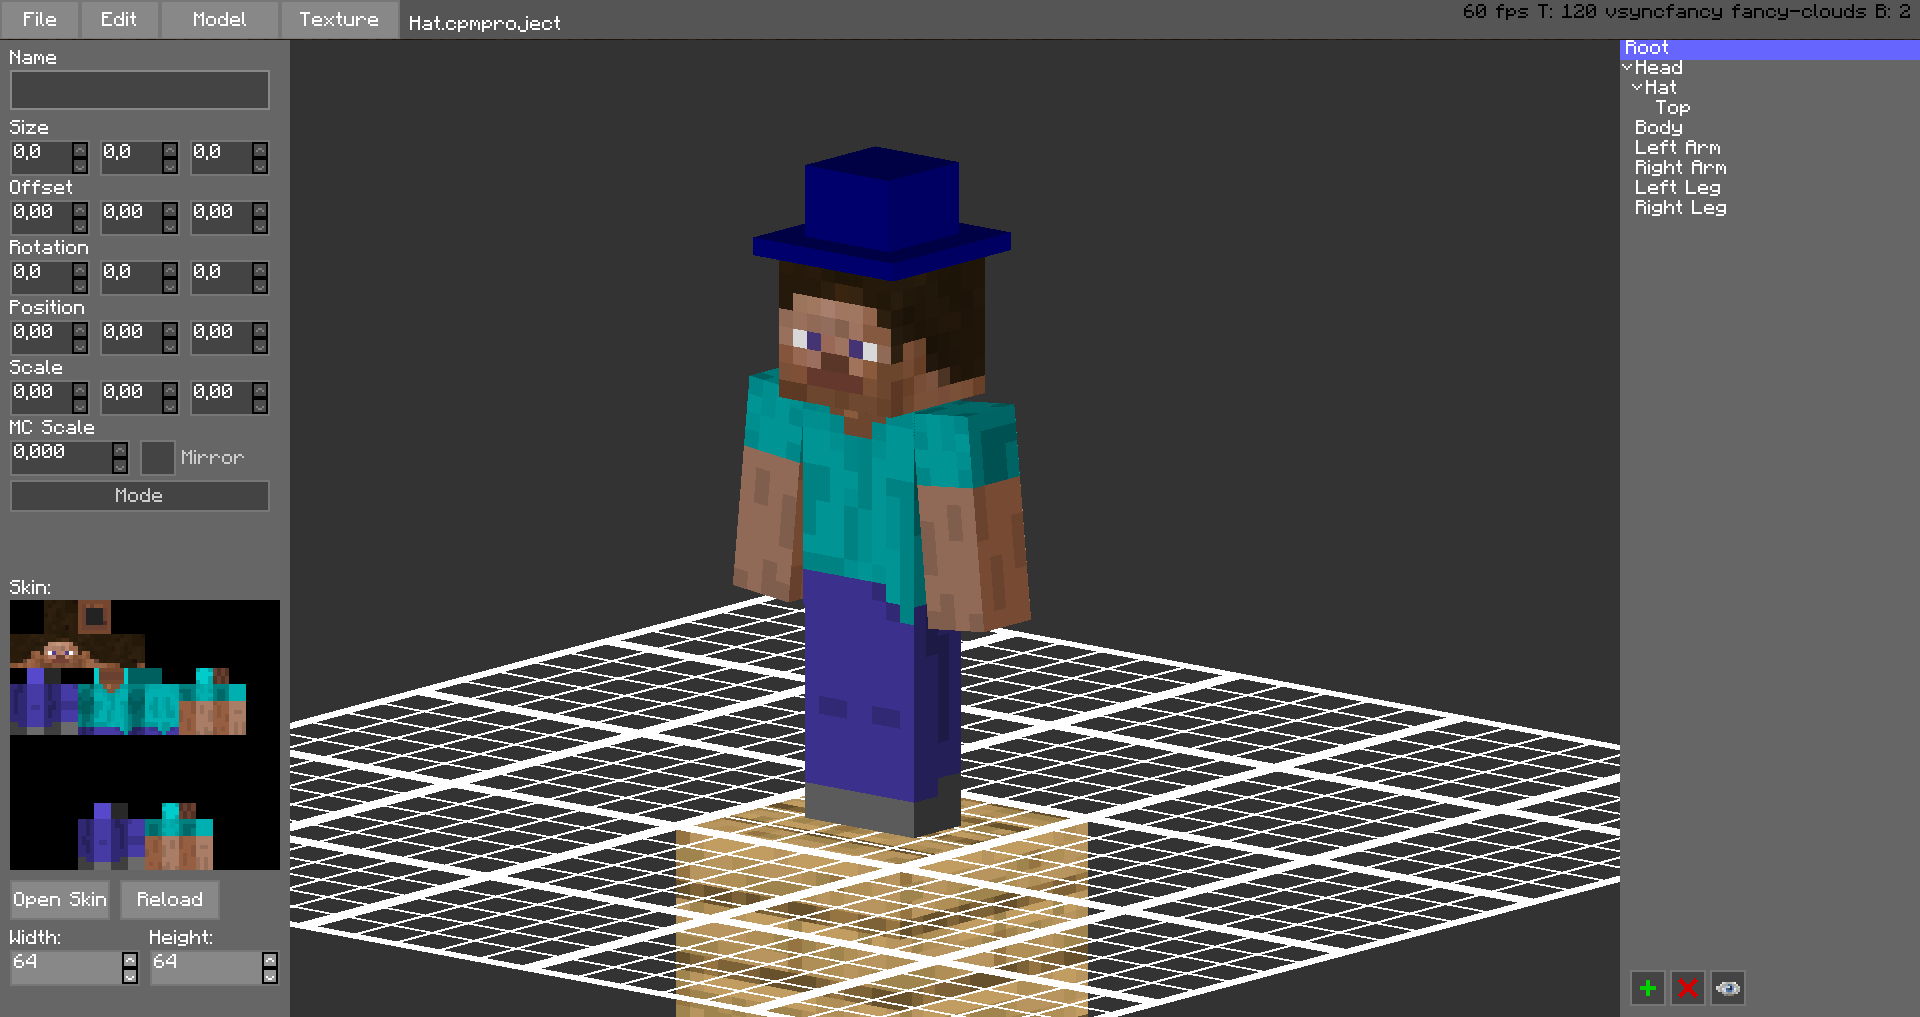
The models are stored in unused space on your Minecraft Skin, or as a Gist on GitHub.
Upload the exported image file as your skin to load the custom model.
Browse uploaded models on the [Models Website](https://cpmmodels.tom5454.com/).
The additional parts can have custom textures, higher resolution skins can be used (Steve skin from [Soartex Fanver – Vanilla](https://www.curseforge.com/minecraft/texture-packs/soartex-fanver-vanilla))
Parts of the normal player model can be hidden or moved around.
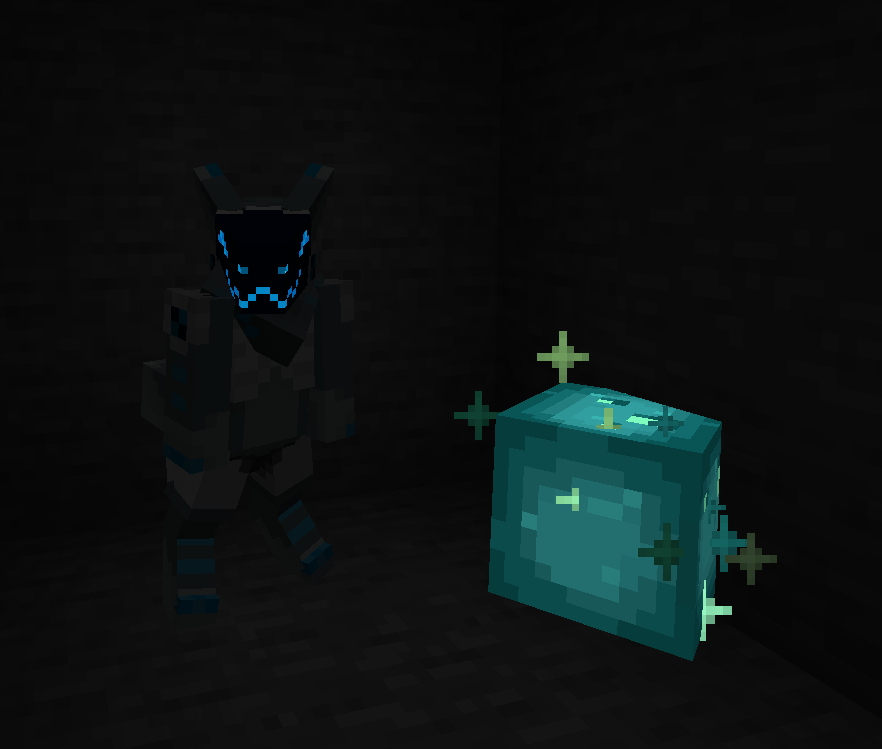
You can even make parts of your skin “glow” like a glow squid.
Plugin for Bukkit/Spigot servers for changing skins ingame (not required): [https://github.com/tom5454/CustomPlayerModels/releases](https://github.com/tom5454/CustomPlayerModels/releases)
Cryonic Config
# 
– Cross-version easy to port config tool with minimal dependencies
– Specifically targeting ease of use and portability
– Cryonic because it’s cool as hell
# Explanation of Functionality
– This will store jsons in {minecraft_dir}/config as “mod_id.json”
– All config files will be read by dictionary in “cryonicconfig.json” on early init
– Configs are only configurable by editing the jsons directly, no plans of GUI config
– For ease of portability, synced variables are sent directly to a player in chat, and intercepted
– Hashmaps are used to look up Str to ConfigStorage and Str to Obj (variable)
# API
## Groovy (build.gradle) Add Dependency
Add Maven:
“`groovy
repositories {
maven { url “https://api.modrinth.com/maven” }
}
“`
Modern/Architectury:
For only fabric or neoforge, replace `${project.name}` with `fabric`,`forge`,`neoforge`
“`groovy
dependencies {
modImplementation “maven.modrinth:cryonicconfig:fabric-${project.name}:1.0.0+mc${rootProject.minecraft_version}”
}
“`
b1.7.3:
“`groovy
dependencies {
modImplementation “maven.modrinth:cryonicconfig:babric:1.0.0+mcb1.7.3”
}
“`
## Simple Usage:
“`java
// You can store or use on the fly, this can be called anywhere
ConfigStorage config = CryonicConfig.getConfig(“mod_id”);
// You can store ints, doubles, booleans, and strings
// By getting them, you are setting their default value too
// getter format (variable name, default value)
// You cannot reuse variable names! They will be overridden.
config.getInt(“varName”, 3);
config.getDouble(“name”, 3.3);
config.getBoolean(“var”, true);
config.getString(“str”, “Geronimo!”)
// The variable will exist locally on client and server
// If you want a connected server player to use a server config
// You must call, making client use the server’s value
config.sync(“varName”, playerEntity);
// Feel free to use this format:
CryonicConfig.getConfig(“mod_id”).getInt(“varName”, 3);
// You can set variables manually, instead of letting get generate them
// This is also useful for overriding old values
config.setInt(“varName”, 3);
config.setDouble(“name”, 3.3);
config.setBoolean(“var”, true);
config.setString(“str”, “Geronimo!”);
“`
## Mark Dependency
In `fabric.mod.json`:
“`json
{
“depends”: {
“cryonicconfig”: “*”
}
}
“`
In `mods.toml`/`neoforge.mods.toml`:
“`toml
[[dependencies.cryonicconfig]]
modId = “cryonicconfig”
type = “required”
versionRange = “[0,)”
“`
CreativeEditorWands StationAPI
# CreativeEditorWands StationAPI for Minecraft Beta 1.7.3
A StationAPI mod for Minecraft Beta 1.7.3 that adds world edit type properties to wooden tools when enabled.
* Mod (mostly) works on Multiplayer with [GlassConfigAPI](https://modrinth.com/mod/glass-config-api) version 3.0+ used to sync configs!
## List of changes
All changes only apply when player is OP or in single-player toggle wands on/off via bedrock.
* Selection Tool (wooden axe)
* Mode 1: Select two points (`right-click` on two blocks)
* Mode 2: Copy selection (area between the two points) over to the new area `right-click`
* Mode 3: Fill selection (area between the two points) with whatever block is `right-clicked`
* Use `scroll-wheel` in inventory to rotate selection (does nothing if no selection has been made)
* Hit living entities to rotate selection in multiplayer (also works in single-player)
* Hold `left-shift` and use `scroll-wheel` to change axe mode in single-player
* Use `right-click` in the air to change axe mode in multiplayer
* Paint Brush (wooden sword)
* Draw with `right-click`
* Block ID zero means copy `right-clicked` block and use it to draw
* Use `scroll-wheel` in inventory to select block type
* Hold `left-shift` and use `scroll-wheel` to select block metadata
* Erase Brush (wooden shovel)
* Erase with `right-click`
* Block ID zero means erase any block
* Use `scroll-wheel` in inventory to select block type
* Hold `left-shift` and use `scroll-wheel` to select block metadata
* Block Picker (wooden pickaxe)
* Select block ID and metadata with `right-click`
* In single-player in inventory pick up the pickaxe and click a brush to apply the color to it
* In multiplayer the selected block will be used for all brushes
* Use `scroll-wheel` in inventory to select block type
* Hold `left-shift` and use `scroll-wheel` to select block metadata
* Brushes Mode (wooden hoe)
* Use `scroll-wheel` in inventory to change brush size
* Hit living entities to change brush size in multiplayer (also works in single-player)
* Use `right-click` on a block to change brush type and apply brush mode
* Use `right-click` in the air to apply brush mode
* Enable/disable creative editor wands tools with bedrock block
* Use `right-click` to enable/disable creative editor wands
* This is a single-player only feature
## Structure Command
If you are using [RetroCommands](https://modrinth.com/mod/retrocommands) with this mod, you now also have access to the `/structure` command.
This command allows you to save, copy, and paste structures.
* NOTE: This command currently does not work with modded blockstates
How it works:
1. `/structure 1` to set the first position of the structure to copy (this happens where your player is standing)
2. `/structure 2` to set the second position of the structure to copy (this happens where your player is standing)
3. `/structure copy SaveName` copies the structure using a cube between positions 1 and 2
– `SaveName` can be anything you want and is the saved name of the structure.
– You can save as many structures as you want, just don’t reuse the same name unless if you want to overwrite that structure.
4. `/structure paste SaveName` pastes the structure at the location the player is currently standing at
5. `/structure fill BlockID (BlockMeta)` fills the structure with the provided block ID (and optionally metadata value) using a cube between positions 1 and 2
## Installation using Prism Launcher
1. Download an instance of Babric for Prism Launcher: https://github.com/babric/prism-instance
2. Install Java 17 and set the instance to use it: https://adoptium.net/temurin/releases/
3. Add GlassConfigAPI 3.0.2+ to the mod folder for the instance: https://modrinth.com/mod/glass-config-api
4. Add Glass Networking to the mod folder for the instance: https://modrinth.com/mod/glass-networking
5. Add StationAPI to the mod folder for the instance: https://modrinth.com/mod/stationapi
6. (Optional) Add Mod Menu to the mod folder for the instance: https://modrinth.com/mod/modmenu-beta
7. Add this mod to the mod folder for the instance: https://github.com/telvarost/GameplayEssentials-StationAPI/releases
8. Run and enjoy! 👍
## Feedback
Got any suggestions on what should be added next? Feel free to share it by [creating an issue](https://github.com/telvarost/CreativeEditorWands-StationAPI/issues/new). Know how to code and want to do it yourself? Then look below on how to get started.
## Contributing
Thanks for considering contributing! To get started fork this repository, make your changes, and create a PR.
If you are new to StationAPI consider watching the following videos on Babric/StationAPI Minecraft modding: https://www.youtube.com/watch?v=9-sVGjnGJ5s&list=PLa2JWzyvH63wGcj5-i0P12VkJG7PDyo9T
Clear Water
This mod adds better visibility underwater by removing the water fog and increasing a the brightness a bit. I intended the mod to make underwater builds in beta minecraft a bit more impressive. It’s also kind of a companion mod to the coral reef port I made for babric. This is intended specifically for babric b1.7.3 minecraft.
Compressed Blocks
Compressed blocks is mod made by me for STApi 2.0.
This mod adds compressing for blocks. Extra Utilities inspired me to create this mod for beta 1.7.3 using StAPI PRE-2.
Right now it adds only some blocks with 3 stages of compressing with crafting and uncrafting.
And maybe somewhere in future i’ll port that mod to other versions like alpha and old releases (before r1.2.5).
Block Helper
# Block Helper
A direct WAILA port for old versions of Minecraft, with almost the same API and many, many additional fixes!
## Download
[**Download on CurseForge**](https://www.curseforge.com/minecraft/mc-mods/block-helper)
[**Download on Modrinth**](https://modrinth.com/mod/block-helper) (More versions are available here)
### Fixers
Some Minecraft versions have bugs. That’s normal. In order to fix some of them, you can install the following fixers:
– [Class Loader Fixer](https://modrinth.com/mod/class-loader-fixer)
– [Font Fixer](https://modrinth.com/mod/font-fixer)
## Old source code
This repository hosts the source code for BlockHelper versions 2.x and onwards.
The source code for older versions (0.x and 1.x), has moved [here](https://github.com/ThexXTURBOXx/BlockHelper-old).
## Installation
### Forge (all versions) / ModLoaderMP (≤ 1.2.3)
#### Client
Just drop the mod into the `mods` folder. Done! 🙂
#### Server
If you are running a server on MC 1.3.x or newer, just copy the Block Helper jar file into the `mods` folder.
On older versions, you need to download the dedicated server build of the mod.
It can be found under “Additional files” both on Modrinth and CurseForge.
In MC b1.5_02 and older, you need to copy all the files from this jar into the server jar.
In all newer versions, it is sufficient to just copy the jar file into the `mods` folder.
#### MCPC+/Cauldron/Bukkit
If you are running a server on MC 1.3.x or newer, just copy the Block Helper jar file into the `mods` folder.
On older versions, you need to download the dedicated Bukkit/MCPC+ build of the mod.
It can be found under “Additional files” both on Modrinth and CurseForge.
In MC b1.7.3 and older, you need to copy all the files from this jar into the Bukkit jar.
In all newer versions, it is sufficient to just copy the jar file into the `mods` folder.
### Fabric
Drop the mod into the `mods` folder and install [Apron](https://github.com/BetterThanUpdates/Apron) or [BetaLoader](https://github.com/paulevsGitch/BetaLoader) (for b1.7.3)
or [Fabricated Forge](https://github.com/arthurbambou/Fabricated-Legacy-Forge) (for 1.3.2+).
## Features
### Mod Compatibility
Next to Vanilla blocks, integration modules for the following mods are in place (list updated only irregularly!):
– Advanced Machines
– Advanced Solar Panels
– Applied Energistics 1
– Barrels
– BuildCraft 2 and 3
– ChickenChunks
– Ender Storage
– Equivalent Exchange 1, 2 and 3
– Factorization
– Falling Meteors
– Flora & Soma / Natura
– Forestry
– Forge Multipart
– GregTech
– IC²
– Immibis’s Microblocks
– IndustrialCraft
– InfiCraft
– NEI
– Pam’s Mods
– Project Zulu
– Railcraft
– Red Power
– Thaumcraft
– Thermal Expansion
– Total Panels
– Twilight Forest
Some of these mods still host downloads to this day.
If you cannot find downloads for some of these,
chances are that they are still downloadable via [MCModArchive](https://mcmodarchive.femtopedia.de/).
### API
Block Helper features WAILA’s API (with minimal changes) from version 2.x onwards.
Since there are many resources online on how to use the API, I will keep this as simple as possible here and just list a few “good” examples:
– [Block Helper’s own plugins](https://github.com/ThexXTURBOXx/BlockHelper/tree/1.5.2/src/main/java/mcp/mobius/waila/addons)
– [BlockHelperAddons](https://github.com/VintageModsReforged/BlockHelperAddons)
Just try to follow these examples and you will succeed. To safely register your plugin, use the code snippet from the
JavaDoc of the `mod_BlockHelper#registerPlugin` function.
### Other features
Yes, Block Helper has a few additional features and integrations you probably have not seen before 🙂
On the Modrinth and CurseForge page, there are a few images of most of these features in action!
_Please note that not every feature is available for every Minecraft version due to modding limitations._
#### NEI/AMI/HMI integration
– Two new keybinds (default: NUM3 and NUM4), which show all the recipes for or using the
block currently looked at
– Show the mod an item is from in the item’s tooltip [this also works without NEI/AMI/HMI in Apron]
– Another keybind specific for NEI (default: I), which shows all the applicable enchantments for the
currently highlighted item in the inventory
#### World Overlays
Just like NEI in MC 1.4.7 and onwards, Block Helper features a light level overlay and chunk border overlay. The default
keybinds for these are F7 and F9, respectively.
## Source Code
Block Helper is being developed for:
– [a1.2.6](https://github.com/ThexXTURBOXx/BlockHelper/tree/a1.2.6)
– [b1.1_01/b1.1_02](https://github.com/ThexXTURBOXx/BlockHelper/tree/b1.1_02)
– [b1.2_02](https://github.com/ThexXTURBOXx/BlockHelper/tree/b1.2_02)
– [b1.3_01](https://github.com/ThexXTURBOXx/BlockHelper/tree/b1.3_01)
– [b1.4_01](https://github.com/ThexXTURBOXx/BlockHelper/tree/b1.4_01)
– [b1.5/b1.5_01](https://github.com/ThexXTURBOXx/BlockHelper/tree/b1.5_01)
– [b1.6.5/b1.6.6](https://github.com/ThexXTURBOXx/BlockHelper/tree/b1.6.6)
– [b1.7-b1.7.3](https://github.com/ThexXTURBOXx/BlockHelper/tree/b1.7.3)
– [b1.8/b1.8.1](https://github.com/ThexXTURBOXx/BlockHelper/tree/b1.8.1)
– [b1.9p5](https://github.com/ThexXTURBOXx/BlockHelper/tree/b1.9p5)
– [1.0/1.0.1](https://github.com/ThexXTURBOXx/BlockHelper/tree/1.0)
– [1.1](https://github.com/ThexXTURBOXx/BlockHelper/tree/1.1)
– [1.2.3](https://github.com/ThexXTURBOXx/BlockHelper/tree/1.2.3)
– [1.2.4/1.2.5](https://github.com/ThexXTURBOXx/BlockHelper/tree/1.2.5)
– [1.3.2](https://github.com/ThexXTURBOXx/BlockHelper/tree/1.3.2)
– [1.4](https://github.com/ThexXTURBOXx/BlockHelper/tree/1.4)
– [1.4.1/1.4.2](https://github.com/ThexXTURBOXx/BlockHelper/tree/1.4.2)
– [1.4.3](https://github.com/ThexXTURBOXx/BlockHelper/tree/1.4.3)
– [1.4.4/1.4.5](https://github.com/ThexXTURBOXx/BlockHelper/tree/1.4.5)
– [1.4.6/1.4.7](https://github.com/ThexXTURBOXx/BlockHelper/tree/1.4.7)
– [1.5.x](https://github.com/ThexXTURBOXx/BlockHelper/tree/1.5.2)
BH Creative
Creative mod for Minecraft beta 1.7.3, created for Beta Horizons modpack.
**Features:**
– Separate worlds for creative and survival (button in world create option)
– Ability to flight while in creative
– Invulnerability while in creative
– Fast block breaking without tools (no drops)
– Infinity block placing
– Pick block from the world with middle mouse button
– API for mods to add custom tabs
– API for block selection
BetterWeather
This mod improves Minecraft b.1.7.3 weather by making clouds volumetric and weather effects local.
**Mod Content:**
– **Volumetric Clouds:** clouds now can be 32-64 blocks tall, they are fluffy and have better shading
– **Local weather:** rain and snow are now local, they will move together with clouds inside rain fronts
– **Better weather sounds:** better rain effect sounds
– **Better rain/snow rendering:** snow and rain now have LOD and can render on larger distances
– **Rain drop circles:** additional visual effect to the rain
– **Dimension tags:** allows to define weather settings per dimension (including modded)
