ModMenu Beta
# This is now deprecated.
Use Modmenu Babric instead.
—
An unofficial port of ModMenu to b1.7.3.
Does nothing aside from add a button on the main and escape menu which lists mods, unless something like Glass Config API is installed, in which case you can edit the settings of any mods that support it.
ModernCmds
A plugin that backports some commands from modern **Java** Edition!
Can totally be useful for admins!
### Commands
|Command|Permission|
|:——|———:|
|achievement |command.achievement|
|clear [player] [item:data]|command.clear|
|damage [player] [amount]|command.damage|
|fill [mode_arg]|command.fill|
|setblock |command.setblock|
|summon |command.summon|
|toggledownfall|command.toggledownfall|
|weather |command.weather|
> More to come!
If you want a creative-mode like thing, you can try my other plugin Instabuild.
Modern Textures
Backports textures from modern Minecraft to 1.2.5 and older.
The “No Mojang” version doesn’t replace the Mojang startup logo. The size of the modern image causes
Modern Armor System Backport
Modern Armor System Backport does what it says, it backports the modern armor system implemented in release 1.0.0 to Minecraft Beta.
# Installation
1. Install the Babric mod loader. This mod is only compatible with this.
– You can install it from the website using the installer or just using the PrismLauncher/MultiMC instance
2. Add the mod to the mods folder and launch the game
# Issues
### For use with StationAPI
When using this mod with StationAPI, the amount of damage you take with armor on is incorrect. This is a bug with StationAPI, not this mod. So don’t use this mod with StationAPI.
Mod Remapping API
# Mod Remapping API
Remaps non-Fabric mods made for a different environment (by default obfuscated) to the current runtime mappings.
Provides hooks to expand the remapping process from other mods.
This mod doesn’t depend on a specific Minecraft version and should work on any version that Fabric Loader can launch.
### Mods depending on this API:
– Fabricated Legacy Forge
– Apron
– Fabricated-Rift
## Credits
### Most of the original code of the mod remapper
– paulevsGitch’s mod BetaLoader
Mod Loading Screen
# Mod Loading Screen
An advanced loading screen with the loading progress of mods. It works on all Minecraft versions, as it doesn’t even require Minecraft. Its only requirement is Fabric Loader 0.12.0 or later or Quilt Loader (specific versions of Quilt support are unknown). Do note that if you run this mod on a game other than Minecraft, the loading screen may not close itself.
## Agent
Mod Loading Screen provides a Java agent, which allows opening the loading screen before even the mod loader itself loads. This feature is primarily targeted at modpack developers who want to make a seamless loading experience. The agent can be used by passing `-javaagent:mod-loading-screen-1.0.4.jar` as a JVM argument. If the agent is used, the loading screen should *not* be installed as a mod.
## API
To depend on the API, use the Modrinth Maven. The API should be JiJed, and doing so will not include Mod Loading Screen inside your mod (it will only include the API, which is only a few kilobytes). The API is designed to have both forwards and backwards binary compatibility with future Mod Loading Screen versions. An API is provided for checking which API calls will return stubs and which ones are real.
“`gradle
repositories {
exclusiveContent {
forRepository {
maven {
name = “Modrinth”
url = “https://api.modrinth.com/maven”
}
}
filter {
includeGroup(“maven.modrinth”)
}
}
}
dependencies {
// implementation, not modImplementation!
include(implementation(“maven.modrinth:mod-loading-screen:1.0.4:api”))
}
“`
The API has two top-level classes: `LoadingScreenApi` and `AvailableFeatures`. Full javadocs are available for both classes.
MineGIT
### Cloud sync for Minecraft worlds!
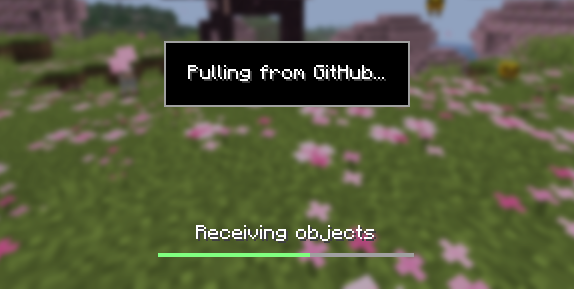
Sync and back up your worlds between multiple devices! Fully integrated into the Minecraft client for a seamless experience when loading, saving, and downloading worlds from the cloud.
## How does it work?
Worlds that you select are uploaded to your GitHub account as repositories. Every time you quit to the title screen, a commit of the current state of your world is created and pushed to the repository on GitHub. Whenever the world is loaded, the mod will check if any new versions of the world are available in the cloud, and if so, they will be downloaded to your device.
Since this mod uses Git internally, it also means that only the files in your world save folder that you modify will be uploaded and downloaded each time, saving storage space and internet bandwidth.
## How do I set it up?
There are several steps to setting up this mod, which include creating a personal access token for GitHub, as well as choosing the worlds you would like to enable MineGIT for.
### Video guide:
### Creating a GitHub personal access token
In order to do the first-time setup, you will need to generate a GitHub personal access token through the following steps:
1. Create an account on GitHub if you do not have one already (https://github.com)
2. Navigate to the page to create a personal access token
3. Click `Generate new token`
4. Enter any name (such as MineGIT) under `Token name`
5. Scroll to `Expiration` and set it to `No expiration` (so that you do not have to repeat this process when the token expires)
6. Under `Repository access` choose `All repositories`
7. Under `Permissions`, click `Add permissions` and select `Administration` and `Contents`
8. Set `Access` on the `Administration` and `Contents` lines to `Read and write`
9. Press `Generate token` and copy the generated token to be pasted into Minecraft later (the generated token should start with `github_pat_` and be followed by a long string of letters and numbers)
### Setting up in-game
Once the mod is installed and you are in-game, do the following steps to link your GitHub account with the mod:
1. Click on the cloud button on the bottom left corner of the world creation or world selection screen (If the button does not appear, you have already previously linked your account; see the section below entitled ‘Reconfiguring account linking’)
2. Enter your GitHub username and personal access token (PAT) that you created in the previous step on the new page that appears
3. Press the button labeled `Test credentials` to make sure you’ve entered the information properly
4. You may now exit the screen and proceed to either enable sync for a world or clone an existing one
#### Reconfiguring account linking
If you have already previously set up account linking and would like to change settings afterwards, you have a couple of options to get back to the configuration screen:
– **Configure through ModMenu:** If you have ModMenu installed, simply find the mod in the mods list and open the configuration from there
– **From the world clone screen:** There is a button in the top right corner of the world cloning screen that will open the configuration screen
– **From the world selection screen:** By holding alt and clicking on the world sync button on the bottom left of the world selection screen, you will be brought back into the configuration screen
### Enabling sync for a world
World syncing needs to be enabled individually for each world you would like to sync to your GitHub account. To enable sync for a world, do the following:
1. Select a world on the world selection screen
2. Press the cloud button in the bottom left of the screen labeled `Enable world sync`
3. Confirm your decision on the next screen
This process will create a new repository named `minegit_[world folder name]` on your GitHub account, initialize a Git repository in your world save folder, and push its current state to GitHub. From this point forward, loading the world will pull the world’s latest changes from GitHub, and exiting the world will push changes to GitHub.
You can now download this world on another device to effectively sync changes between them through the next step: cloning.
### Downloading a world on a different device (Cloning)
Cloning a world will download the exact state of the world as it was last saved to GitHub. Use the following steps to clone a world:
1. Navigate to github.com in a web browser
2. Click on your profile picture in the top right corner and then `Repositories`
3. Find the repository corresponding to the world you would like to clone and copy its name
4. Back in Minecraft, click on the button with an arrow pointing downwards labelled in the bottom left corner of either the world selection screen or world creation screen
5. Paste the name of the repository you copied earlier and press `Clone`
6. You are now able to load the world like normal and have changes be synced across your devices!
### Tips & Tricks
– If you want to exit a world without pushing it to GitHub (for example, if you wanted to restart Minecraft and load the same world without having to wait for changes to be pushed), you can hold `Alt` while clicking `Save and Quit to Title`. This will skip the ‘pushing to GitHub’ step.
– Git keeps a list of all of the worlds changes every time you exit the world. This is useful, since if you have a little knowledge of how to use the Git command line interface you can rollback your world to a previous version!
– If you want to save some storage space taken up by the size of the Git repository on your computer, or make the world quicker to clone on other devices, use the `Prune World Commits` button in the edit world menu. This will delete all of the old versions of your world, leaving only the most recent one.
## Report an issue
If you run into bugs, crashes, or simply have a suggestion on how to improve the mod, please feel free to open an issue on the mod’s issue tracker!
Please include the current Minecraft version, Fabric version, mod version, and any relevant game logs when submitting an issue.
MinecraftCapes | Wear any cape, cost free
MinecraftCapes is a client side mod which allows you to wear any cape you wish in-game, cost free. Getting our mod working correctly is easy, just follow the steps below.
We have over 1,000,000 users enjoying their free capes. You can upload any cape you like, or make your own!
When you install the mod, you can also see anyone elses capes, no server mod or plugins required!
Don’t bother paying for capes or “cloaks” from clients or other services which exploit children, instead use our mod and have any cape you want FOR FREE!

## **Website, Gallery and Cape Creators can be found here:**
https://minecraftcapes.net/
## **How to install**
1. Download and install Fabric, Forge or NeoForge
2. Download the mod and place it in the .minecraft/mods folder.
3. Register an account and upload a cape to https://minecraftcapes.net
**You have your cape!**
## **Features**
– Pixel Capes
– HD Capes
– Animated Capes
– Enchanted Cape
– Dinnerbone Feature
– Deadmau5 Feature
# **Still feeling a little stuck?**
You can join our discord. We will help you with any crashes.
Minecraft. Super Mario Bros Edition.
Introduces Minecraft to the world of Super Mario Bros.
#
(May contain sprites from Super Mario Bros. 2: The Lost Levels and Super Mario Maker 2
Minecraft Sigma MCS
# Mod Info
Minecraft Sigma (MCS) is a total conversion mod for beta 1.7.3. Deceivingly simple features which create immersive gameplay. Challenging survival that breeds creative solutions, encourages exploration, while preserving the sandbox nature.

Official Wiki
# Major Additions include:
– Cauldron brewing for potions.
– Arcane magic and spell creation.
– Nether Expansion!
– Double world height using same world format!
– Alpha monoliths form past 3000 blocks!
– New ore distribution.
– Ice boat drifting (Not too fast)
– Animal taming.
– Sponge in the oceans.
– Armor stands.
– Slime blocks for bouncing items and entities.
– Dynamite for rocket jumping.
– Mob AI upgrade.
– Backported ravines.
– Implemented my version of beacons (No GUI, just multiblock with mob spawn prevention, potentially more effects in futurte).
– Walking speed bonuses on certain materials to make road building practical.
– Hundreds of bug fixes and QoL
# Recent features
– Stone age survival.
– doubled world height to 256 (compatible with old worlds)
– Expanded nether.
– Added arcane sorcery system.
Join Discord to discuss the mod or get test snapshots:
https://discord.gg/4GySNencr4
# INSTALLATION
1. Download and install Java 8.
2. Download and install MultiMC or PrismLauncher.
3. Create a new b1.7.3 instance.
4. Download the latest MCS mod zip file from releases.
5. In Launcher, Select Edit > Version > Add to Minecraft jar > choose mcs-[version].zip
6. Play!
### DO NOT install other mods alongside MCS as they are not compatible!
# Survival Tips
– Check achievements, they can give you hints!
– Dig gravel or loot zombies for flint.
– Craft stone tools from flint.
– Hunt spiders for string.
– String is needed for stone pickaxe, and bed.
– Dig clay and place it in the sun to dry.
– Build furnace from bricks.
– Tame animals with different foods.
– Mix and match armor for defence bonuses.
– Store armor on stands.
– Control and right click to place down tools.
– Use inventory shortcuts like number keys, dragging, control click.
– Build roads for faster walking
– Construct beacons for powerful effects.
– Mine Nether ores to discover potion brewing and sorcery
– don’t let your guard down at night
– your items linger for 20 minutes in loaded chunks so you have time to prepare for the trip back; late game you can use black sand to point in the direction of your corpse.

# Notable Recipes
Spoiler
Recipe: Bed x1
Ingredients:
– String
– Cloth
– Planks
Recipe: Cauldron and Arcane Table
Ingredients:
– Dormant rock
Potions: mix items and find out
Recipe: Saddle x1
Ingredients:
– Leather
Recipe: Bucket Empty x1
Ingredients:
– Ingot Gold
Recipe: Web x1
Ingredients:
– String
Recipe: Dynamite x4
Ingredients:
– Redstone x1
– Gunpowder x1
– Gunpowder x1
– String x1
Recipe: Tnt x1
Ingredients:
– Dynamite
– Paper
Recipe: Apple Gold x1
Ingredients:
– Ingot Gold
– Apple Red
Recipe: Compass x1
Ingredients:
– Ingot Iron
– Redstone
Recipe: Lapis Bricks x2
Ingredients:
– Lapis
– Clay
Recipe: Seared Bricks x4
Ingredients:
– Seared Stone
Recipe: Grout x2
Ingredients:
– Soul Sand
– Gravel
– Clay
Recipe: Brick Block x2
Ingredients:
– Brick
– Clay
Recipe: White Stone x1
Ingredients:
– Cobblestone
– Bonemeal
Recipe: Beacon x1
Ingredients:
– Glass
– Glow Stone
– Obsidian
Recipe: Stone Bricks x4
Ingredients:
– Stone
Recipe: Iron Grate x6
Ingredients:
– Ingot Iron
Recipe: Slime Block x1
Ingredients:
– Slime Ball
Recipe: Slime Ball x4
Ingredients:
– Slime Block
Recipe: Barrel x1
Ingredients:
– Wood Logs
Recipe: Armor Stand x1
Ingredients:
– Fence
– Stone Slab
# Useful Java args
-XX:+UseConcMarkSweepGC -XX:-UseAdaptiveSizePolicy -Xss1024K
You should allocate 1 gigabyte of RAM, old minecraft does not need much.
# WARNING
Not compatible with other mods! No multiplayer yet. This is a hobby project of mine, althought I try to add content and bugfixes regularly, there is no guaranteed plan.
# Credits
Mojang – the game itself and assets;
RetroMCP – the tool I used to decompile, reobfuscate and build this mod;
Birevan – Light Color modification;
FloweChild – Piston packing code, game design ideas such as material walk speed, gloom, textures for barrel and creeper oysters.
Bestsoft100 – help with dynamic block mining delay;
alexchompski – light sensor, observer, spells textures, snowball idea.
Krzysztof Pikes – new music
_This project modifies obfuscated class files from Minecraft Beta 1.7.3, which is © Mojang AB and not open source.
The author claims no ownership over the original Minecraft code.
This mod is provided for educational and archival purposes only.
No part of this project may be used commercially. Redistribution of Minecraft code remains subject to Mojang’s end-user license agreement (EULA)._