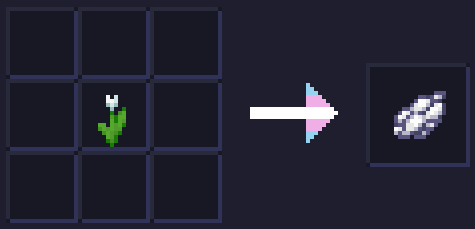
White Tulips Make White Dye
White Tulips Make White Dye replaces the recipe for making Light Gray Dye from White Tulips and crafts White Dye instead!
World Edit Mini
You can run the command `/function editor:get_items` to get an “Open Editor” tool which, when used, will select the block you are looking at, and enter Selection Mode. (You will also get a “Teleport” tool; this is unrelated and just for utility.)
In Selection Mode (where any number of block positions can be selected), these tools are available:
1. Toggle (gold): Select the block position you are looking at, or de-select it if it is already selected.
2. Exit (wooden): De-select all selected blocks and exit the editor.
3. Convert to Cube (diamond): Find the smallest cuboid containing all selected positions. Select this cuboid (deselecting all positions), and switch to Cube Mode.
4. Set Blocks (stone): Set each selected block to the block you are currently looking at.
5. Move (iron): Move all selected positions by one block in the direction you are looking.
In Cube Mode (where a cube(oid) is selected), these tools are available:
1. Exit (wooden): De-select the cube and exit the editor.
2. Generate Structure Block (netherite): Create a structure block configured to contain the selected cube.
3. Fill (stone): Fill the cube with the block you are looking at.
4. Convert to Positions (diamond): Select one position at each corner of the selected cube. De-select the cube and switch to Selection Mode.
5. Move (iron): Move the cube _by its size_ in the direction you are looking. (For example, if the cube is 2 blocks high and you are looking up, it will move 2 blocks up. If you want to move by 1 block, convert to positions first.)
6. Copy (copper): Copy the selected region to the clipboard. You will get a new “clipboard item” representing the copied structure. Holding the clipboard item, you can right-click to paste, or left-click to discard. (Do not destroy the clipboard item through any other means, or you may experience bugs!)
Have fun! 🙂
A few notes:
– As the “fill cube” method is relatively inefficent due to command limitations, `/gamerule max_command_sequence_length` (by default set to 65536) determines (approximately) the maximum number of blocks that may be filled. You may wish to set this to a larger value (for example, `/gamerule max_command_sequence_length 16777216`).
– Similarily, `/gamerule max_block_modifications` (by default set to 32768) determines the number of blocks that may be copied or pasted. You can set this to a larger value (for example, `/gamerule max_block_modifications 2147483647`), however the server may slow down or crash if lots of blocks are being copied or pasted.
– If you find any bugs, let me know! (I’m on Discord!)
_(**Disclaimer**: I haven’t used WorldEdit and have no idea how it works, but I wasn’t really sure what else to name this datapack. I just made this because I wanted to be able to use /fill easier, and use copy-paste.)_
Wooden and Stone Type Tools
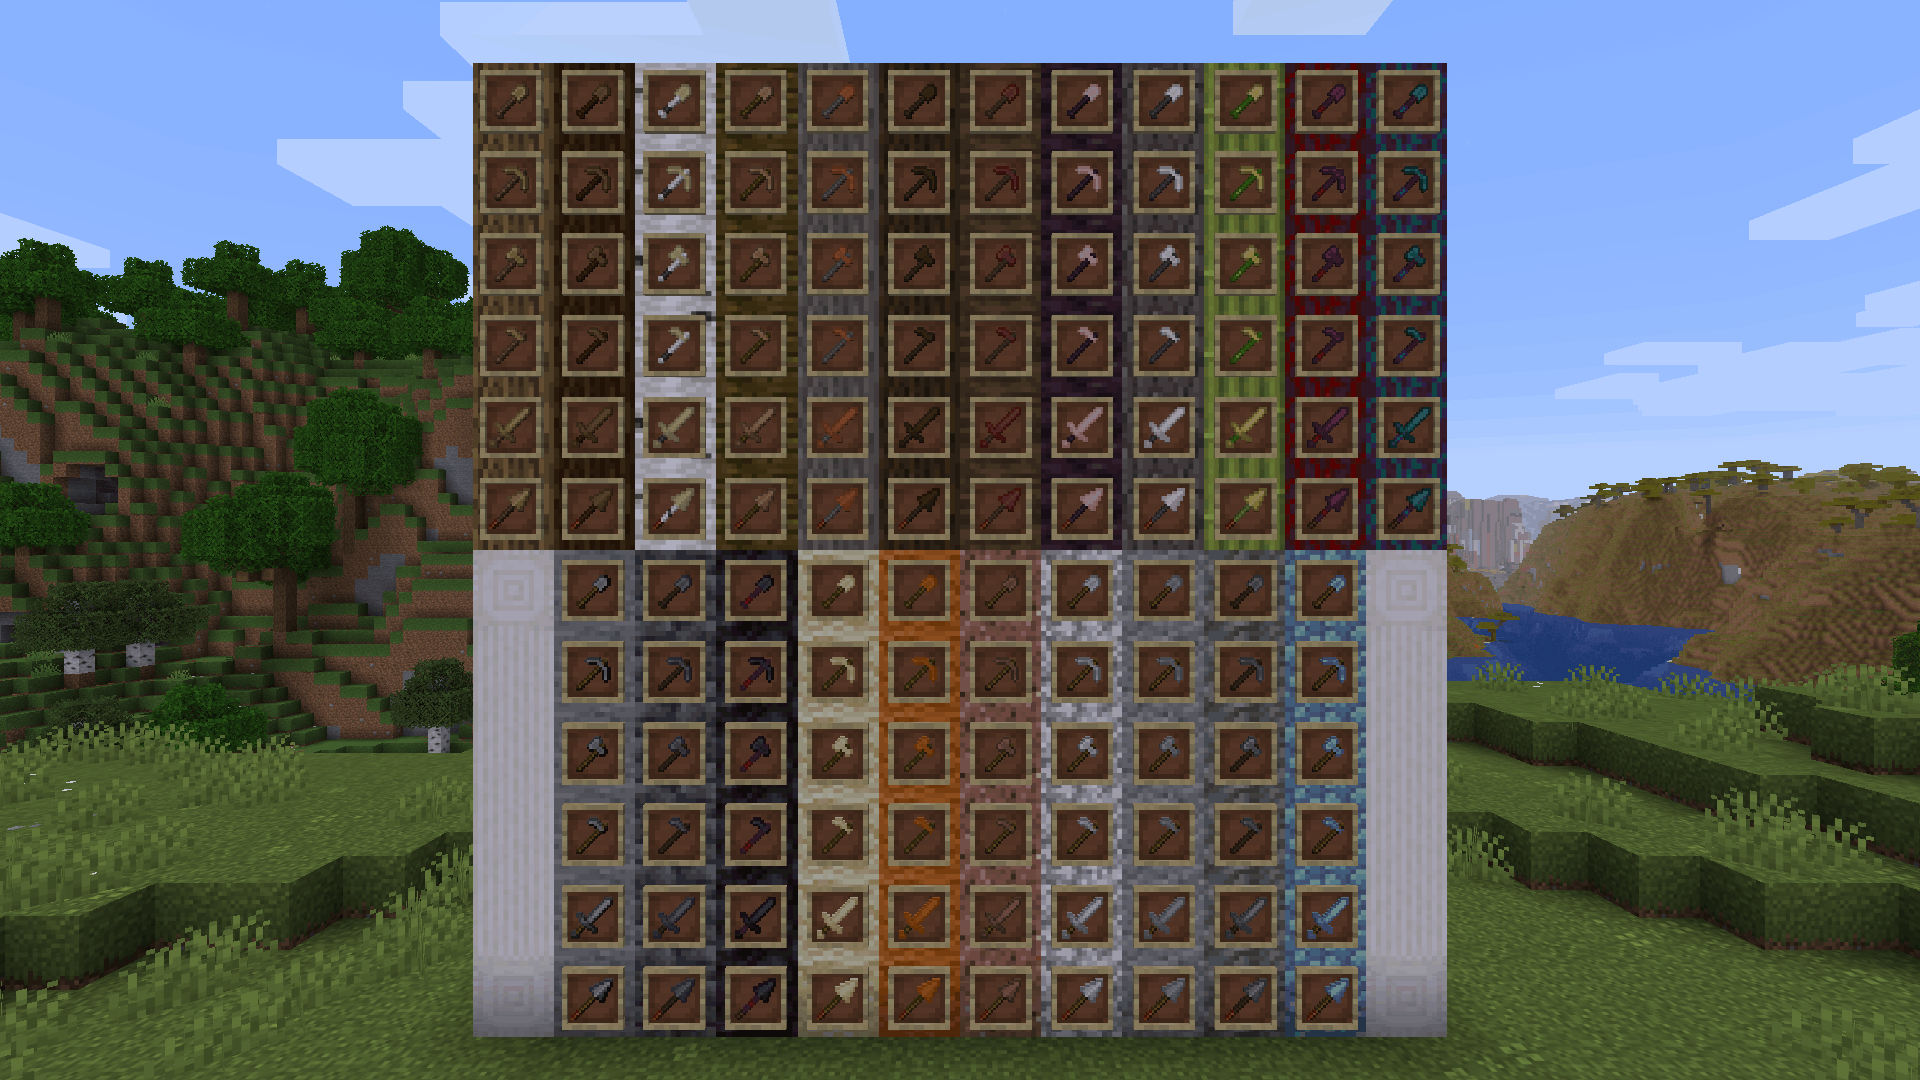
**Wooden and Stone Type Tools** lets you have wooden tools of all wood types and stone tools of many different stone types by renaming then in an anvil.
# Additions and Changes
* Adds many new textures for wooden and stone tools
* Default names for all wooden tools have been changed to “Oak [tool]”
* The default texture for all wooden tools have been changed to appear more oak-ish to reflect this name change
# How to Use
Place a wooden or stone tool inside an anvil and rename it to one of the following:
Wooden Tool Names
* Spruce [tool]
* Birch [tool]
* Jungle [tool]
* Acacia [tool]
* Dark Oak [tool]
* Mangrove [tool]
* Cherry [tool]
* Pale Oak [tool]
* Bamboo [tool]
* Crimson [tool]
* Warped [tool]
Stone Tool Names
* Deepslate [tool]
* Blackstone [tool]
* Sandstone [tool]
* Red Sandstone [tool]
* Granite [tool]
* Diorite [tool]
* Andesite [tool]
* Tuff [tool]
* Prismarine [tool]
Check out the gallery to see examples of each wood and stone type.
# Different Languages!
I saw that the model .json files allowed for a list of different strings to produce the same result, meaning I could add support for different languages. Open the list below to see the 100+ languages besides American English that you can use this resource pack in. If you’d like to correct any translations (because I am *confident* that I botched at least one of these) or provide your own for any languages not on this list, contact me at [email protected] or click [here.](https://crowdin.com/project/minecraft)
Supported Languages
* العربية (Arabic)
* Azərbaycanca (Azerbaijani)
* Boarisch (Bavarian)
* Беларуская кірыліца (Cyrillic Belarusian)
* Biełaruskaja łacinka (Latin Belarusian)
* Български (Bulgarian)
* Brezhoneg (Breton)
* Braobans (Brabantian)
* Català (Catalan)
* Čeština (Czech)
* Чӑвашла (Chuvash)
* Cymraeg (Welsh)
* Dansk (Danish)
* Deitsch (Austrian German)
* Schwiizerdütsch (Swiss German)
* Deutsch (German)
* Ελληνικά (Greek)
* Australian English
* British English
* Canadian English
* New Zealand English
* Pirate Speak
* ɥsᴉꞁᵷuƎ uʍoᗡ ǝpᴉsd∩
* Anglish (Modern English minus loanwords)
* Shakespearean English (Early Modern English)
* Esperanto (Constructed language created by L. L. Zamenhof)
* Español argentino (Argentine Spanish)
* Español chileno (Chilean Spanish)
* Español ecuatoriano (Ecuadorian Spanish)
* Español (European Spanish)
* Español mexicano (Mexican Spanish)
* Español uruguayo (Uruguayan Spanish)
* Español venezolano (Venezuelan Spanish)
* Andalûh (Andalusian)
* Eesti keel (Estonian)
* Euskara (Basque)
* فارسی (Persian)
* Suomi (Finnish)
* Filipino (hulaan ang wika)
* Français canadien (Canadian French)
* Français de Suisse (Swiss French)
* Français (Metropolitan French)
* Furlan (Friulian)
* Gaeilge (Irish)
* Galego (Galician)
* Galo (Gallo)
* Галицка (Halychian)
* ʻŌlelo Hawaiʻi (Hawaiian)
* עִברִית (Hebrew)
* हिंदी (Hindi)
* Høgnorsk (High Norwegian)
* Hrvatski (Croatian)
* Magyar (Hungarian)
* Հայերեն (Armenian)
* Bahasa Indonesia (Indonesian)
* Íslenska (Icelandic)
* Italiano (Italian)
* 日本語 (Japanese)
* la .lojban. (Lojban, constructed language)
* ქართული (Georgian)
* Қазақша (Kazakh)
* 한국어 (Korean)
* Kölsch/Ripoarisch (Kölsch/Ripuarian)
* Kernewek (Cornish)
* Кыргызча (Kyrgyz)
* Latina (Latin)
* Lëtzebuergesch (Luxembourgish)
* LOLCAT
* Lietuvių (Lithuanian)
* Latviešu (Latvian)
* 文言 (Literary Chinese)
* Монгол (Mongolian)
* Bahasa Melayu (Malay, Latin script)
* Malti (Maltese)
* Mēxikatlahtōlli (Nahuatl)
* Vlaams (Flemish Dutch)
* Nederlands (Dutch)
* Norsk nynorsk (Nynorsk Norwegian)
* Norsk bokmål (Bokmål Norwegian)
* Övdalska (Elfdalian)
* Polski (Polish)
* Ngiiwa (Popoloca)
* Português brasileiro (Brazilian Portuguese)
* Português (European Portuguese)
* Cántabru/Montañés (Cantabrian)
* Bahasa Indonesia edjaän lama (Pre-reform spelling Indonesian)
* Quenya (Constructed language created by J. R. R. Tolkien)
* Română (Romanian)
* Русскій дореформенный (Pre-revolutionary Russian)
* Русский (Russian)
* Руснацькый (Rusyn)
* Сахалыы (Yakut)
* Davvisámegiella (Northern Sámi)
* Slovenčina (Slovak)
* Slovenščina (Slovenian)
* Shqip (Albanian)
* Svenska (Swedish)
* Säggs’sch (Upper Saxon German)
* Ślōnski (Silesian)
* ไทย (Thai)
* Tagalog (hulaan ang wika)
* tlhIngan Hol (Klingon, constructed language created by Marc Okrand)
* toki pona (Constructed language created by Sonja Lang)
* Türkçe (Turkish)
* Татарча (Tatar)
* Bats’i k’op (Tzotzil)
* Українська (Ukrainian)
* O’zbekcha (Uzbek)
* Català valencià (Valencian)
* Tiếng Việt (Vietnamese)
* Viossa (Constructed language created by [the conlangs subreddit](https://www.reddit.com/r/conlangs/))
* Võro kiil (Voro)
* 简体中文 (Simplified Chinese)
* 繁體中文香港 (Traditional Chinese, Hong Kong)
* 繁體中文台灣 (Traditional Chinese, Taiwan)
* بهاس ملايو (Jawi Malay)
WI Zoom
# WI Zoom (Wurst-Imperium Zoom)
The WI Zoom Minecraft mod lets you zoom in and out with the mouse wheel, providing up to 50x magnification without the need for a spyglass. This mod is fully compatible with OptiFine and Sodium, but unlike OptiFine’s zoom, WI Zoom lets the camera move in a logical way, without making it wobble around. WI Zoom supports all of the latest Minecraft versions, including snapshots.

## Features
– Up to 50x zoom!
– No spyglass needed!
– Zoom in and out with the mouse wheel!
– No wobbly camera nonsense!
– Dynamic mouse sensitivity! (since v1.1)
– Fully compatible with OptiFine / Sodium!
## How To Zoom
Hold down the V key to activate the zoom (this keybind can be changed).
While zooming, you can use the mouse wheel to zoom in further.
## Changing The Zoom Keybind
How to change the keybind (click to expand)
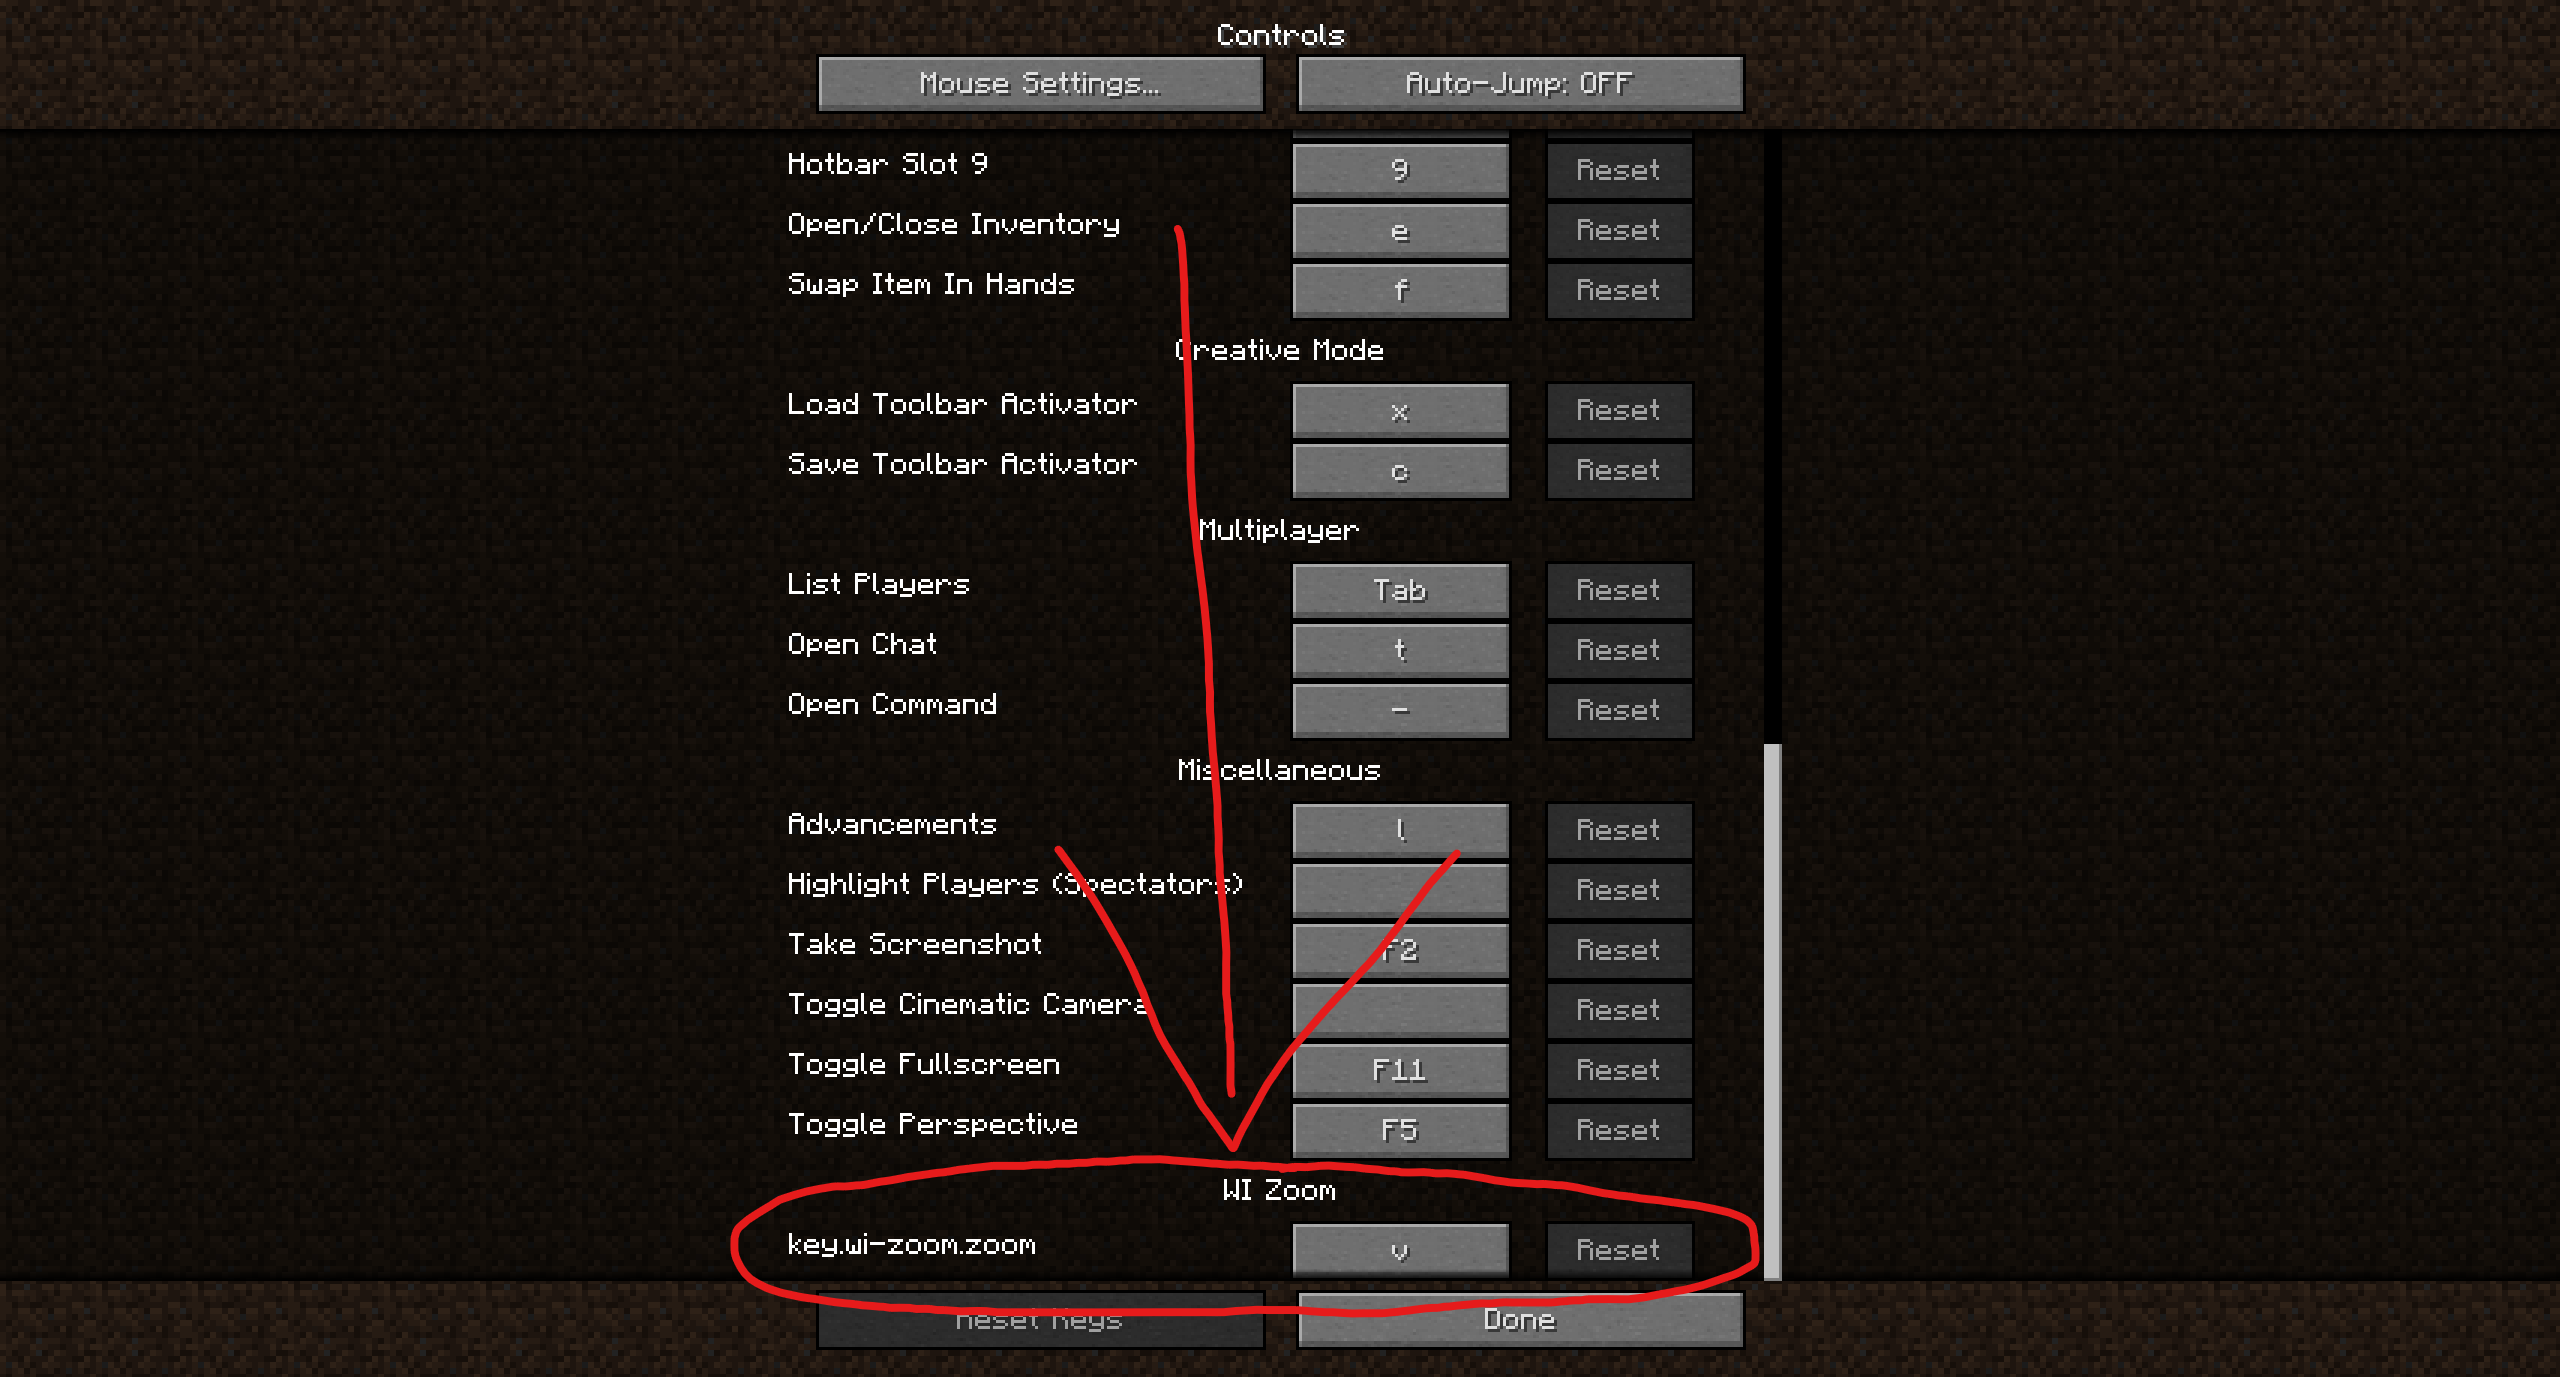
In the pause menu, click on “Options…”.
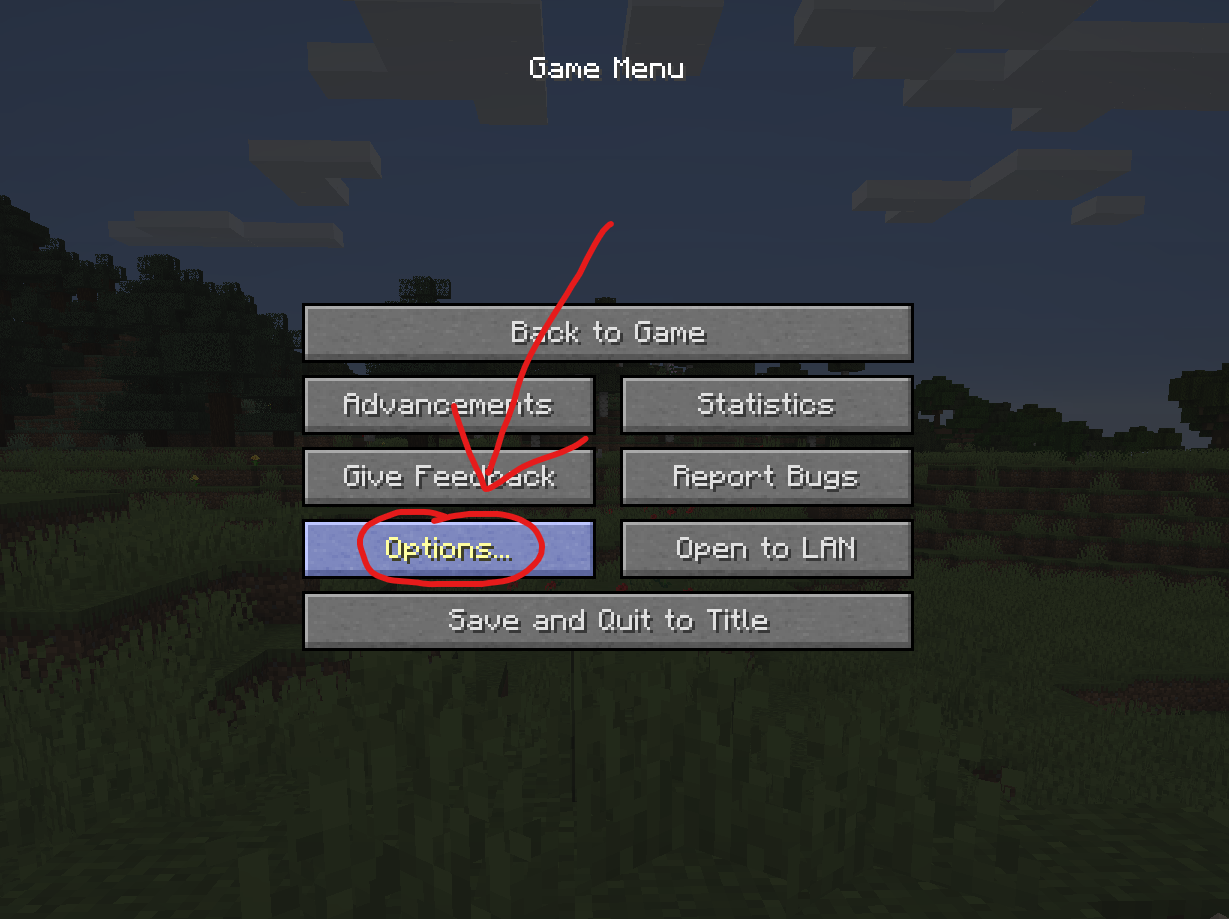
In the Options menu, click on “Controls…”.

In the Controls menu, scroll down to the “WI Zoom” section. If you don’t have any other mods installed, you will find this section at the very bottom.
## Supported Languages
– Azerbaijani (Azerbaijan) (since v1.5)
– Chinese (Simplified/Mainland) (since v1.4)
– Chinese (Traditional/Taiwan) (since v1.4)
– Cantonese (Hong Kong) (since v1.4)
– Classical Chinese (since v1.4)
– Dutch (Netherlands) (since v1.5)
– English (US)
– Estonian (Estonia) (since v1.4)
– French (France) (since v1.4)
– German (Germany)
– Kurdish (since v1.5)
– Portuguese (Brazil) (since v1.5)
– Russian (Russia) (since v1.3)
– Turkish (Turkey) (since v1.5)
– Ukrainian (Ukraine) (since v1.5)
WI Freecam

# WI Freecam (Wurst-Imperium Freecam)
WI Freecam allows you to detach your camera and move it around freely while your character stays in place. It’s the photo mode that Mojang never added. Spectator mode except it doesn’t move your character and works on any server. The literal perspective shift you need to become a better builder.
Have you ever built a giant dirt tower just to get a better view of your village? Ever wasted half a stack of rockets trying to take a screenshot of your skyscraper from the perfect angle? Ever dug up all your hidden redstone because you forgot how it works? These are common signs that you need a Freecam.
## Why choose WI Freecam
### Movement controls that don’t suck
You shouldn’t have to fight your tools to position a camera.
– WASD is for horizontal movement only. Pressing W won’t send you diagonally downward just because your crosshair isn’t perfectly level. You have space and shift for that.
– Your camera stops moving the moment you release the button. No sliding past your target as if you’re on ice.
– Scroll to change speed, but with precision. You can quickly adjust your speed, but you can also scroll it to an exact value. The on-screen indicator displays your current speed so that there’s no guessing (unlike vanilla spectator mode).
– Vertical speed that actually makes sense. WI Freecam stores your preferred _ratio_ between horizontal and vertical speed, not an absolute value that you then have to re-adjust every time. Set it to 50% once and it will always be half as fast as your horizontal speed.
– Precise input mode. CTRL-click on any slider and type in the exact number you want, instead of fiddling with the mouse for 20 minutes because you’re one pixel off.
### Always up to date
I’m tired of mods that take forever to update when a new Minecraft version comes out. You should be too. “Long term modding version” is a made-up concept by modders who either can’t escape dependency hell or stopped playing Minecraft years ago.
WI Freecam provides day one support for every new Minecraft version, usually within **30 minutes** of release. That’s right, minutes, not weeks! Snapshots are supported too, though those can take a bit longer if they break something.
How is this possible?
First, through lots of automation. As soon as a new Minecraft version is released, a robot compiles the mod against that version, runs it, and goes through a big testing routine where it does everything you could possibly do in the mod at a ridiculously fast speed ([it’s quite fun to watch](https://www.youtube.com/watch?v=fKRFiPcDbfw)). If all tests pass, it then also releases the mod automatically. But if even one pixel looks different, it instead tells me what went wrong so I can get straight to fixing it.
Second, because I built WI Freecam using my own custom settings engine instead of relying on an off-the-shelf config library. You can have the best snapshot automation in the world, but that won’t help you at all if you’re stuck waiting for Cloth Config to update (as I found out the hard way in my last mod).
### A proper modern Freecam
Most Freecam mods are built on decade-old workarounds. Some freeze your movement packets, others spawn a fake camera entity. Both methods mess up the game’s physics, which then requires dozens of messy patches to deal with the side effects.
WI Freecam does something radically simpler: **it just moves the camera**. No fake entities. No frozen packets. No physics workarounds. The camera is just a coordinate: no hitbox, no collision, no name tag, no problems. This wasn’t possible in older Minecraft versions, but clinging to outdated fakery today is unnecessary. WI Freecam is what Freecam should have always been.
## Feature List
– Free camera movement
– Full player physics while in Freecam
– No fake entities or movement packet shenanigans
– On-the-fly switching between camera control and character control (keybindable too)
– Separate horizontal and vertical speed sliders (ratio-based)
– Scroll to change speed (optional)
– On-screen speed indicator (optional)
– Adjustable initial camera position (inside, in front, on top)
– Optional tracer line to help you find your character
– Hide hand for clean screenshots (optional)
– Disable on damage for safety (optional)
– Works on snapshots, updates instantly to new releases
– No third-party dependencies other than Fabric API
– Automated testing to ensure it works reliably
**Disclosure:** This mod collects anonymous statistics to help me decide which versions and environments are still worth supporting. It reports the mod/Minecraft/Fabric version, versions of Mod Menu, Sodium, and Sinytra Connector (if installed), game language, and basic OS info on startup, when you open the mod’s settings, and when you enter a world. When entering a world, it also reports the world type (singleplayer, multiplayer, LAN, or Realms). No personal data such as usernames or IPs is ever collected. You can opt out at any time in the settings menu.
## Installation
> ⚠ Always make sure that your modloader and all of your mods are made for the same Minecraft version. Your game will crash if you mix different versions.
### Installation using Fabric
1. Install Fabric Loader.
2. Add Fabric API to your mods folder.
3. Add WI Freecam to your mods folder.
(NeoForge is not yet supported.)
## Chat Commands
– `/freecam`: Opens the settings menu
## Keybinds
– Toggle Freecam (default: `U`)
– Switch Camera/Player Control (default: not bound)
– Open Settings (default: `Right CTRL`)
## Supported languages
– English (US)
– German (Germany)
Pull requests welcome – [add your native language](https://github.com/Wurst-Imperium/WI-Freecam/tree/master/src/main/resources/assets/wi_freecam/translations)!
White World
This minecraft texture pack makes every single texture be white. This also keep alpha (transparency) values, meaning that blocks like leaves and water will still work, and you can still see through them like normally, they are now just tinted white.
—
### 🌍 Want Your Own Minecraft Server?
Running an **SMP**, playing with friends, or testing mods and plugins?
**ByteBuilders Hosting** delivers fast, reliable Minecraft servers at affordable prices.
🚀 **Features include:**
– ⚡ High-performance nodes
– 💾 **Unlimited storage***
– 🔄 **Unlimited backups***
– 🛠️ Simple control panel
– 🤝 Helpful support
🎁 **Get 20% OFF your server** using this affiliate link:
👉 **[Click here to get 20% off at ByteBuilders Hosting](https://billing.bytebuilders.co.za/aff/BF20)**
—
White Anime Girl Totem
A clean and stylish Totem of Undying texture pack featuring a white-haired anime girl. This pack replaces the default Minecraft totem with a cute high-quality anime design while keeping the vanilla style smooth and lightweight. Perfect for PvP, survival, and aesthetic gameplay
White and Black World
This is a minecraft texture pack that makes all textures white and black, basically, gray scale. This also keeps the alpha values (transperency) of textures, so textures like water and leaves, you will still be able to see though like normally.
—
### 🌍 Want Your Own Minecraft Server?
Running an **SMP**, playing with friends, or testing mods and plugins?
**ByteBuilders Hosting** delivers fast, reliable Minecraft servers at affordable prices.
🚀 **Features include:**
– ⚡ High-performance nodes
– 💾 **Unlimited storage***
– 🔄 **Unlimited backups***
– 🛠️ Simple control panel
– 🤝 Helpful support
🎁 **Get 20% OFF your server** using this affiliate link:
👉 **[Click here to get 20% off at ByteBuilders Hosting](https://billing.bytebuilders.co.za/aff/BF20)**
—
Weird and powerful weapons – Texture pack
**This ressource pack add custom textures on the items of the datapack [Weird and powerful weapons](https://modrinth.com/project/Jr3nq9JV)**
## Totem of protection
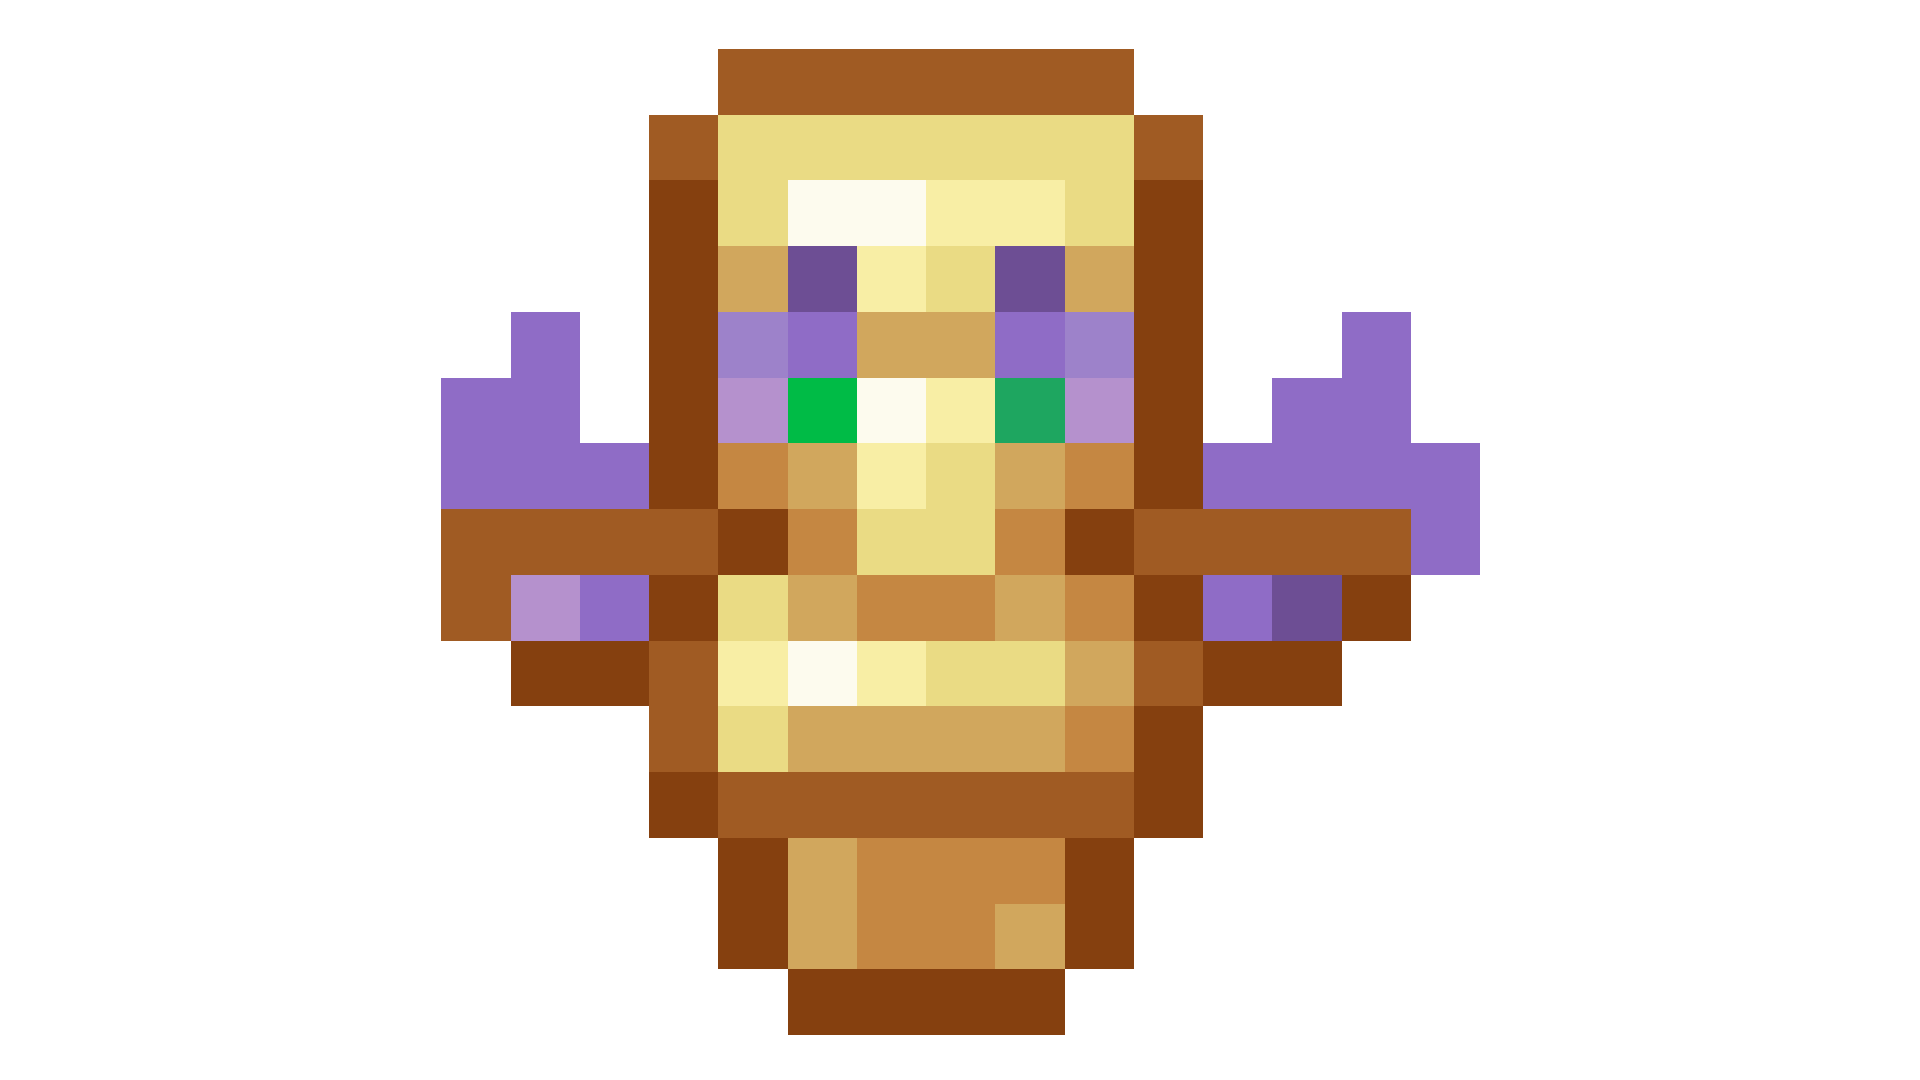
Weird and powerful weapons
# Weird and powerful weapons
**Today Weird and powerful weapons have just 1 item but I want to add more items**
To give you an item do
“`
/function totem/give/
“`
To have the custom textures you can download this [RESSOURCES PACK](https://modrinth.com/project/1p4AiChX)
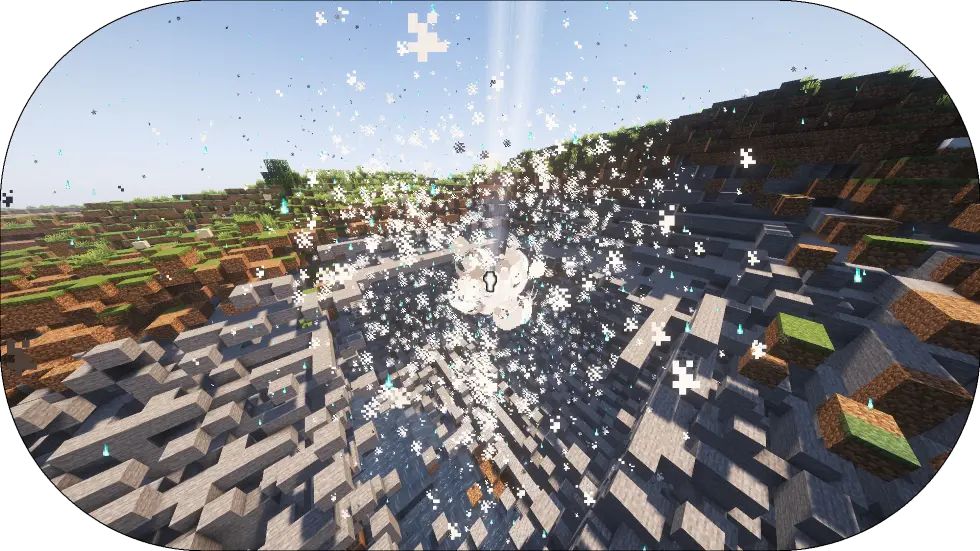
## Totem of protection
Add a new Totem of undying that explose when the player hold his right-click
——————————————————————
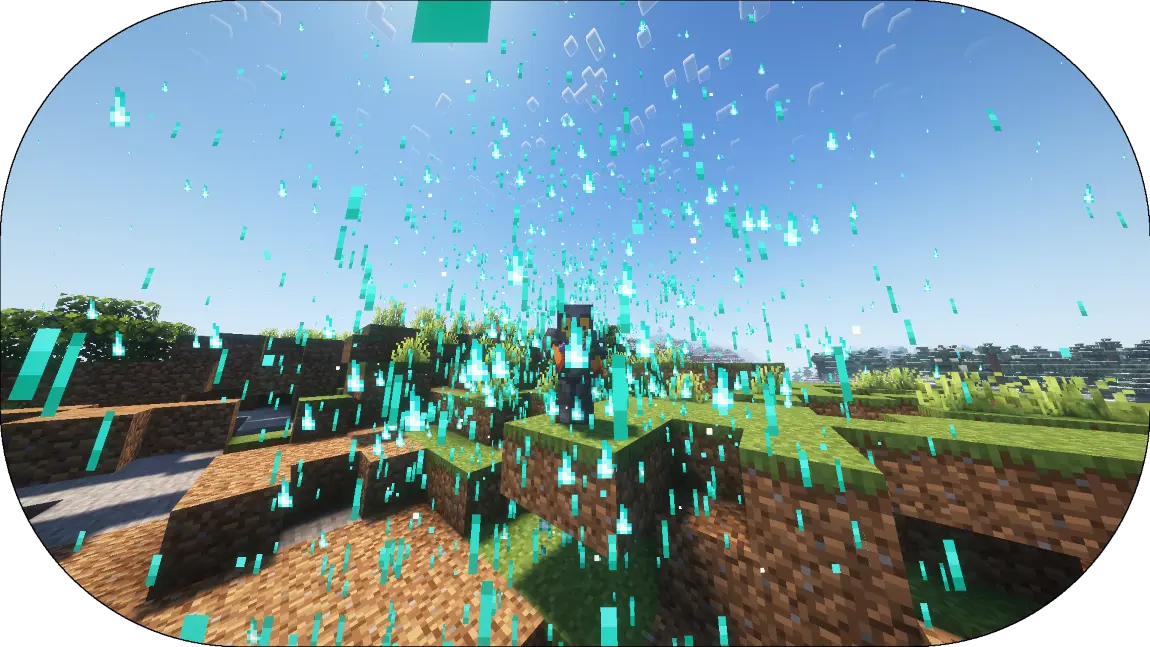
Totem of protection have a loading time before he start to Explose
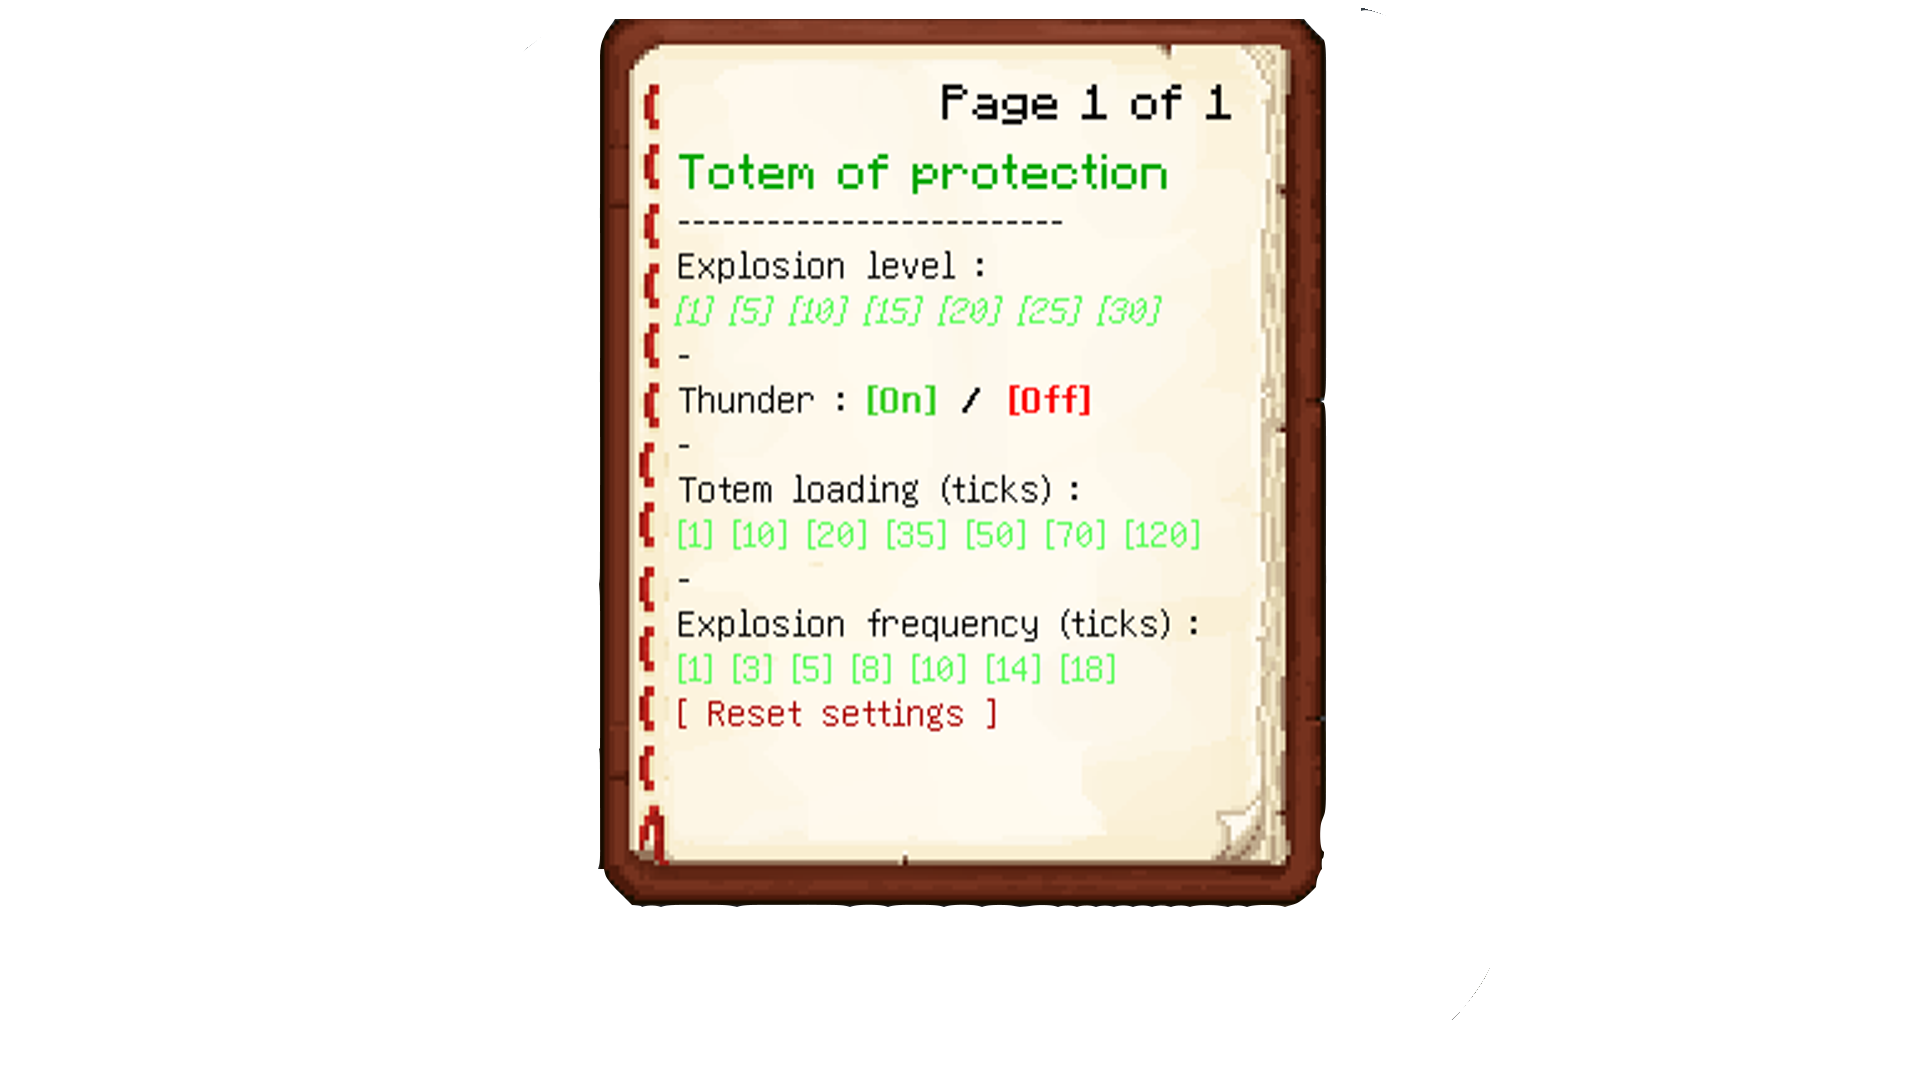
## Config menu
To config the datapack do
“`
/function totem:config_book
“`