ZyveraWeb-lite
A lightweight, no-fuss web server plugin for Paper Minecraft servers — host static websites directly from your server with zero external setup.
## What is this?
ZyveraWeb Lite lets you serve static web content (HTML, CSS, JavaScript, images, and more) straight from your Minecraft server. No need for Apache, Nginx, or other external web servers — just install the plugin and go.
## Features
– 🌐 Serve static files via HTTP or HTTPS
– 🔒 Optional HTTPS support with custom SSL certificates
– 📂 Automatic default web file generation on first launch
– 🛡️ Built-in path traversal protection to keep your server safe
– 📄 Automatically serves `index.html` when accessing directories
– 🏷️ Branded footer automatically added to HTML pages
## Getting Started
1. Drop the plugin jar into your server’s `plugins/` folder and restart.
2. Default web files are created automatically in `plugins/ZyveraWeb-lite/www/`.
3. Tweak settings in `plugins/ZyveraWeb-lite/config.yml` (see below).
4. Access your site at `http://your-server-ip:8080` (default) or the HTTPS port if enabled.
## Configuration
Edit `plugins/ZyveraWeb-lite/config.yml` to adjust settings:
^^^yaml
server:
host: “0.0.0.0”
domain: “” # Just to display. Leave empty for loopback (localhost)
http:
enabled: true
port: 8080
https:
enabled: false
port: 8443
SSLPubl: fullchain.pem
SSLPriv: privkey.pem
^^^
### HTTPS Setup
Enable HTTPS by setting `https.enabled` to `true`, then place your SSL certificate (`fullchain.pem`) and private key (`privkey.pem`) in `plugins/ZyveraWeb-lite/ssl/`.
ZyPass
Unlike typical password plugins, this system goes a step further by tracking both a player’s unique ID and their IP address.
When a player joins and successfully enters the password, their ID and IP are stored as a trusted combination. On future joins from the same IP, they won’t need to re-enter the password, making the experience seamless for regular players. All trusted players are saved to the config file, so you can manually remove an IP and user ID if needed to force a password re-entry- just remember to restart the server after making any manual changes.
However, if that same account logs in from a different IP- whether it’s the player on a new network or someone attempting unauthorized access- the plugin will require the password again. Since the IP doesn’t match the trusted record, bypass is not allowed.
This approach improves security while still keeping things convenient for trusted users. No repeated logins for regulars, but strong protection against potential intruders.
Setup Instructions:
1. Download the plugin and place it in your server’s plugins folder.
2. Restart your server.
3. Open the generated ZyPass folder and edit the config file:
Keep the quotation marks.
Enter your password in the first set of quotes.
Enter your hint in the second set of quotes.
Do not modify anything else- the plugin will automatically manage additional data as players authenticate.
Players only need to type the password itself (not the quotation marks).
4. Save your changes and restart the server again.
5. Join the server, wait for the on-screen instructions (displayed above the hotbar), and enter your password in chat.
Additional Notes:
Password messages are not fully sent in chat, so other players cannot see what you entered.
Your password remains private unless you choose to share it.
zy optimised pack
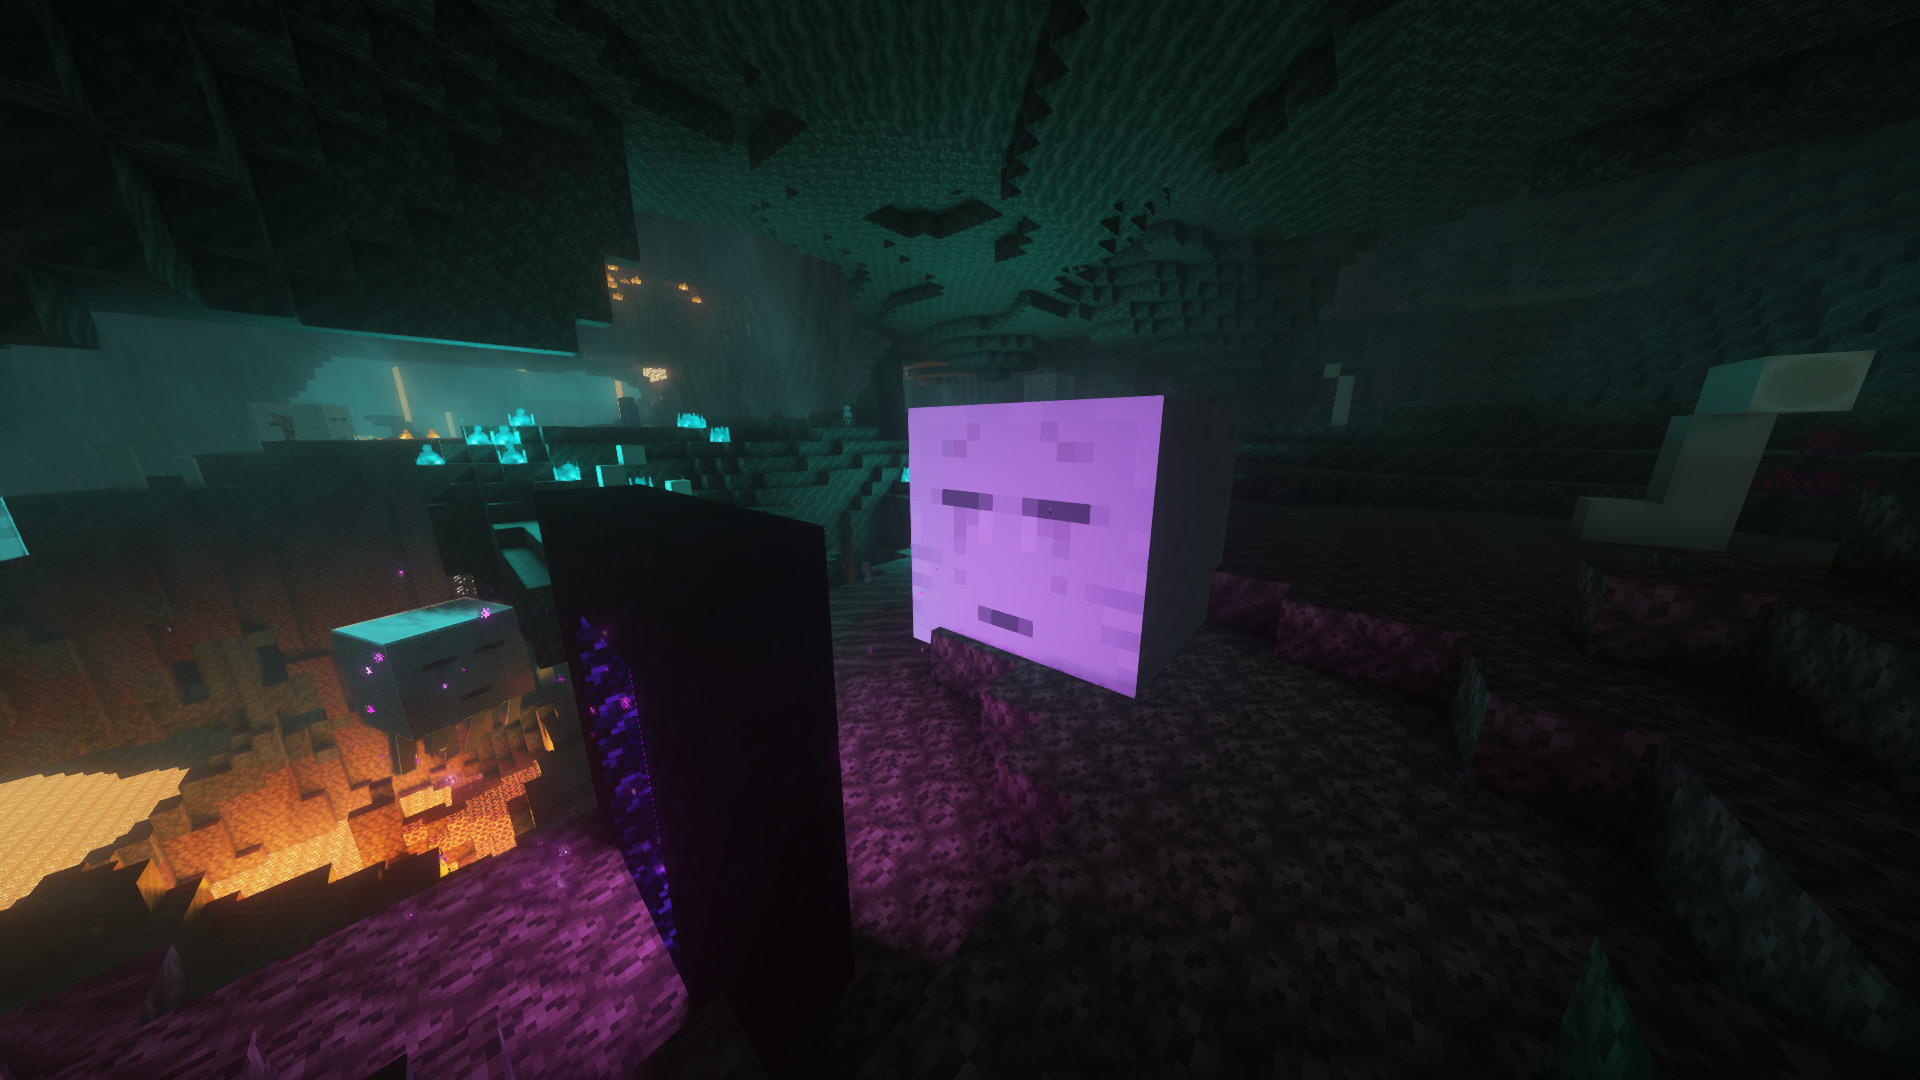
zy optimised pack is modpack with a focus on optimisation and quality of life features. The performance of the game is improved with mods such as [Sodium](https://modrinth.com/mod/sodium) and [Lithum](https://modrinth.com/mod/lithium), with QoL mods such as [Bobby](https://modrinth.com/mod/bobby), [WI Zoom](https://modrinth.com/mod/wi-zoom), [Shulker Box Tooltip](https://modrinth.com/mod/shulkerboxtooltip) and [WI Zoom](https://modrinth.com/mod/wi-zoom) being included.
Various resource packs and shaders are included, making configuration easily accessible upon startup. This modpack aims to enable good performance across various devices and keep the experience as close to vanilla as possible, whilst improving the game in unobtrusive ways.
[PrismLauncher](https://prismlauncher.org/) is recommended to manage different Minecraft versions.
## How to Install
[PrismLauncher](https://prismlauncher.org/download/) is recommended to manage instances and download mods. With PrismLauncher open, click the `Add Instance` button, select the `Modrinth` tab and search for this modpack (either by name or by using the link).
Alternatively, you can use the `Import` tab to select the `.mrpack` that can be downloaded to import the pack into PrismLauncher.
You will need Java (version 21) installed on your device. PrismLauncher can download Java for you when you open it for the first time.
Additionally, you can also download Java here: [adoptium.net](https://adoptium.net/en-GB/temurin/releases/?version=21&os=any&arch=any).
> **Note: On Macs with Intel processors, you need to install the x64 version of Java, on Macs with Arm 64 (Apple silicon) processors, you need to install the Arm 64 (aarch64) version of Java.**
## When Updating
To keep your settings, make sure to copy over `options.txt` to the new instance’s folder, from your old folder. Also, if you want, copy over `servers.dat` (your server list), `hotbar.nbt` (your saved creative hotbars), `saves/` (your worlds) and `screenshots/`, along with `.bobby/` (only made if you have the bobby mod).
## Included Resource Packs and Shaders
**Resource Packs**
> – [Bare Bones](https://modrinth.com/resourcepack/bare-bones)
> – [C418 Songs Only](https://modrinth.com/resourcepack/c418-songs-only)
> – [Default Dark Mode](https://modrinth.com/resourcepack/default-dark-mode)
> – [Enchantment Glows](https://modrinth.com/resourcepack/enchantment-glows)
> – [Even Better Enchants](https://modrinth.com/resourcepack/even-better-enchants)
> – [No Mob Variants](https://modrinth.com/resourcepack/even-better-enchants)
> – [No Wolf Skin Variants](https://modrinth.com/resourcepack/no-wolf-skin-variants)
> – [Redstone Tweaks](https://modrinth.com/resourcepack/redstone-tweaks)
> – [Vanilla Tweaks](https://vanillatweaks.net/picker/resource-packs/)
**Shaders**
> – [BSL Shaders](https://modrinth.com/shader/bsl-shaders)
> – [Complementary Reimagined](https://modrinth.com/shader/complementary-reimagined)
> – [Complementary Reimagined](https://modrinth.com/shader/complementary-reimagined) [+ Euphoria Patches](https://modrinth.com/mod/euphoria-patches)
> – [Rethinking Voxels](https://modrinth.com/shader/rethinking-voxels/versions)
zSupportExtender
## 🚀 zSupportExtender
**zSupportExtender** is a lightweight compatibility layer designed for Paper servers, enabling plugins to run smoothly across multiple Minecraft versions without requiring updates or modifications.
—
### 🛒 Buy Here
**zSupportExtender+++** https://discord.gg/4xZB53Bwd4
—
### ✨ What it does
zSupportExtender helps bridge differences between Minecraft versions by providing a stable runtime environment for plugins. It reduces version-related issues and improves compatibility from **Paper 1.19 up to 26.1.2**.
—
### ⚙️ Features
* Cross-version compatibility support (1.19 → 1.21.1)
* No external dependencies required
* Lightweight and optimized for performance
* Safe fallback handling for API differences
* Clean startup with no warnings or unnecessary logs
—
### 📦 Supported Platforms
* ✔ Paper 1.19
* ✔ Paper 1.20 / 1.20.x
* ✔ Paper 1.21 / 1.21.1
* ✔ Paper 26.1.2
—
### 🛠 Use Case
This plugin is ideal for server owners who want to:
* Run older plugins on newer versions
* Maintain compatibility without constant updates
* Reduce breakage caused by API changes
—
### ⚠️ Important Notes
* This plugin does not modify other plugins directly
* Compatibility depends on how plugins are built ( some may still break (well it?) )
* Designed to improve compatibility, not guarantee it in all cases
—
### 📄 Installation
1. Download the latest version
2. Place the `.jar` file into your `/plugins` folder
3. Restart your server
—
### 👨💻 Developer Info
* Built using stable Paper APIs
* Designed with forward compatibility in mind
* No configuration required (plug & play)
—
**zSupportExtender** focuses on simplicity, performance, and practical compatibility for modern Paper servers.
zOptimized



## 💬 Description – *english*
Well optimized with a lot of its own chips fully client modpack. There are mods for beautiful clouds, splashes on the water, and even… for bedrock edition?
You don’t have to worry about anything, resource packs, configs and shaders are already in the file.
We update to the latest stable versions and always stay cool. Stable updates and modpack support – yes
Modpack simplifies common processes in Minecraft, such as crafting or moving items
– Item Scroller – allows you to quickly move items from inventory to another inventory
The main purpose of the modpack – is beauty, added a lot of mods that either improve the external component of Minecraft
– Better Clouds – beautiful clouds
– Subtle Effects – beautiful partials in different interactions
– And a lot of other mods for splashes on the water or shine on the armor
### 📩 How to install?
🟢 Modrinth App
One of the easiest ways to install modpack
– Open the Launcher
– Search for this modpack (Action & Stuff ON JAVA)
– Click download
– Run and play
– ✅
🌍 MultiMC / Prism Launcher and etc.
In these launchers there are 2 ways to install modpack
1:
– Click in the launcher “Add build”
– Select “Modrinth” and search this modpack (Action & Stuff ON JAVA)
– Click download (or OK)
– Run and play
– ✅
2:
– Download the modpack file [here](https://modrinth.com/modpack/actionandstuffonjava/versions)
– Click “Add build” in the launcher
– Select “Import from file”
– Import modpack file to launcher
– Run and play
– ✅
2.1:
– Download the modpack file [here](https://modrinth.com/modpack/actionandstuffonjava/versions)
– Grab the file with your mouse and move it to the launcher (modpack starts installing)
– Run and play
– ✅
🦠 TLauncher
– Download the modpack file [here](https://modrinth.com/modpack/actionandstuffonjava/versions)
– Convert the modpack from .mrpack to .zip on any website (search *mrpack to zip converter*)
– Create build in “TL Mods” (Create modpack/instance/build > Select your MC version (version of file *1.21.4/8/10*) > Select Fabric *last version* > Remove check mark from “Use skin system TL” and “Use Optifine”)
– Open the files (.minecraft) > Open “versions” folder > Open “*your name of modpack*” folder
– All files from .zip file should be moved here
– Run and play
– ✅
🟤 Official launcher or any other launcher
The hardest way
– Download the modpack file [here](https://modrinth.com/modpack/actionandstuffonjava/versions)
– Fabric Loader must be installed (you can find the tutorials on how to download it yourself)
– Convert the modpack from .mrpack to .zip on any website (search *mrpack to zip converter*)
– All files from .zip file should be moved to the folder with minecraft (*.minecraft* mostly)
– If you have done everything correctly modpack should start and work correctly
– Run and play
– ✅
—
## 💬 Описание – *русский*
Хорошо оптимизированный с кучей своих фишек полностью клиентский модпак. Есть мод на красивые облака, всплески на воде, и даже… на bedrock edition?
Вам ненадо ни о чем беспокоиться, ресурс паки, конфиги и шейдеры уже находятся в файле
Мы обновляемся на самые последние стабильные версии и всегда остаемся крутыми. Стабильные обновления и поддержка модпака присутствуют
Модпак упрощает обычные процессы в майнкрафте, такие как крафт или перемещения предметов
– Item Scroller – позволяет быстро перемещать предметы из инвентаря в другой инвентарь
Основная цель модпака – это красота, добавлено очень много модов которые как либо улучшают внешнюю состовляющую майнкрафта
– Better Clouds – красивые облака
– Subtle Effects – красивые партиклы при разных взаимодействиях
– И еще очень много других модов на вспески на воде или блеск на броне
### 📩 Как установить?
🟢 Modrinth App
Один из самых простых способов установки модпака
– Откройте лаунчер
– Найдите этот модпак (Action & Stuff ON JAVA)
– Нажмите
– Запустить и играть
– ✅
🌍 MultiMC / Prism Launcher
В этих лаунчерах есть 2 способа установить модпак
1:
– Нажмите в лаунчере “Добавить экземпляр (Add build)”
– Выберите “Modrinth” и найдите эту сборку (Action & Stuff ON JAVA)
– Нажмите скачать (или ОК)
– Запустить и играть
– ✅
2:
– Скачайте файл модпака [здесь](https://modrinth.com/modpack/actionandstuffonjava/versions)
– Нажмите в лаунчере “Добавить экземпляр (Add build)”
– Выберите “Импортировать из файла”
– Импортируйте файл модпака в лаунчер
– Запустить и играть
– ✅
2.1:
– Скачайте файл модпака [здесь](https://modrinth.com/modpack/actionandstuffonjava/versions)
– Захватите файл мышью и перенесите его в лаунчер (модпак начнет установливаться)
– Запускай и играй
– ✅
🦠 TLauncher
– Скачайте файл модпака [здесь](https://modrinth.com/modpack/actionandstuffonjava/versions)
– Конвертируйте модпак из .mrpack в .zip на любом сайте (ищите *mrpack to zip converter*)
– Создайте сборку в “TL Mods” (Создать модпак/экземпляр/сборку > Выберите вашу MC версию (версия файла сборки *1.21.4/8/10*) > Выберите Fabric *последняя версия* > Уберите галочку из “Ипользовать систему скинов TL” и “Использовать Optifine”)
– Откройте файлы (.minecraft) > Откройте папку “versions” > Откройте папку “*your name of modpack*”
– Все файлы из .zip файла необходимо переместить в эту папку
– Запускай и играй
– ✅
🟤 Официальный лаунчер или любой другой
Самый сложный способ
– Скачайте файл модпака [здесь](https://modrinth.com/modpack/actionandstuffonjava/versions)
– Fabric Loader должен быть установлен предварительно (вы можете найти руководство, как скачать его самостоятельно)
– Конвертируйте модпак из .mrpack в .zip на любом сайте (ищите *mrpack to zip converter*)
– Все файлы из .zip файла необходимо переместить в папку с майнкрафтом (*.minecraft* обычно)
– Если вы все сделали правильно, модпак должен запуститься и работать корректно
– Запускай и играй
– ✅
ZoomX
# ZoomX – A Simple & Lightweight Zoom Mod
**ZoomX** is a simple, lightweight, and performance-friendly zoom mod for **Minecraft Fabric**. It adds a zoom feature to the game without changing the vanilla feel. The mod works perfectly with **vanilla Minecraft**, **Sodium**, and other popular Fabric optimization mods.
If you are looking for a clean zoom experience without heavy features or FPS drops, ZoomX is the perfect choice.
### Want Smooth Zoom? Try ZoomX Smooth 👇
[](https://modrinth.com/mod/zoomx-smooth)
—
## What is ZoomX?
ZoomX allows players to zoom in and out while playing Minecraft. It is designed to be minimal and efficient, focusing only on zoom functionality. There are no unnecessary settings or complex menus—just install and use.
—
## Features
### ⚡ Lightweight & High Performance
ZoomX is extremely lightweight and has minimal impact on FPS, even on low-end systems.
### 🧩 Fabric Based
Built specifically for the Fabric mod loader, ensuring fast load times and modern mod compatibility. (Will add more compatible loaders in future)
### 🟩 Vanilla & Sodium Compatible
– Works with vanilla-style gameplay
– Fully compatible with Sodium
– Safe to use with other Fabric performance mods
### 🎮 Easy to Use
No complicated configuration. Install the mod and start zooming instantly.
—
Got issues? Join [Discord](https://discord.com/invite/spunky-insaan-851780887271571456)
ZoomUtils

Supported Versions:

Smooth, configurable zoom mod
—
Hold the zoom key (default: `C`) to zoom in. Scroll the mouse wheel while zoomed to adjust the level. Release to zoom back out.
Zoomglass
A Fabric mod that quickly puts a spyglass into your hand with a press of a button.
Made for people who prefer roleplaying aspects of a spyglass but don’t want to miss out on convenience!
Additionally, you can use a fake spyglass while in Spectator gamemode, or in Creative when you don’t have
it in your inventory.
The default keybind is `z`, and you can find it under the “Inventory” section in keybinding settings.
Requires Fabric API
Zone Miner Single Use
## Zone Miner is a NeoForge mod that adds configurable area mining.
Switch between simple mining, 3x3x3, 5x5x5, or a fully custom mining shape, all while keeping vanilla-style durability handling and tool restrictions.
### Features
– Multiple mining modes:
– `1×1`
– `3x3x3`
– `5x5x5`
– `Custom`
– In-game keybinds to switch modes and open the custom area settings
– Mining direction follows the player’s look direction
– Live white block outline preview before breaking
– Only breaks extra blocks when the held tool is appropriate
– Ore vein support
– Vanilla block breaking logic is preserved for drops and interactions
## Two Versions Available
This project is available in two separate versions for NeoForge :
### Zone Miner
The standard version uses `legacy durability`.
Your tool loses durability based on the number of blocks actually broken.
[You’ll find it here!](https://modrinth.com/mod/zone-miner-legacy)
### Zone Miner Single Use
This version keeps the same mining features, but only uses `one durability point` for the whole area break.
_You’re on the right page!_
## Controls
– `Y` : Cycle mining mode
– `U` : Open custom area settings
## Custom Area Settings
The custom mode lets you configure:
– Left
– Right
– Up
– Down
– Depth
**Zone Miner is designed to stay simple and practical**
no enchantment requirement, no complicated setup, just configurable area mining with two durability variants depending on how you want to play.
Zone Miner Legacy
## Zone Miner is a NeoForge mod that adds configurable area mining.
Switch between simple mining, 3x3x3, 5x5x5, or a fully custom mining shape, all while keeping vanilla-style durability handling and tool restrictions.
### Features
– Multiple mining modes:
– `1×1`
– `3x3x3`
– `5x5x5`
– `Custom`
– In-game keybinds to switch modes and open the custom area settings
– Mining direction follows the player’s look direction
– Live white block outline preview before breaking
– Only breaks extra blocks when the held tool is appropriate
– Ore vein support
– Vanilla block breaking logic is preserved for drops and interactions
## Two Versions Available
This project is available in two separate versions for NeoForge :
### Zone Miner
The standard version uses `legacy durability`.
Your tool loses durability based on the number of blocks actually broken.
_You’re on the right page!_
### Zone Miner Single Use
This version keeps the same mining features, but only uses `one durability point` for the whole area break.
[You’ll find it here!](https://modrinth.com/mod/zone-miner-single-use)
## Controls
– `Y` : Cycle mining mode
– `U` : Open custom area settings
## Custom Area Settings
The custom mode lets you configure:
– Left
– Right
– Up
– Down
– Depth
**Zone Miner is designed to stay simple and practical**
no enchantment requirement, no complicated setup, just configurable area mining with two durability variants depending on how you want to play.