MineGIT
### Cloud sync for Minecraft worlds!
Sync and back up your worlds between multiple devices! Fully integrated into the Minecraft client for a seamless experience when loading, saving, and downloading worlds from the cloud.
## How does it work?
Worlds that you select are uploaded to your GitHub account as repositories. Every time you quit to the title screen, a commit of the current state of your world is created and pushed to the repository on GitHub. Whenever the world is loaded, the mod will check if any new versions of the world are available in the cloud, and if so, they will be downloaded to your device.
Since this mod uses Git internally, it also means that only the files in your world save folder that you modify will be uploaded and downloaded each time, saving storage space and internet bandwidth.
## How do I set it up?
There are several steps to setting up this mod, which include creating a personal access token for GitHub, as well as choosing the worlds you would like to enable MineGIT for.
### Video guide:
### Creating a GitHub personal access token
In order to do the first-time setup, you will need to generate a GitHub personal access token through the following steps:
1. Create an account on GitHub if you do not have one already (https://github.com)
2. Navigate to the page to create a personal access token
3. Click `Generate new token`
4. Enter any name (such as MineGIT) under `Token name`
5. Scroll to `Expiration` and set it to `No expiration` (so that you do not have to repeat this process when the token expires)
6. Under `Repository access` choose `All repositories`
7. Under `Permissions`, click `Add permissions` and select `Administration` and `Contents`
8. Set `Access` on the `Administration` and `Contents` lines to `Read and write`
9. Press `Generate token` and copy the generated token to be pasted into Minecraft later (the generated token should start with `github_pat_` and be followed by a long string of letters and numbers)
### Setting up in-game
Once the mod is installed and you are in-game, do the following steps to link your GitHub account with the mod:
1. Click on the cloud button on the bottom left corner of the world creation or world selection screen (If the button does not appear, you have already previously linked your account; see the section below entitled ‘Reconfiguring account linking’)
2. Enter your GitHub username and personal access token (PAT) that you created in the previous step on the new page that appears
3. Press the button labeled `Test credentials` to make sure you’ve entered the information properly
4. You may now exit the screen and proceed to either enable sync for a world or clone an existing one
#### Reconfiguring account linking
If you have already previously set up account linking and would like to change settings afterwards, you have a couple of options to get back to the configuration screen:
– **Configure through ModMenu:** If you have ModMenu installed, simply find the mod in the mods list and open the configuration from there
– **From the world clone screen:** There is a button in the top right corner of the world cloning screen that will open the configuration screen
– **From the world selection screen:** By holding alt and clicking on the world sync button on the bottom left of the world selection screen, you will be brought back into the configuration screen
### Enabling sync for a world
World syncing needs to be enabled individually for each world you would like to sync to your GitHub account. To enable sync for a world, do the following:
1. Select a world on the world selection screen
2. Press the cloud button in the bottom left of the screen labeled `Enable world sync`
3. Confirm your decision on the next screen
This process will create a new repository named `minegit_[world folder name]` on your GitHub account, initialize a Git repository in your world save folder, and push its current state to GitHub. From this point forward, loading the world will pull the world’s latest changes from GitHub, and exiting the world will push changes to GitHub.
You can now download this world on another device to effectively sync changes between them through the next step: cloning.
### Downloading a world on a different device (Cloning)
Cloning a world will download the exact state of the world as it was last saved to GitHub. Use the following steps to clone a world:
1. Navigate to github.com in a web browser
2. Click on your profile picture in the top right corner and then `Repositories`
3. Find the repository corresponding to the world you would like to clone and copy its name
4. Back in Minecraft, click on the button with an arrow pointing downwards labelled in the bottom left corner of either the world selection screen or world creation screen
5. Paste the name of the repository you copied earlier and press `Clone`
6. You are now able to load the world like normal and have changes be synced across your devices!
### Tips & Tricks
– If you want to exit a world without pushing it to GitHub (for example, if you wanted to restart Minecraft and load the same world without having to wait for changes to be pushed), you can hold `Alt` while clicking `Save and Quit to Title`. This will skip the ‘pushing to GitHub’ step.
– Git keeps a list of all of the worlds changes every time you exit the world. This is useful, since if you have a little knowledge of how to use the Git command line interface you can rollback your world to a previous version!
– If you want to save some storage space taken up by the size of the Git repository on your computer, or make the world quicker to clone on other devices, use the `Prune World Commits` button in the edit world menu. This will delete all of the old versions of your world, leaving only the most recent one.
## Report an issue
If you run into bugs, crashes, or simply have a suggestion on how to improve the mod, please feel free to open an issue on the mod’s issue tracker!
Please include the current Minecraft version, Fabric version, mod version, and any relevant game logs when submitting an issue.
MinecraftStateMessages
# MinecraftStateMessages



A powerful Minecraft server plugin that sends real-time server status notifications to Discord via webhooks with customizable embeds.
[Features](#-features) • [Installation](#-installation) • [Configuration](#-configuration) • [Support](#-support)
—
## 📋 Features
– **🔔 Real-time Notifications** – Instant Discord notifications when your server starts or stops
– **🎨 Customizable Embeds** – Beautiful, fully customizable Discord embeds with color coding
– **🔧 Flexible Configuration** – Easy-to-use YAML configuration with sensible defaults
– **🎯 Lightweight** – Minimal performance impact on your server
## 📦 Installation
1. Download the latest `MinecraftStateMessages.jar` from the releases page
2. Place the JAR file in your server’s `plugins/` directory
3. Restart your server
4. Configure the plugin by editing `plugins/MinecraftStateMessages/config.yml`
5. Run `/reload` or restart the server to apply changes
## ⚙️ Configuration
After the first run, a `config.yml` file will be generated in `plugins/MinecraftStateMessages/`. Here’s a detailed breakdown of all configuration options:
### Basic Settings
“`yaml
# Message sent to Discord when the server starts
server-start-message: “Server has been started!”
# Message sent to Discord when the server stops
server-stop-message: “Server has been stopped!”
# Your Discord webhook URL – get this from Discord Server Settings > Integrations > Webhooks
discord-webhook-url: “https://discord.com/api/webhooks/your-webhook-url”
“`
### Embed Settings
“`yaml
# Enable or disable Discord embeds (if false, sends plain text messages)
embed-enabled: true
# Color for server start notifications
# Supported: green, red, blue, yellow, orange, purple, gray/grey, black, white
# Or use hex codes: “#2ECC71” or “2ECC71”
embed-start-color: “green”
# Color for server stop notifications
embed-stop-color: “red”
# Title displayed at the top of the embed
# Leave empty (“”) to hide the title completely
embed-title: “Minecraft Server”
“`
#### 🎨 Color Reference
| Color Name | Hex Code | Preview |
|————|———-|———|
| `green` | `#2ECC71` | 🟢 Perfect for start messages |
| `red` | `#E74C3C` | 🔴 Perfect for stop messages |
| `blue` | `#3498DB` | 🔵 General information |
| `yellow` | `#FFFF00` | 🟡 Warnings |
| `orange` | `#E67E22` | 🟠 Alerts |
| `purple` | `#9B59B6` | 🟣 Special events |
| `gray`/`grey` | `#95A5A6` | ⚪ Neutral |
| `black` | `#23272A` | ⚫ Discord dark theme |
| `white` | `#FFFFFF` | ⚪ Bright |
You can also use any custom hex color:
“`yaml
embed-start-color: “#FF6B6B” # Custom coral red
embed-stop-color: “4ECDC4” # Custom turquoise (# is optional)
“`
### Configuration Examples
#### Example 1: Minimal Setup (No Title)
“`yaml
server-start-message: “✅ Server Online”
server-stop-message: “❌ Server Offline”
discord-webhook-url: “https://discord.com/api/webhooks/123456789/abcdefg”
embed-enabled: true
embed-start-color: “green”
embed-stop-color: “red”
embed-title: “” # Empty = no title shown
“`
#### Example 2: Branded Server
“`yaml
server-start-message: “🎮 The server is now online and ready for players!”
server-stop-message: “🛑 The server is now offline for maintenance.”
discord-webhook-url: “https://discord.com/api/webhooks/123456789/abcdefg”
embed-enabled: true
embed-start-color: “#00FF00”
embed-stop-color: “#FF0000”
embed-title: “🌟 AwesomeCraft Network”
“`
#### Example 3: Simple Text Messages (No Embeds)
“`yaml
server-start-message: “[SERVER] Started successfully!”
server-stop-message: “[SERVER] Shutting down…”
discord-webhook-url: “https://discord.com/api/webhooks/123456789/abcdefg”
embed-enabled: false # Sends plain text instead of embeds
embed-start-color: “green”
embed-stop-color: “red”
embed-title: “”
“`
## 🔗 Setting Up Discord Webhook
1. Open your Discord server
2. Go to **Server Settings** → **Integrations** → **Webhooks**
3. Click **New Webhook** or **Create Webhook**
4. Customize the webhook name and channel
5. Click **Copy Webhook URL**
6. Paste the URL into `discord-webhook-url` in your config.yml
## 🛠️ Advanced Usage
### Title Visibility
The `embed-title` field has special behavior:
– **Set to any text**: Displays that text as the embed title
“`yaml
embed-title: “My Awesome Server”
“`
– **Set to empty string (`””`))**: No title will be shown
“`yaml
embed-title: “”
“`
– **Not specified/removed**: No title will be shown (same as empty)
### Multiple Webhooks (Advanced)
Want to send notifications to multiple Discord channels? You can modify the webhook URL dynamically or create multiple configurations. For advanced setups, consider forking this plugin and adding multi-webhook support.
## 🔍 Troubleshooting
### Webhook not sending
**Problem**: No messages appear in Discord
**Solutions**:
– ✅ Verify your webhook URL is correct
– ✅ Ensure `discord-webhook-url` is not set to the default placeholder
– ✅ Check server console for error messages
– ✅ Confirm the webhook hasn’t been deleted in Discord
– ✅ Test the webhook URL using a tool like webhook.site
### Colors not working
**Problem**: Embeds show wrong colors or no color
**Solutions**:
– ✅ Use supported color names (see [Color Reference](#-color-reference))
– ✅ If using hex codes, ensure format is correct: `”#FF0000″` or `”FF0000″`
– ✅ Reload the plugin after changing colors
### Title showing when it shouldn’t
**Problem**: Title appears even when set to empty
**Solutions**:
– ✅ Ensure `embed-title: “”` is exactly like this (empty quotes)
– ✅ Remove any spaces between quotes: ❌ `” “` → ✅ `””`
– ✅ Reload/restart server after config changes
## 🤝 Support & Links
### Get Help & Stay Connected


– **💬 Support Server**: dsc.gg/gglvxd – Get help, report bugs, or suggest features
– **👨💻 Developer**: gglvxd.net – Visit the developer’s website
– **🏢 Organization**: Fryde – Powered by Fryde
## 📝 Permissions
This plugin requires no special permissions. It only needs:
– File system access for config management
– Network access for webhook requests
## 📜 License
This project is licensed under the MIT License – see the [LICENSE](LICENSE) file for details.
## 🙏 Credits
Developed with ❤️ by gglvxd
—
**Made with 💜 by gglvxd | Powered by Fryde**
*If you like this plugin, consider giving it a ⭐ and joining our Discord!*
MI-PBR
A minimal PBR resource pack for the Modern Industrialization mod. Requires a shader supporting “Lab” or “Old/seus” PBR.
This project is still an early work-in-progress so not all blocks are complete.
Message Display Time
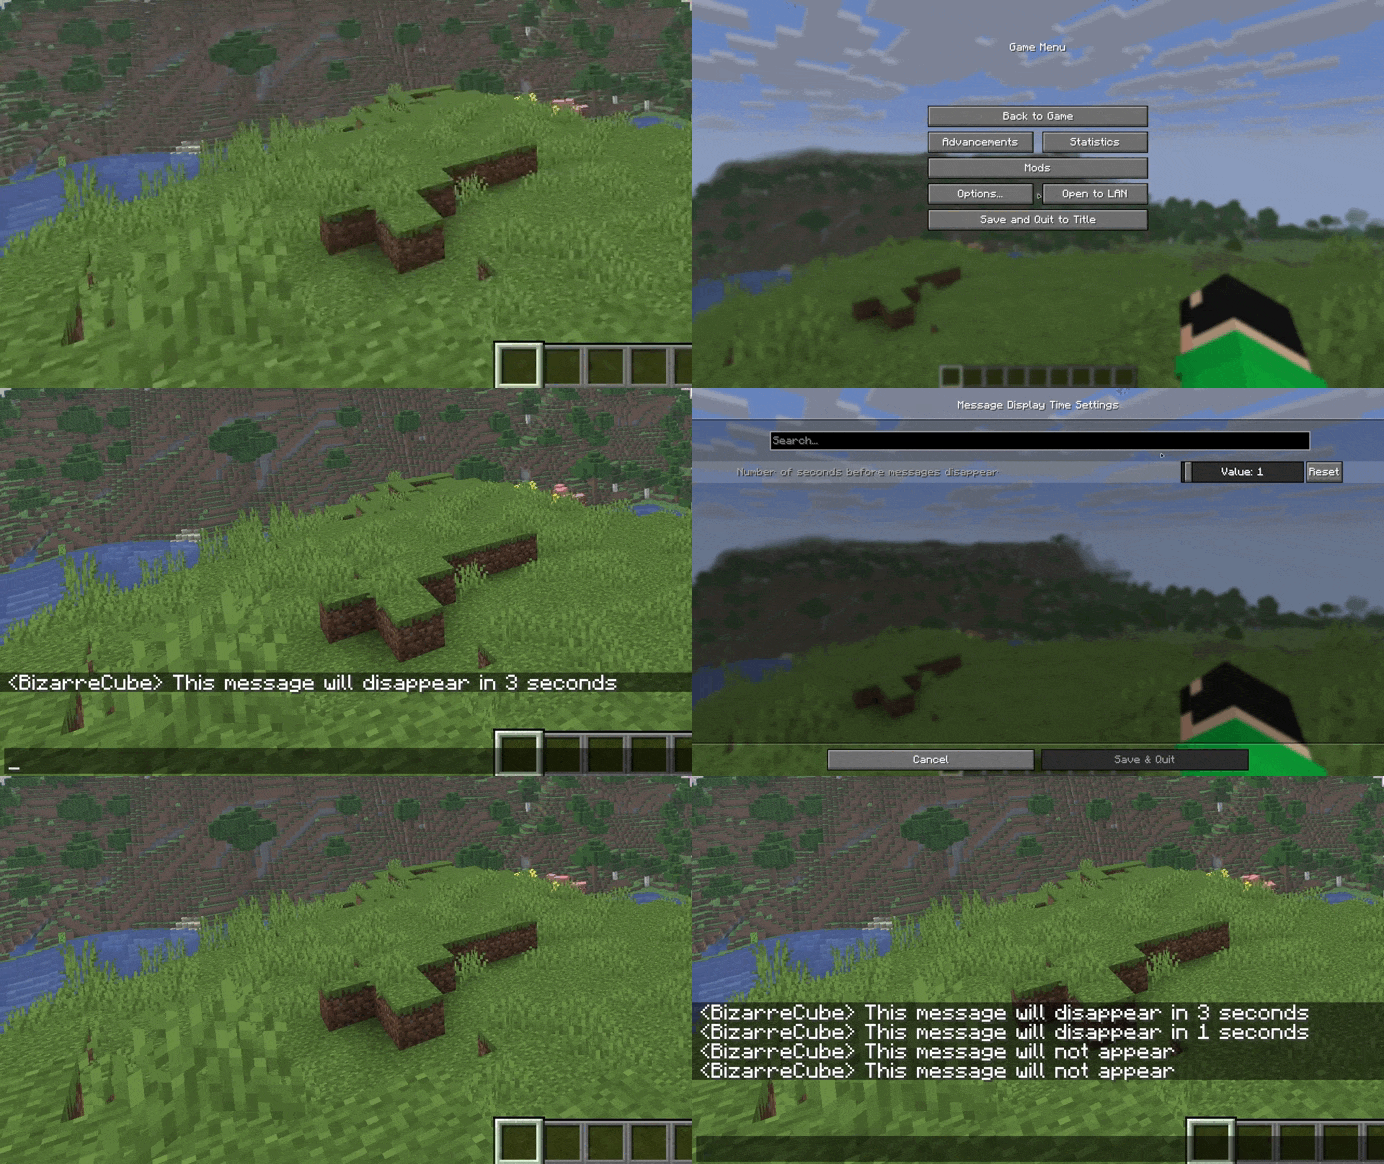
## Message Display Time
A mod that adds a setting for seconds before messages in chat disappear.
## Usage
By default, the mod changes the number of seconds before disappearance from 10 to 5, but the mod can be customized using the Cloth Config API mod.
## Support
If you like my mods, feel free to support their creator!

Meowl Totem of Undying
– EN: Meowl or “kotosova”, is an Internet meme that is a hybrid created using a photo editor that combines the head of a cat with the body of an owl.
– RU: Meowl (с англ. — «Меовл»), также известный как «мяовл», «мяул», «мяуль» или «котосова», это интернет-мем, представляющий собой созданный с помощью фоторедактора гибрид, который сочетает голову кошки с телом совы
Check collection with all memes + streamers Totems
Mellstroy (Я уже красный) Totem of Undying
**EN**: This resource pack replaces the original **Totem of Undying** with the Meme from Mellstroy **I’m already red, it won’t work out culturally** with sound. This meme has become very popular on TikTok over the past couple of years.
**RU**: Этот ресурспак заменяет оригинальный **Тотем бессмертия** на Мем от Меллстроя **Я уже красный, культурно не получится** со звуком, данный мем за последние пару лет стал очень популярным в Тик Ток
– Омайгадность Тотем
– Тотем Меллстрой
– ПОЛНАЯ КОЛЛЕКЦИЯ РЕСУРСПАКОВ – МЕМЫ + СТРИМЕРЫ

Meadow Grass Everywhere!
#
Meadow Grass Everywhere!
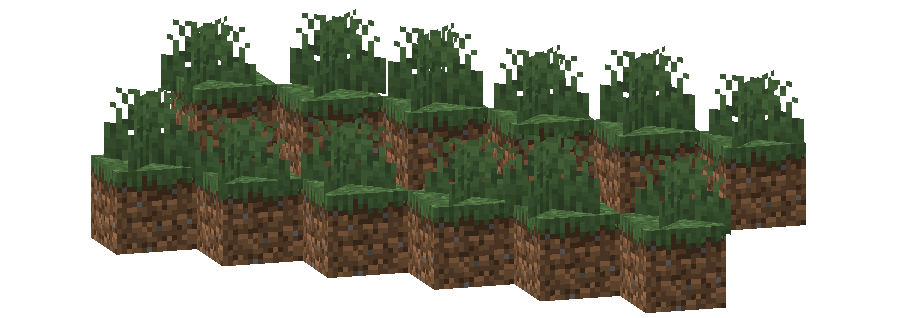
This pack changes the **Grass colormap** so that it always matches the color of the **Meadow biome(s)**.
The Meadow uses the color `#83BB6D` in vanilla Minecraft.
List of biomes that use this color in vanilla Minecraft
* Meadow
Additional Information
* build_time: `2025-10-06T02:13:39+02:00`
* build_user: `rotgruengelb`
## Limitations
Some biomes use hardcoded colors that cannot be overridden by resource packs.
This is a limitation of Minecraft itself, not of this pack.
## Installation
Download the pack and place it in your `resourcepacks` folder.
## About “Oh My Colormap!”
A collection of resource packs that change Minecraft’s colormaps.
### Rotgruengelb (Developer & Artist):


MCSM enchantment glint
**Enchantment glint in Minecraft story mode looks different than the one in minecraft**, so i decided to **make a texture pack** that **looks similar** to the one seen in Minecraft story mode, it **isnt the same** but its good enough. this texture pack **will be updated in the future** because it **isnt perfect**
Max Totem of Undying
– ENG: Max is a Russian cross-platform instant messaging service based on the digital system of the same name. It was founded in 2025 by the VK technology company. Resourcepack replaces the immortality totem with the logo
– RU: Max — российский кроссплатформенный сервис мгновенного обмена сообщениями на базе одноимённой цифровой системы. Основан в 2025 году технологической компанией VK. Ресурспак заменяет тотем бессмертия на логотип
Check collection with all memes + streamers Totems
– Тотем Я уже Красный-totem-of-undying)
– Тотем Меллстрой
– Colored Bricks
– MACAN Totem of Undying
Masa’s Mods lzh Translation Pack
> 喜报:
本翻译包已被Litematica维护者Sakura Ryoko合并!
这意味着,对于新版本日后不必下载本资源包,也可以使用Litematica文言翻译了(
查看详情)。
不过,对于老版本的Masa系列模组,仍然需要翻译包的支持。
## 简介
> 注意:这**不是简体中文**翻译!!!如果你想要简体中文或繁体中文翻译,建议点击此处。
这是一份**文言**翻译资源包,用于填补MASA系列模组缺少文言的空白,目前翻译进度较低。
~~如果你是一个生电大佬,非常熟悉MASA系列模组,觉得原版的MASA系列模组还是太好用了的话,可以尝试下载这个资源包来抹平您的大脑皮层(笑)你也可以把这个翻译包假扮成其他资源包后发给你的朋友,硬控他们几分钟。~~
|支持的模组| 原名 | 链接 |
| ——- | ——- | ——- |
|**清影**|Litematica|Modrinth|
|**摩輕庫**|MaLiLib|Modrinth|
|**眇訊**|MiniHUD|Modrinth|
|**伺服司**|Servux|Modrinth|
|**調祛術**|Tweakeroo|Modrinth|
## 如何使用
1. 确保您的Minecraft装载了MASA系列模组。
2. 下载该项目最新的翻译包。
3. 将翻译包拖入”resoucepacks”文件夹并装载。
4. 将您的Minecraft游戏语言调整为“`文言(華夏)“`。若无法生效大多是这一步忘了。
5. 锵锵!不出意外的话,您的MASA模组此时已翻译成文言了吧。可以按下“`M“`键打开Litematica的菜单检验。
## 版本命名规则
这一部分有点长,请展开观看
1. 资源包分为`Release` `Alpha` `Beta` 三类。分别对应正式版、测试版、早期测试版。R1.0之前的版本都是Alpha版本,R1.0之后的所有测试版都是Beta版本。
2. 正式版命名规则如下
`摩挲改囊文言全譯 R{version}.zip`
例如:摩挲改囊文言全譯 R1.0.zip
其中`version`由两位有效数字组成。第一位为大版本号,第二位为大版本号的修订号。大版本号分配计划如下表所示:
|序号|达成标志|大版本号|情况|
|—|—|—|—|
|1|资源包被Sakura合并|1.0|√已达成|
|2|完成Litematica翻译|2.0|×未达成|
|3|完成MaLiLib翻译|3.0|×未达成|
|4|完成Tweakeroo翻译|4.0|×未达成|
|5|完成MiniHUD翻译|5.0|×未达成|
|6|完成Servux翻译|6.0|×未达成|
|敬请期待|……|……|……|
3. 测试版命名规则如下
`摩挲改囊文言全譯 B{version}.{timestamp}.zip`
例如:摩挲改囊文言全譯 B1.1.260219.zip
其中`version`为对应预发布的正式版本号。`timestamp`为构建时间。
> 注意,早期Alpha测试版以`摩挲改囊文言全譯 A{version}.zip`命名。因为之后不再会有Alpha版本(只有Beta版本),所以这种方式将不再使用。
希望这能帮助你更好理解并下载本翻译包。
## 贡献
发现大量词条未翻译/错误?想要参与翻译?点击这里进入Crowdin参与翻译!(审核通过方可翻译)
若发现有以下情况,请报告到项目Issue:
– 文不对意
– 用字讹误
– 翻译错用
– 语法不通
– 缺少变量
– 用词不统一
– 翻译包失效
– 与原版已有的术语不一致
– 使用了§等格式化代码而显示不正确
## 进度






