MineZRoy’s Avontuur – Music Disc
Changes music disc 13 to a very good song about MineZRoy. 100% recommend it!
Changes music disc 13 to a very good song about MineZRoy. 100% recommend it!
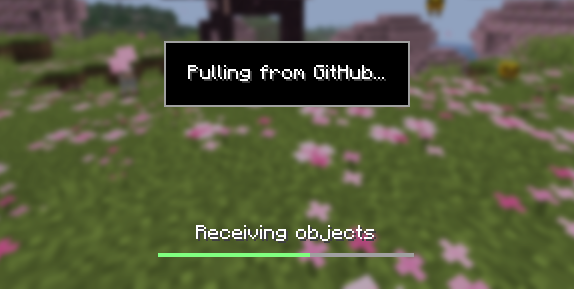
### Cloud sync for Minecraft worlds!
Sync and back up your worlds between multiple devices! Fully integrated into the Minecraft client for a seamless experience when loading, saving, and downloading worlds from the cloud.
## How does it work?
Worlds that you select are uploaded to your GitHub account as repositories. Every time you quit to the title screen, a commit of the current state of your world is created and pushed to the repository on GitHub. Whenever the world is loaded, the mod will check if any new versions of the world are available in the cloud, and if so, they will be downloaded to your device.
Since this mod uses Git internally, it also means that only the files in your world save folder that you modify will be uploaded and downloaded each time, saving storage space and internet bandwidth.
## How do I set it up?
There are several steps to setting up this mod, which include creating a personal access token for GitHub, as well as choosing the worlds you would like to enable MineGIT for.
### Video guide:
### Creating a GitHub personal access token
In order to do the first-time setup, you will need to generate a GitHub personal access token through the following steps:
1. Create an account on GitHub if you do not have one already (https://github.com)
2. Navigate to the [page to create a personal access token](https://github.com/settings/personal-access-tokens)
3. Click `Generate new token`
4. Enter any name (such as MineGIT) under `Token name`
5. Scroll to `Expiration` and set it to `No expiration` (so that you do not have to repeat this process when the token expires)
6. Under `Repository access` choose `All repositories`
7. Under `Permissions`, click `Add permissions` and select `Administration` and `Contents`
8. Set `Access` on the `Administration` and `Contents` lines to `Read and write`
9. Press `Generate token` and copy the generated token to be pasted into Minecraft later (the generated token should start with `github_pat_` and be followed by a long string of letters and numbers)
### Setting up in-game
Once the mod is installed and you are in-game, do the following steps to link your GitHub account with the mod:
1. Click on the cloud button on the bottom left corner of the world creation or world selection screen (If the button does not appear, you have already previously linked your account; see the section below entitled ‘Reconfiguring account linking’)
2. Enter your GitHub username and personal access token (PAT) that you created in the previous step on the new page that appears
3. Press the button labeled `Test credentials` to make sure you’ve entered the information properly
4. You may now exit the screen and proceed to either enable sync for a world or clone an existing one
#### Reconfiguring account linking
If you have already previously set up account linking and would like to change settings afterwards, you have a couple of options to get back to the configuration screen:
– **Configure through ModMenu:** If you have [ModMenu](https://modrinth.com/mod/mod-menu) installed, simply find the mod in the mods list and open the configuration from there
– **From the world clone screen:** There is a button in the top right corner of the world cloning screen that will open the configuration screen
– **From the world selection screen:** By holding alt and clicking on the world sync button on the bottom left of the world selection screen, you will be brought back into the configuration screen
### Enabling sync for a world
World syncing needs to be enabled individually for each world you would like to sync to your GitHub account. To enable sync for a world, do the following:
1. Select a world on the world selection screen
2. Press the cloud button in the bottom left of the screen labeled `Enable world sync`
3. Confirm your decision on the next screen
This process will create a new repository named `minegit_[world folder name]` on your GitHub account, initialize a Git repository in your world save folder, and push its current state to GitHub. From this point forward, loading the world will pull the world’s latest changes from GitHub, and exiting the world will push changes to GitHub.
You can now download this world on another device to effectively sync changes between them through the next step: cloning.
### Downloading a world on a different device (Cloning)
Cloning a world will download the exact state of the world as it was last saved to GitHub. Use the following steps to clone a world:
1. Navigate to [github.com](https://github.com) in a web browser
2. Click on your profile picture in the top right corner and then `Repositories`
3. Find the repository corresponding to the world you would like to clone and copy its name
4. Back in Minecraft, click on the button with an arrow pointing downwards labelled in the bottom left corner of either the world selection screen or world creation screen
5. Paste the name of the repository you copied earlier and press `Clone`
6. You are now able to load the world like normal and have changes be synced across your devices!
### Tips & Tricks
– If you want to exit a world without pushing it to GitHub (for example, if you wanted to restart Minecraft and load the same world without having to wait for changes to be pushed), you can hold `Alt` while clicking `Save and Quit to Title`. This will skip the ‘pushing to GitHub’ step.
– Git keeps a list of all of the worlds changes every time you exit the world. This is useful, since if you have a little knowledge of how to use the Git command line interface you can rollback your world to a previous version!
– If you want to save some storage space taken up by the size of the Git repository on your computer, or make the world quicker to clone on other devices, use the `Prune World Commits` button in the edit world menu. This will delete all of the old versions of your world, leaving only the most recent one.
## Report an issue
If you run into bugs, crashes, or simply have a suggestion on how to improve the mod, please feel free to open an issue on the mod’s [issue tracker](https://github.com/ModMonster/MineGIT/issues)!
Please include the current Minecraft version, Fabric version, mod version, and any relevant game logs when submitting an issue.
**EN**: This resource pack replaces the original **Totem of Undying** with the Meme from Mellstroy **I’m already red, it won’t work out culturally** with sound. This meme has become very popular on TikTok over the past couple of years.
**RU**: Этот ресурспак заменяет оригинальный **Тотем бессмертия** на Мем от Меллстроя **Я уже красный, культурно не получится** со звуком, данный мем за последние пару лет стал очень популярным в Тик Ток
– [Омайгадность Тотем](https://modrinth.com/resourcepack/ohmygod-totem-of-undying)
– [Тотем Меллстрой](https://modrinth.com/resourcepack/mellstroy-totem-of-undying)
– [ПОЛНАЯ КОЛЛЕКЦИЯ РЕСУРСПАКОВ – МЕМЫ + СТРИМЕРЫ](https://modrinth.com/collection/sfDcDGAi)

Fixes [MC-122296](https://bugs.mojang.com/browse/MC-122296)
Fixes [MC-121772](https://bugs.mojang.com/browse/MC-121772)
Fixes [MC-59810](https://bugs.mojang.com/browse/MC-59810)
Fixes [MC-22882](https://bugs.mojang.com/browse/MC-22882)
Fixes control + tab and control + escape not being detected
Specific fixes:
– Correctly detects left click while control is pressed
– Make trackpad scrolling not scroll a ridiculous number of items at once
– It also fixes momentum scrolling (which changes the number of scroll events based on how quickly you did it, even by like x5-10, meaning you couldn’t easily scroll to the correct item)
– On the trackpad it also only considers scrolling while fingers are on the trackpad (and the same for any fancy mice that support the relevant api e.g. probably apple’s fancy mice/trackpad thing)
– It also fixes scrolling being broken when shift is down on some older mice.
– When dropping an item, Minecraft checks for command + the key, since the default key is Q, this doesn’t make sense, so this mod allows both control + key and command + key to work
– Fixes control + tab and control + escape not being detected
Menu Options (under Mouse Settings Screen):
– Option for trackpad scrolling sensitivity (macOS only)
– Option to enable momentum scrolling on hotbar (macOS only)
– Option to disable workaround for smooth scrolling in interfaces (macOS only)
– Option to reverse scrolling of the whole game
– Option to reverse scrolling of the hotbar
– Option to disable the fix for the ctrl + left click becomes right click bug (macOS only)
On platforms other than macOS, the mod does nothing (except the aformentioned menu options), so it can be safely included in any modpack.
Requires Fabric Loader 0.18.5+
Requires Minecraft 1.14+
NOTE!
If you get an error like the following, you need to update Fabric Launcher to the version specified above. Some launchers may require you to update fabric launcher, remove macos input fixes mod fully, and then re-add macos input fixes mod. See https://github.com/hamarb123/MCMacOSInputFixes/issues/60 for the original issue. Note that the “More details” section is very misleading, and parts around it about my mod should be ignored (try disabling it, after the steps before for re-installing, if you are still getting errors to confirm that it is actually an issue with this mod).

Github repository: [https://github.com/hamarb123/MCMacOSInputFixes](https://github.com/hamarb123/MCMacOSInputFixes).
And yes, I know I need a better icon 😉
### DISCLAIMER
As [required](https://www.minecraft.net/en-us/usage-guidelines) to mention prominently according to Mojang – THIS IS NOT AN OFFICIAL MINECRAFT PRODUCT. NOT APPROVED BY OR ASSOCIATED WITH MOJANG OR MICROSOFT.
View the license for the disclaimer of the actual mod.
**LoginPhaseProxy** is a somewhat “*simple*” Velocity Plugin that allows you to proxy the LoginPluginMessagePacket from backend server to the player and LoginPluginResponsePacket from the player to the backend server. This is useful for modded backend servers that rely on Login Plugin Message communication to work, such as [AutoModpack](https://github.com/Skidamek/AutoModpack).
> Disclaimer: This plugin is in early development and may contain bugs and performance issues. Use it at your own risk.
## 🔁 When to use
| Author(s) | Mod |
|—————————————–|——————————————————————————–|
| [Skidam](https://github.com/Skidamek) | [AutoModpack](https://github.com/Skidamek/AutoModpack) (Fabric/Forge/Neoforge) |
> You’re welcome to suggest new use cases via [Issue](https://github.com/caiostoduto/LoginPhaseProxy/issues/new/choose) or [Pull Request](https://github.com/caiostoduto/LoginPhaseProxy/pulls)!
## ❓ What does it solve (detailed)

Normal Setup ⦁ Made in Figma
On a normal Velocity setup, when a player connects to the proxy, they go through the (P ↔ V) Login Phase, exchanging packets with the Velocity until the proxy sends a Server Login Success Packet, completing the (P ↔ V) Login Phase and triggering the backend connection process. The backend server then goes through its own (V ↔ B) Login Phase, where it may send Login Plugin Message Packets to the Velocity, and they can’t be forwarded to the player, because the (P ↔ V) Login Phase is already complete, so Velocity reponds them with an empty data Login Plugin Response Packet, as it doesn’t know how to handle them. This is a problem for modded backend servers that rely on Login Plugin Message communication to work, such as [AutoModpack](https://github.com/Skidamek/AutoModpack), as they won’t be able to send the necessary data to the player during the Login Phase, and the player won’t be able to join the backend server. This plugin tries to solve this issue by proxying the Login Plugin Message communication between the player and the backend server, allowing modded backend servers to work with Velocity without any issues.
## ✨ How it works (detailed)
~~Basically black magic 🪄🔮~~. It uses [Java Reflection](https://www.oracle.com/technical-resources/articles/java/javareflection.html) to access the internal Velocity classes [ProxyServer](https://github.com/PaperMC/Velocity/blob/ad8de4361c9d6e93b818d3381e85b14e0c90ad05/proxy/src/main/java/com/velocitypowered/proxy/VelocityServer.java) -> [ConnectionManager](https://github.com/PaperMC/Velocity/blob/dev/3.0.0/proxy/src/main/java/com/velocitypowered/proxy/network/ConnectionManager.java)[[1]](https://github.com/caiostoduto/LoginPhaseProxy/blob/main/src/main/java/com/caiostoduto/loginPhaseProxy/initializer/VelocityChannelInitializer.java) to override the serverChannelInitializer[[2]](https://github.com/caiostoduto/LoginPhaseProxy/blob/main/src/main/java/com/caiostoduto/loginPhaseProxy/initializer/FrontendChannelInitializer.java) and backendChannelInitializer[[3]](https://github.com/caiostoduto/LoginPhaseProxy/blob/main/src/main/java/com/caiostoduto/loginPhaseProxy/initializer/BackendChannelInitializer.java), so it can intercept the Velocity communication with the player (P <-> V)[[4]](https://github.com/caiostoduto/LoginPhaseProxy/blob/main/src/main/java/com/caiostoduto/loginPhaseProxy/intercept/FrontendInterceptor.java) and backend server (V <-> S)[[5]](https://github.com/caiostoduto/LoginPhaseProxy/blob/main/src/main/java/com/caiostoduto/loginPhaseProxy/intercept/BackendInterceptor.java), respectively.

Plugin Implementation ⦁ Made in Figma
With that, our plugin watches the Login Phase player connection until it sees a SetCompressionPacket(5) (optionally) and ServerLoginSuccessPacket(6), adding them to a buffer instead of sending them to the player and synthetically sends a loginAcknowledgedPacket(7) to the Velocity pipeline, tricking it into thinking the Login Phase is complete and starting the backend connection process. To make sure the Velocity doesn’t mess the packet interception and sending process, our plugin removes stealthly (so that it doesn’t trigger it’s handlerRemoved lifecycle[[6]](https://github.com/caiostoduto/LoginPhaseProxy/blob/main/src/main/java/com/caiostoduto/loginPhaseProxy/utils/StealthPipeline.java)) the handlers from the Velocity serverChannel pipeline[[4]](https://github.com/caiostoduto/LoginPhaseProxy/blob/main/src/main/java/com/caiostoduto/loginPhaseProxy/intercept/FrontendInterceptor.java) that were added after the Login Phase to Config Phase transition ([MinecraftCompressorAndLengthEncoder](https://github.com/PaperMC/Velocity/blob/ad8de4361c9d6e93b818d3381e85b14e0c90ad05/proxy/src/main/java/com/velocitypowered/proxy/protocol/netty/MinecraftCompressorAndLengthEncoder.java#L33) and [MinecraftCompressDecoder](https://github.com/PaperMC/Velocity/blob/ad8de4361c9d6e93b818d3381e85b14e0c90ad05/proxy/src/main/java/com/velocitypowered/proxy/protocol/netty/MinecraftCompressDecoder.java#L34), others are removed naturally afterwards). Also, our plugin adds the [MinecraftVarintLengthEncoder](https://github.com/PaperMC/Velocity/blob/ad8de4361c9d6e93b818d3381e85b14e0c90ad05/proxy/src/main/java/com/velocitypowered/proxy/protocol/netty/MinecraftVarintLengthEncoder.java#L33)[[4]](https://github.com/caiostoduto/LoginPhaseProxy/blob/main/src/main/java/com/caiostoduto/loginPhaseProxy/intercept/FrontendInterceptor.java) back (was removed at the transition) and sets the [MinecraftDecoder](https://github.com/PaperMC/Velocity/blob/ad8de4361c9d6e93b818d3381e85b14e0c90ad05/proxy/src/main/java/com/velocitypowered/proxy/protocol/netty/MinecraftDecoder.java#L34) state to StateRegistry.LOGIN[[4]](https://github.com/caiostoduto/LoginPhaseProxy/blob/main/src/main/java/com/caiostoduto/loginPhaseProxy/intercept/FrontendInterceptor.java) so the packets are properly encoded and decoded.
If the backend server sends a LoginPluginMessagePacket(10) during its Login Phase, our plugin will intercept it and send it to the player(11), and if the player sends a LoginPluginResponsePacket(12), our plugin will intercept it and send it to the backend server(13). This way, we can effectively proxy the LoginPluginMessagePacket and LoginPluginResponsePacket between the player and the backend server, allowing modded backend servers to work with Velocity without any issues. Then, when the backend server ends the Login Phase sending the ServerLoginSuccessPacket(15), our plugin will flush the buffered packets to the player, completing the Login Phase and allowing the player to join the backend server as normal. Afterwards, if the user sends a LoginAcknowledgedPacket (clientProtocolVersion >= ProtocolVersion.MINECRAFT_1_20_2)(16) after the Login Phase is complete, our plugin will simply ignore it, as it is not expected to be sent by the player at that point. Finally, the plugin will restore the [MinecraftDecoder](https://github.com/PaperMC/Velocity/blob/ad8de4361c9d6e93b818d3381e85b14e0c90ad05/proxy/src/main/java/com/velocitypowered/proxy/protocol/netty/MinecraftDecoder.java#L34) state to its previous state (Config Phase).
So, yeah, *basically black magic* 🪄🔮. Yayyyy!
## 🙏 Acknowledgements
– [Skidam](https://github.com/Skidamek), who inspired me to create this plugin!
– [lucas-gcp](https://github.com/lucas-gcp), who supported me and helped with testing!
A lightweight mod that cleans old, unused log files.
The best thing is that this mod keeps files not based on creation date, but the most recent access (of any kind) to the file, so logs that are still being accessed for whatever reason are not removed unwillingly.
It works both client-side only and server-side only, and works in every Minecraft version.
By default, it will clean logs that haven’t been used in more than 14 days, so there’s plenty of time in case you ever need them for debugging, but you can configure it to any amount of days you want.
## Configuration
You can find the mod’s configuration file in `config/logcleaner.json`. There’s two options you can change in there:
– `daysOld`: The number of days a log has to have been unused in order for it to be deleted. Defaults to `14`
– `silent`: If set to `true`, Log Cleaner will not send a message with the amount of deleted log files to the log. Defaults to `false`
## Description
Litematica is a modern schematic mod primarily targeting light mod loaders like LiteLoader on MC 1.12.x, Rift on MC 1.13.x and Fabric on MC 1.14+.
There is also a Forge version, but currently only for MC 1.12.2. For later MC versions there are currently only third party ports such as [Forgematica](https://modrinth.com/mod/forgematica).
Litematica has all the main features (plus a bunch more) of the old [Schematica](https://legacy.curseforge.com/minecraft/mc-mods/schematica) mod, except for the printer, which is not planned for Litematica itself, but instead is left to extension mods (see: [aria1th printer](https://modrinth.com/mod/litematica-printer-easyplace-extension) or [the other printer](https://modrinth.com/mod/litematica-printer)).
## Compatibility with shaders
**Litematica’s rendering doesn’t currently work properly with shaders (even with Iris) in 1.21.3+. So when you need to use Litematica (schematic rendering), disable shaders.**
In older MC versions the rendering works better with shaders, at least with Iris, but also depending on the shader pack. Some shader packs break the rendering pretty badly, but some used to work pretty nicely. Optifine in general is/was a lot more problematic, pretty much you can’t use shaders at all with Optifine if you use Litematica. The general recommendation is to use Sodium (and Iris) instead of Optifine.
## Hotkeys
The default hotkey to open the Litematica main menu is `M`.
Note: If you use a non-QWERTY keyboard layout, then the keys may be different, such as `M` becoming `,` on AZERTY.
– `M + C` – The direct hotkey to open the **c**onfig menu
– `M + R` – Toggle ON/OFF ALL **r**endering from Litematica
– `M + G` – Toggle ON/OFF just schematic rendering (“**g**host blocks” – all HUDs for example will still render)
– `M + T` – Toggle ON/OFF the “**t**ool item” (which is by default a stick) functionality
– `M + P` – Directly open the Schematic **P**lacements menu/list
– `M + V` – Open the Schematic **V**erifier menu
– `Numpad minus` – Open the placement configuration menu for the currently selected placement
– `Numpad multiply` – Open the Area Editor menu
– `Page Up/Down` – Change the selected layer in the render layers settings
– `M + Page Up/Down` – Change the render layers mode
– `Ctrl + scroll` (holding the tool) – Cycle the “tool mode” (there is also a button for this in the lower left corner of the main menu)
– `Alt + scroll` (holding the tool) – Nudge/move the selected placement or area selection box or corner (depending on the tool mode) in the direction the player is looking at
– `Ctrl + M` – Toggle or cycle the “sub-mode” or main setting of some of the “tool modes”, such as `pasteReplaceBehavior` in Paste mode, the `Corners` vs. `Expand` behavior in Area Selection mode, or the `Area` vs. `Placement` behavior of the Delete mode
## Warning for multiplayer
The Easy Place mode feature may get you banned on some servers!
The Easy Place feature will always be clicking on the target position’s air block, and this can easily be detected by anti-cheat systems. So this can result in at least two things: The block placement will just be rejected and you just get client-side ghost blocks, or some anti-cheat system flags that as cheating and auto-bans you from the server. So before using Easy Place, find out of it’s allowed on the server!
## If you have Optifine…
In general I don’t recommend using Optifine (with Litematica, or otherwise) due to the various rendering issues it causes. Instead I would recommend using Sodium and/or Iris if you want shaders.
If you have Optifine installed, then there are some options that you most likely will need to disable in Optifine, or otherwise it will break the schematic rendering:
– If you get glitchy weird triangles, then in 1.16+ first try updating to the latest Litematica version. If that doesn’t work, then set shaders to `OFF` (**not** `Internal`) and restart the game.
– `Render Regions` probably needs to be disabled to prevent weird rendering issues (the schematic partially rendering in weird places)
– `Fast Render` might also need to be disabled if there are still some weird HUD/GUI rendering issues
## Documentation
There is a [wiki](https://github.com/maruohon/litematica/wiki). The wiki is still being worked on, and it will probably have a new address at some point (or rather there will be a new wiki in a new location with a lot more coverage).
### Other/older documentation and explanations, some FAQ answers
Here is a Reddit post that explains the very basics of the mod:
– https://old.reddit.com/r/Minecraft/comments/cqdmkk/anyone_can_help_me_how_do_i_make_schematics_with/exeug78/
Litematica – Easy Place support on servers
– https://old.reddit.com/r/litematica/comments/1c7j79l/easy_place_on_server/l0hzmkt/
Schematic format conversions:
– https://old.reddit.com/r/Minecraft/comments/oabwea/schem_files_work_in_litematica_but_schematic/h3ju3sy/
Litematica Normal selection mode with sub-regions:
– https://old.reddit.com/r/feedthebeast/comments/r9n9mi/litematicas_addselectionbox_keybind_wont_work/
– https://old.reddit.com/r/feedthebeast/comments/r9n9mi/litematicas_addselectionbox_keybind_wont_work/hnpe9yg/
Litematica – hiding an area selection:
– https://github.com/maruohon/litematica/discussions/755#discussioncomment-6772682
– https://old.reddit.com/r/fabricmc/comments/yw9r5y/litematica_1192_issues/ixr7l5h/
Litematica – can’t create new selection sub-regions (in Simple mode):
– https://www.curseforge.com/minecraft/mc-mods/litematica?comment=2694
Litematica – Normal/Multi-Region area selection tutorial:
– https://github.com/maruohon/litematica/issues/716#issuecomment-1596121219
Litematica – Easy Place on a server with FabricCarpet but no CarpetExtra:
– https://discord.com/channels/169369095538606080/566649314001158165/1235158483792433214
– https://discord.com/channels/169369095538606080/566649314001158165/1221223833889935420
Litematica – easy/fast selections tutorial:
– https://discord.com/channels/169369095538606080/566649314001158165/1187372903377936435
Litematica – schematic formats:
– https://discord.com/channels/169369095538606080/183172448919748608/1180841121845354516
– https://discord.com/channels/169369095538606080/566649314001158165/1176569283271213098
– https://discord.com/channels/169369095538606080/566649314001158165/1097540707931127938
– https://discord.com/channels/169369095538606080/169369095538606080/1081089742944337941
– https://discord.com/channels/169369095538606080/566649314001158165/1097564948999184394
– https://github.com/maruohon/litematica/issues/812#issuecomment-1924300257
Litematica – saving and pasting with block entity data:
– https://discord.com/channels/169369095538606080/566649314001158165/1193304174838960200
Litematica – Material Lists variants:
– https://www.reddit.com/r/litematica/comments/15yz2bo/material_list_not_showing_up/jxfiwvh/
Litematica – Manual Origin issue:
– https://github.com/maruohon/litematica/issues/751#issuecomment-1671611897
Litematica – placing stairs correctly:
– https://github.com/maruohon/litematica/issues/797#issuecomment-1848386879
Litematica – performance tips with large schematics:
– https://discord.com/channels/169369095538606080/566649314001158165/1186744945399320647
Litematica – large schematics, bad performance or crashes, what to do:
– https://discord.com/channels/169369095538606080/566649314001158165/1122755969651318894
Litematica – how to only show one block type at a time:
– https://discord.com/channels/169369095538606080/566649314001158165/1133702185121755258
Litematica not working/keys not working:
– https://discord.com/channels/169369095538606080/566649314001158165/1196124302634922075
Litematica “only render one block”:
– https://discord.com/channels/169369095538606080/566649314001158165/1061881509579075684
Litematica – finding the schematics directory/game directory:
– https://old.reddit.com/r/litematica/comments/1co6vh4/downloading_schematics_on_different_versions_of/l3c21l9/
– https://old.reddit.com/r/litematica/comments/13es48n/how_to_import_schematics_on_mac/kb8bu5d/
Litematica – using sub-regions:
– https://github.com/maruohon/litematica/discussions/647
Litematica – pasting redstone on servers:
– https://discord.com/channels/169369095538606080/566649314001158165/1063578995347685446
– https://legacy.curseforge.com/minecraft/mc-mods/litematica?comment=2838
– https://discord.com/channels/169369095538606080/566649314001158165/1227276878830764183
Litematica – pasting inventory contents on servers, feat. Litemoretica:
– https://old.reddit.com/r/litematica/comments/1cg186f/items_wont_transfer/
Litematica – paste task not running + somewhat comprehensive mspt and profiling quick howto:
– https://github.com/maruohon/litematica/issues/656
Litematica – schematic placement explained:
– https://github.com/maruohon/litematica/issues/703#issuecomment-1553132401
Litematica – material list:
– https://discord.com/channels/169369095538606080/566649314001158165/1071408321417973780
Litematica – performance tips with large schematics:
– https://discord.com/channels/169369095538606080/566649314001158165/1198321606536200324
Litematica – no schematics directory in the .minecraft directory:
– https://www.reddit.com/r/fabricmc/comments/jn8u5d/how_do_i_add_a_schematic_for_litematic_to_load/jhk6941/
Litematica “not working” (not in Controls) -> F3, malilib keys, Mod Menu:
– https://discord.com/channels/169369095538606080/169369095538606080/1197972330958295110
World Edit pasting:
– https://old.reddit.com/r/technicalminecraft/comments/j9ipu1/how_can_i_load_a_schem_file_that_i_downloaded/g8k49xj/
MacOS how to go up one directory:
– https://discord.com/channels/169369095538606080/1135325334565298237/1186539038572822618
## Youtube tutorials
Here are some of the better Youtube tutorial videos I’ve come across.
[](https://modrinth.com/project/I7bAUQBi)
[](https://discord.gg/FVq3j5heAc)
[](https://fabricmc.net/)
[](https://quiltmc.org/)
[](https://neoforged.net/)
[](minecraftforge.net)
___
## What’s Killer Head ?
**Killer Head** is a project to drop the killer’s head when his victim dies.
## How it works ?
### Edit player loot table `entities/player.json`
Adds a player head to the death of a player and correlates the characteristics of the killer.
## Complementary
You can also use [Drop Head](https://modrinth.com/project/drop-head).
Here’s [Stackable Heads](https://modrinth.com/project/stackable-heads) which is interesting to use.
## Compatibility
**Killer Head** should work anywhere.
## Support me!
Join my Hardcore Minecraft server: `38.143.19.130:51965`
## Keep Inventory Always
The mod turns on a game rule that allows you to save your inventory when you die in each world
## How to use
To use the mod, you only need to install it. Now when creating a world, the game rule keepInventory will always be enabled
## Dependencies
– Fabric loader requires [Fabric API](https://modrinth.com/mod/fabric-api)
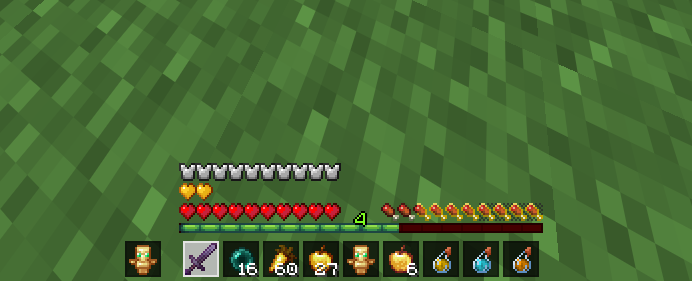
# Just Hotbar
This texture pack changes the hearts and hotbar, making them simpler