A simple Velocity plugin to whitelist/blacklist versions from connecting to your network. This let’s you block or allow certain versions.
## Features
* Whitelist/blacklist versions from connecting.
* Custom disconnect message.
## Documentation
Visit the [wiki](https://docs.hyper.lol/plugins/velocityblockversion/about/) for help.
## License
This plugin is released under GNU General Public License v3. See [LICENSE](https://github.com/hyperdefined/VelocityBlockVersion/blob/master/LICENSE).
Lightweight HTTP API for Velocity proxies. Expose player lists, per-server counts, per-player details, etc. Ideal for websites, bots or other monitoring applications. I built it for my own uses, but it might help someone else out too.
## Quick Install
– Drop the compiled plugin JAR into your Velocity `plugins/` folder.
– Start (or restart) your proxy; the plugin will create its data folder and a `config.cfg` (if missing) in the plugin data directory.
## Configuration
– The plugin creates a `config.cfg` in its data folder on first run. Available keys:
– `port` : port the HTTP server listens on (default `25576`).
– `bindAddress` : interface/address to bind the HTTP server (default `0.0.0.0` to listen on all IPv4 interfaces; set to `127.0.0.1` for local-only access).
– `checkUpdates` : enable automatic Hangar update checks (default `true`).
– `snapshotUpdates` : include snapshot/unstable updates in checks (default `false`).
– `debugEnabled` : show debug messages (`logger.debug`) in the proxy console when `true` (default `false`).
– `allowedOrigins` : CORS allowed origins for HTTP API access (comma-separated, or * for all) (default `*`).
## Tested With
– Velocity 3.x (expects `velocity-api` on the runtime classpath)
## Endpoints
All JSON endpoints return `Content-Type: application/json; charset=utf-8` unless otherwise noted.
– `/`
– Serves the embedded `index.html` (browser-friendly).
– Example URL: `http://localhost:25576/`
– `/playerlist`
– Purpose: list connected players with basic metadata and a total count.
– Example URL: `http://localhost:25576/playerlist`
– Sample response:
– `/count`
– Purpose: return the total number of connected players.
– Example URL: `http://localhost:25576/count`
– Sample response:
“`json
{
“count”: 42
}
“`
– `/player/` or `/player?username=`
– Purpose: fetch detailed info for a connected player (exact-case lookup).
– Example URLs:
– `http://localhost:25576/player/Notch`
– `http://localhost:25576/player?username=Notch`
– Notes: returns `400` if username is missing; `404` if the player is not connected.
– Sample response:
– `/servers`
– Purpose: returns a mapping of server names to player counts.
– Example URL: `http://localhost:25576/servers`
– Sample response:
“`json
{
“lobby”: 5,
“minigames”: 12
}
“`
– `/health`
– Purpose: lightweight health check for monitoring.
– Example URL: `http://localhost:25576/health`
– Sample response:
“`json
{
“status”: “ok”
}
“`
## Commands
– `/vwapi reload` : reloads the `config.cfg` from the plugin data directory and restarts the HTTP server if the `port` or `bindAddress` have changed.
– `/vwapi version` : prints the plugin version (from the plugin metadata).
– `/vwapi debug [on|off]` : toggle or explicitly set debug logging at runtime. When enabled, the plugin prints detailed debug messages and HTTP access lines to the console.
– `/vwapi status` : shows the current HTTP server status (running/not running), the bound host and port, and an example URL you can visit (falls back to `localhost` when bound to all interfaces).
– `/vwapi help` : prints a short help listing the available `/vwapi` subcommands and usage examples.
## Permissions
– `vwapi.admin` : required to use the `/vwapi` commands.
## Notes & Behavior
– Player lookup is exact-case and only returns connected players.
– The HTTP server binds to `bindAddress`; by default this is `0.0.0.0` (all interfaces). Change to `127.0.0.1` for local-only access or a specific IP if desired.
– When you change `bindAddress` or `port` and run `/vwapi reload`, the plugin will restart the HTTP server automatically to apply the new bind/port (a full proxy restart is no longer required for those changes).
## Troubleshooting
– If the HTTP server does not start, check the proxy logs for errors about port binding or resource issues.
– Ensure `velocity-api` is available at runtime and that the plugin is placed in the correct `plugins/` folder.
## License & Support
– Licensed under the MIT License.
– If you need any help or support, please contact me on [our Discord](https://discord.2lz.pro/).
Velocity-Skript
# Velocity-Skript
## _Having bugs on new Velocity Version will be fixed next update_
—
### _**A Velocity Plugin where you can create your own commands like the bukkit plugin Skript!**_
**Test.vsk** _(every skript file need to end with .vsk to work)_
“`
# Welcome message on player join
on join:
send “Welcome, %player%! Enjoy your stay on %players-server%!” to player
# Commands
command /greet:
trigger:
send “Hello, %player%! Welcome to the server!” to player
# Broadcast to the everybody
command /broadcast:
trigger:
broadcast “Attention everyone!”
command /connectlobby:
trigger:
connect player to “Lobby-1”
“`
## Available Placeholders
> **%player%**
>
> Description: This placeholder is replaced with the username of the player who triggered the command or event.
> Example Usage: send “Hello, %player%!” to player
> Example Output: Hello, DieSuperKatze!
> **%players-server%**
>
> Description: This placeholder is replaced with the name of the server that the player is currently connected to.
> Example Usage: send “You are currently on %players-server%.” to player
> Example Output: You are currently on Lobby-1.
> **%loop-player%**
>
> Description: This placeholder is used within a loop of all players. It is replaced with the username of the player being processed in the current iteration of the loop.
> Example Usage: send “Hello, %loop-player%!” to loop-player
> Example Output: Hello, Player1! (and so on for each player in the loop)
## Todo:
– Adding events for setting Server Motds
– Adding multiple arguments in one command
– Fix issues with the every
Join my Discord server for support, questions, or just to hang out!
—
Velocity Server Manager
# Velocity Server Manager
This project is a fork of [BungeeServerManager](https://git.fetz-gr.ch/NoahFetz/bungeeservermanager) by Noah Fetz, edited to work on Velocity Proxies.
This project follows the MIT License as per upstream, it has not been edited.
Check out the original Plugin on SpigotMC here: [BungeeServerManager [BungeeCord] [MySQL]](https://www.spigotmc.org/resources/bungeeservermanager-bungeecord-mysql.24837/)
## Features
* Add or Remove Servers from your Velocity Proxy without restarting
* Restriction who can join specific servers with permissions
* Jump to any player’s server you want
* Servers are saved in a MySQL Database
* Receive notifications when servers go online or offline
* Kick all players from a specific server to a random lobby
* Manage Server Flags to customize server behavior
* /hub or /lobby command to go to a lobby server
* Configurable messages
## Known Issues.
– No known issues at this time.
## Installation
### Prerequisites
You’ll need:
* A Proxy that is running Velocity (duh)
* A MySQL or MariaDB Database
* About 5-10 minutes of your time to set everything up
### Setup
1. Download the latest release of Velocity Server Manager.
2. Place the downloaded `.jar` file into your `plugins` folder of your Velocity Proxy.
3. Start your Proxy to generate the default configuration files. It will shutdown automatically due to a missing database connection.
4. Open the generated `mysql.yml` file in a text editor and fill in the details for a valid database connection.
5. Start your Proxy again. The plugin should connect to the database and create the necessary tables.
6. (Optional, but **_encouraged_**) Remove all servers that are not fallback servers from your `velocity.toml`. Instead, add them using `/addserver` either ingame or in the console. Refer to [here](#commands).
7. (Optional) Configure the messages in `messages.yml` to your liking.
You are now ready to use Velocity Server Manager! Have fun managing your servers on the fly, dynamically.
### FAQ
If you read this, you’ve probably encountered an issue or are interested in some other stuff. Here are some common things and what to do:
1. **The Proxy shuts down immediately after starting!**
– Make sure your database connection details in `mysql.yml` are correct.
– Ensure that your database server is running and accessible from the machine running the Proxy.
– If any of the above do not apply, check the Proxy logs for any error messages related to the plugin. It is probably not this plugin’s fault. (Hopefully)
2. **I can’t connect to a server that I added!**
– Make sure the server is online and reachable from the Proxy.
– Check `/server` to see if the server is listed. If it isn’t, it probably has the `DISABLED` [flag](#flags) set.
– Check if the server is marked as `RESTRICTED` and ensure you have the necessary permissions to join it.
3. **The plugin doesn’t seem to be working at all!**
– Update Velocity if you haven’t updated in a while.
– Check the Proxy logs for any error messages related to the plugin.
4. **I found a bug or have a feature request!**
– Open an issue [here](https://github.com/GunnableScum/velocity-server-manager/issues) on GitHub describing the problem or feature you’d like to see.
– Please do not contact me on any other platform regarding bugs or features. GitHub is the only place where I want and will track these things. I’ve had somebody interested in a different project message me on Reddit in a Private Chat. Who does that?
## Permissions
Have fun configuring to your heart’s desire.
* `servermanager.goto` – Be able to use /goto and /jumpto.
* `servermanager.help` – See the help list.
* `servermanager.notify` – Receive notifications when somebody manages servers.
* `servermanager.servers.add` – Add servers to your network.
* `servermanager.servers.delete` – Delete servers from your network.
* `servermanager.servers.reload` – Reload server data from the database and re-add them to the proxy.
* `servermanager.servers.list` – List all servers in your network.
* `servermanager.servers.kick` – Kick all players from a specific server to a random lobby.
* `servermanager.ignorekick` – Be exempt from being kicked when a server is cleared.
* `servermanager.servers.info` – View information about a specific server.
* `servermanager.servers.flags` – Manage Server flags. Check [here](#flags) for more info.
* `servermanager.server.[servername]` – Access a specific server if it has the `RESTRICTED` flag.
* `servermanager.server.*` – Access all servers that have the `RESTRICTED` flag.
* `servermanager.ignorerestriction` – Ditto of the above, if your Permission system does not support wildcards.
## Commands
– `[hub, lobby]` – Go to a Lobby Server
– `[goto, jumpto]` – Go to a player’s current server
– `[whereami, wai]` – Find which server you are currently on
– `[addserver]` – Adds a server to your network
– `[delserver]` – Deletes a server from your network
– `[reloadserver]` – Reloads the data of a specific server or all servers in the network
– `[serverlist, sl]` – Lists all servers in your network
– `[serverinfo, si]` – Shows some information about a specific server
– `[flagserver]` – Add a flag to a server
– `[unflagserver]` – Remove a flag from a server
– `[clearserver, kickserver]` – Kicks all players from the specific server to a random lobby
– `[servermanager]` – A unified command for every action
## Flags
Flags are how to plugin identifies servers and their conditions. Some are immutable.
* `EMPTY (Bitvalue: 0)` – No flags set
* `LOBBY (Bitvalue: 1)` – This server is a lobby server. Players will be sent here when they join the proxy or are kicked from another server.
* `RESTRICTED (Bitvalue: 2)` – This server is restricted. Only players with the `servermanager.server.*` or `servermanager.ignorerestriction` permission can join.
* `DISABLED (Bitvalue: 4)` – This server is disabled. Players cannot join this server, not even staff. If you want this server to be joinable by only staff, use RESTRICTED instead.
* `PROXYMANAGED (Bitvalue: 9)` – This server is managed by the proxy. This flag is immutable and applies to all servers added in the `velocity.toml` file. If this flag is present, you cannot apply any other flags.
**NOTE: Bitvalue 9 means that the PROXYMANAGED flag is a combination of the LOBBY flag and itself. This is intentional to encourage people to only put fallback servers into their `velocity.toml` file.**
**NOTE: Flags of Servers are stored in the database. Please do not tamper with the database manually unless you know exactly what you are doing. I will not fix any bugs where the database has been manually tampered with. You are on your own.**
## Contribution
I made this as a small side project to learn a tiny bit more about Programming for the Velocity Proxy. I will probably not look at PR Requests anytime soon. If you do feel up to the task, you can fork this repository instead.
Just make sure to follow the license.
Instead, if you’d like to support me financially, you can [Donate on my Ko-Fi Page](https://ko-fi.com/GunnableScum)!
## License
This fork is licensed under the upstream MIT License – see the LICENSE file here or [upstream](https://git.fetz-gr.ch/NoahFetz/bungeeservermanager/-/blob/master/LICENSE?ref_type=heads) for details
Velocity Limbo Handler
# ⚡ Velocity Limbo Handler
🌀 A smart **limbo & queue handler** for [Velocity](https://velocitypowered.com)
Keeps your players connected, calm, and coming back even when backend servers crash.
1. Grab the latest `.jar` from [Releases](https://github.com/akselglyholt/velocity-limbo-handler/releases).
2. Drop it into your Velocity `plugins` folder.
3. Restart the proxy (config files will generate).
4. Adjust `config.yml` + `messages.yml` to your liking.
5. Restart once more — done! 🎉
—
## ⚙️ Config Highlights
“`yaml
# config.yml
limbo-name: “limbo” # The name of your limbo server
direct-connect-server: “lobby” # Where to send direct connections
task-interval: 3000 # Queue processing interval (milliseconds)
queue-notify-interval: 30 # How often to tell players their position
disabled-commands: [“server”,”hub”] # Commands blocked in limbo
“`
👉 Messages can be tweaked in `messages.yml` so your players see exactly what you want.
* Players get queued automatically, no setup required.
* Commands blocked per config.
* LibreLogin support ensures login/auth flow isn’t broken.
* Maintenance plugins are respected (bypass logic included).
—
## 🤝 Contributing
Pull requests are welcome! Just follow the style already in place.
Check `CONTRIBUTING.md` for details.
—
## 📖 License
Licensed under **GPL-3.0** — free to use, modify, and share under the same license.
velocity-hub-command
The velocity-hub plugin adds the /hub command to the velocity network for easy return if a hub server or similar is present.Simply add it to the velocity server and the /hub command will run on all connected servers!
The `/hub`command is added across the entire Velocity network. There is no need to add the plugin to Paper servers or other server connected to Velocity.
The game version is for all versions supported by Velocity 3.4.0-SNAPSHOT as it is added to the proxy server only. The game version must be specified and is specified, but see the [PaperMC website](https://docs.papermc.io/velocity/server-compatibility/) for details.
# Installation
1. Download the latest release of the plugin
2. Put velocity-hub-x.x-SNAPSHOT.jar in /plugins directory of velocity
This completes the process!
# Config reference
– hubServerName
Specify the destination server. This is the server name listed in servers in velocity.toml. (Usually, the hubServerName is the same as the server name listed in the try=[] brackets.)
### Message custom
We support Japanese, Russian, and other languages. If there are any languages that we do not support, please let us know via GitHub issue!
MiniMessage is supported. If you write like `hub`
, it will be displayed in red. See [here](https://docs.papermc.io/misc/tools/minimessage-web-editor) for details.
You can test the display at the following sites.
[https://webui.advntr.dev/](https://webui.advntr.dev/)
[https://minecraft.menu/minecraft-rgb-generator](https://minecraft.menu/minecraft-rgb-generator)
– transferMessage
Sets the message to be sent to the player who used the command during the transfer.
– alreadyConnectedMessage
Sets the message if the player using the command is on the server designated as the forwarding destination.
– serverNotAvailableMessage
Sets the message when the specified server is unavailable.
# Issue and question
If the plugin does not work properly, try deleting config.json.
Problems and questions feature request [here](https://github.com/stellarcielo/velocity-hub/issues).
Velocity/hub
# Velocity/hub
This plugin, written for networks running velocity, adds the ability for users, to use the /hub command, to return to the lobby.
The available servers for lobbies are configurable, and the first available server on the list will be used to transfer players to it.
With additional permissions, it is possible, to transfer other players to the lobby, using the /hub command.
# Permissions
To protect the unappropriated use of the /hub command, we have set some permissions.
### vhub.command.hub
This permission protects the whole base of the /hub command.
### vhub.command.hub.others
This permission protects the /hub command.
For the use to send other players to the hub, both, this and the base permission are required at the same time.
# Configuration
This plugin provides a configuration file in the json format.
The content is the list of server names, which are your lobby.
On trying to connect to the lobby, the plugin picks the first available server and sends the target player to it.
# Dependencies
This plugin requires the availability of the Kotlin 1.8.21 library, we recommend using the [MCKotlin](https://modrinth.com/plugin/mckotlin) because it supports Velocity as well.
But you are free to use any other platform supported Kotlin library provider as well!
# Have fun
You are welcome to use the plugin on your velocity server!
Velocity-CommandLimiter
# What Is This
Powerful Plugin that manipulates all commands under proxy or proxies to control display and execution!
limit and disable command!
# How To Use
### Before Installation
Basically, it is recommended to use with permission management plug-ins such as LuckPerms.
## How To Setup
Put the downloaded plugin into the Velocity plugin folder and run it once.
Then the default config will be generated.
### Config
The settings described in `[[permissions]]` in config will be applied to players who have the permissions described in `[[permissions]]`.
If a player has multiple permissions due to group inheritance in LuckPerms, etc., all settings will be activated, so the settings with the most restrictions will be given priority.
For example, if `default` is set to `commands = [“help”, “list”]` and `guest` inherits the default permissions, then even if `guest` is set to `commands = [“list”]`, `help `is not available!
“`toml
# Permission to view and execute all commands `commandlimiter.admin` for the following
allAllowed = “admin”
# Restrict the display and execution of all commands by players who do not have any privileges, or
limitNoPermissionsPlayer = true
# Configuration of commands available for each permission node
[[permissions]]
# Value of permission node `commandlimiter.default` for the following
nodeName = “default”
# Enable whitelist or not?
# If false, it will be in blacklist format
whiteList = true
# For whitelist, only the commands described below can be displayed and executed
# If blacklisted, only the commands described below will be restricted
# Commands containing subcommands can be filtered by wildcards or regular expressions
commands = [“help”, “list”, “me*”, “msg*”, “teammsg*”, “tell*”, “tm*”, “trigger*”, “w*”, “random*”]
“`
### Permission Node
The root of the permission node for this plugin is `commandlimiter`.
If you want to set it up with LuckPerms etc., you need to set it up as follows
> Example of LuckPerms settings saved in yaml
“`yaml
name: default
permissions:
– commandlimiter.default:
value: true
“`
## Command
The following commands are available
| Command |Alias | Description | Required Permission Nodes |
|—————————|————-|————————————————-|———————–|
| `/commandlimiter-reload` | `/cl-reload` | Reload the plugin config to reflect the settings | `commandlimiter.admin`|
> ⚠️Attention⚠️
Even if you reload the configuration with the command, the client will display the commands as they were before they were configured** until you reconnect to the server.
This is due to the fact that the client gets the commands that are available when connecting to the server.
# Support SNS
SNSList: [https://kuwa.dev/](https://kuwa.dev/)
# Velocity Carbon Discord
Bridging [Carbon](https://modrinth.com/plugin/carbon) chat channels to Discord.
Carbon must be installed on the proxy to use this plugin. If you use Carbon on your backend servers, please use their DiscordSRV compatibility.
## Features
– Highly configurable
– Webhooks or bot messages for chat
– Display player count in bot status
– Ping discord users from in-game
– Reply to in-game messages from Discord
– Handle separate chat channel mappings (E.g. one channel for global chat, one channel for staff chat)
– Customisable Minecraft Avatar display
– Link discord attachments in-game
– Status messages on server start and shutdown, as well as player join, leave or change server
– Formats Xaero’s Minimap shared waypoints in Discord
## Installation
1. Create a discord bot application [here](https://discordapp.com/developers/applications/)
– Click `Add application` and then go to the `Bot` tab
2. Enable the `SERVER MEMBERS INTENT` and `MESSAGE CONTENT INTENT` under `Privileged Gateway Intents`
3. Go to the `OAuth2` tab and copy the `CLIENT ID`
4. Create an invite link for your new bot [here](https://discordapi.com/permissions.html)
– Enable permissions: `View Channels`, `Send Messages` and `Read Message History`
– Paste the copied `CLIENT ID` into the field on the page
– Click the generated link to invite your bot to your discord server
3. Go to the `Bot` tab and copy the bot token, you may need to click `Reset Token` first
4. Install the plugin on your server, start the server once to generate the config and stop the server again.
5. Open the plugin config files at `plugins/velocitycarbondiscord/config.yaml`
6. Replace where it says `TOKEN` with the bot token you copied previously
7. Edit the channel mapping to include the carbon channels and discord channels IDs you want to link
8. Set any additional config options you want
9. Start the server
## Support
Support for Carbon and Velocity Carbon Discord can be obtained in the [Carbon discord server](https://discord.gg/S8s75Yf). For Velocity Carbon Discord issues, please ping `@Jarva`
## Configuration
Default config generated on startup:
“`yaml
discord:
token: ‘TOKEN’
# Available placeholders:
messages:
# Additional placeholders:
chat_message: ‘: ‘
# Additional placeholders:
join_message: ‘** joined **’
leave_message: ‘** left **’
# Additional placeholders: N/A
disconnect_message: ‘** was disconnected**’
# Additional placeholders:
disconnect_server_message: ‘** was disconnected from **’
# Additional placeholders:
server_switch_message: ‘** moved from to **’
# Available placeholders: N/A
shutdown_message: ‘**Proxy shutting down**’
start_message: ‘**Ready for connections**’
# Additional placeholders: <description><br />
advancement_default_message: “**<username>** has just earned the achievement [<title>]** _(<description>)_”<br />
advancement_challenge_message: “**<username>** has completed the challenge [<title>]** _(<description>)_”<br />
advancement_goal_message: “**<username>** has reached the goal [<title>]** _(<description>)_”<br />
advancement_task_message: “**<username>** has made the advancement [<title>]** _(<description>)_”<br />
# Additional placeholders: <displayname> <message><br />
death_message: “**<message>**”<br />
webhook:<br />
# Available placeholders: <displayname> <username> <uuid><br />
avatar_url: ‘https://crafatar.com/renders/head/<uuid>?overlay’<br />
username: ‘<username>‘<br />
# Available placeholders: <message><br />
message: ‘<message>‘<br />
show_bot_messages: false<br />
show_attachments_ingame: true<br />
show_activity: true<br />
# Available placeholders: <amount><br />
activity_text: ‘with <amount> players online’<br />
enable_mentions: true<br />
enable_everyone_and_here: false<br />
prefer_webhook: true<br />
# Available placeholders: <message> <nickname> <role_color> <username><br />
minecraft:<br />
# Additional placeholders: <attachments> <discord_format> <reply_format> <username_format><br />
format: ‘<discord_format> <reply_format><username_format> <dark_gray>» <reset><message><attachments>‘<br />
discord_format: ‘<dark_gray>(<color:#7289da>discord<dark_gray>)<reset>‘<br />
username_format: ‘<color:<role_color>><hover:show_text:<username>><nickname></hover><reset>‘<br />
mention_format: ‘<color:<role_color>><underlined>@<nickname></underlined></color>‘<br />
# Additional placeholders: <reply_message> <reply_nickname> <reply_role_color> <reply_url> <reply_username><br />
reply_format: ‘<dark_gray><click:open_url:<reply_url>>[<color:#4abdff>←<color:<reply_role_color>><hover:show_text:<reply_username>><reply_nickname></hover><dark_gray>]</click><reset> ‘<br />
# Additional placeholders: <attachment_url><br />
attachment_format: ‘<dark_gray><click:open_url:<attachment_url>>[<color:#4abdff>Attachment<dark_gray>]</click><reset>‘<br />
channels:<br />
– name: ‘carbon:global’<br />
enabled: true<br />
broadcast_events: true<br />
discord:<br />
webhook:<br />
url: ‘WEBHOOK_URL’<br />
channel_id: ‘CHANNEL_ID’<br />
– name: ‘carbon:staff’<br />
enabled: true<br />
minecraft:<br />
format: ‘<discord_format> <gray>✦</gray> <username_format> <dark_gray>» <aqua><message><attachments>‘<br />
discord:<br />
webhook:<br />
url: ‘WEBHOOK_URL’<br />
channel_id: ‘CHANNEL_ID’<br />
“`</p>
<p>## Credits<br />
– fooooooooooooooo: Creation of [Velocity Discord](https://modrinth.com/plugin/velocitydiscord/) which heavily inspired the features, and this README<br />
– Draycia: Creator of [Carbon](https://modrinth.com/plugin/carbon), as well as provided lots of help figuring out implementation details</p>
</article>
<article>
<h1>Velocity – Auto Reconnect</h1>
<p>VelocityReconnect keeps players online while a backend server restarts and reconnects them automatically when it comes back.</p>
<p>Instead of kicking players out during a restart, VelocityReconnect keeps retrying in the background and can hold players inside the proxy while they wait. This makes restarts, crashes, and maintenance feel much smoother for players.</p>
<p>By default, VelocityReconnect uses its built-in no-limbo mode, so no extra backend or limbo server is required. If you prefer, it can also work with a real holding server.</p>
<p>Features:</p>
<p>Native Velocity reconnect handling<br />
No limbo server required<br />
Built-in no-limbo mode enabled by default<br />
Optional support for a real holding server<br />
Automatic reconnect attempts while the backend is offline<br />
Custom reconnect titles, subtitles, and actionbar messages<br />
Animation support in reconnect messages<br />
Configurable reconnect timing and retry behavior<br />
Fallback server support<br />
Per-server permission support<br />
Simple Voice Chat compatibility for built-in holding mode<br />
Setup:</p>
<p>1. Drop the plugin into your proxy’s plugins folder.<br />
2. Restart your Velocity proxy.<br />
3. Open the config and set the reconnect timing to match how long your server usually takes to start.<br />
4. Check that the shutdown text or regex matches the message your backend sends when it restarts.<br />
5. If needed, edit the config and reload the plugin.<br />
Test it and enjoy.</p>
<p>Credits:<br />
VelocityReconnect is based on and ported from tau’s BungeeReconnect, with additional Velocity-specific changes and built-in proxy holding support for single-backend setups.</p>
<p>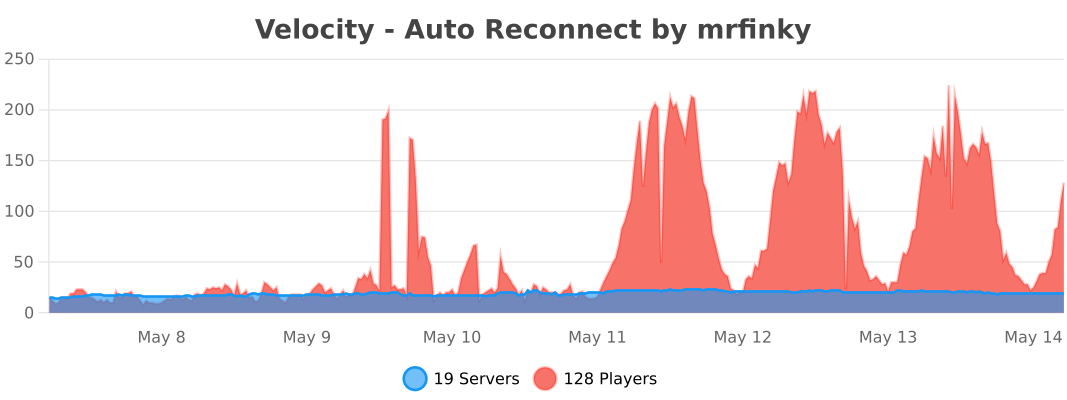</p>
</article>
</main>
<script type="speculationrules">
{"prefetch":[{"source":"document","where":{"and":[{"href_matches":"/*"},{"not":{"href_matches":["/wp-*.php","/wp-admin/*","/wp-content/uploads/*","/wp-content/*","/wp-content/plugins/*","/wp-content/themes/minecraft/*","/*\\?(.+)"]}},{"not":{"selector_matches":"a[rel~=\"nofollow\"]"}},{"not":{"selector_matches":".no-prefetch, .no-prefetch a"}}]},"eagerness":"conservative"}]}
</script>
<div class="gtranslate_wrapper" id="gt-wrapper-10468866"></div><script id="gt_widget_script_10468866-js-before">
window.gtranslateSettings = /* document.write */ window.gtranslateSettings || {};window.gtranslateSettings['10468866'] = {"default_language":"en","languages":["ar","az","bn","bg","hr","cs","da","nl","en","fi","fr","de","el","hu","id","it","ja","kk","ko","fa","pl","pt","ro","ru","sl","es","sv","th","uk","uz","vi"],"url_structure":"sub_directory","flag_style":"2d","wrapper_selector":"#gt-wrapper-10468866","alt_flags":[],"custom_domains":{"ru":"minecraft.vpesports.games"},"float_switcher_open_direction":"top","switcher_horizontal_position":"left","switcher_vertical_position":"bottom","flags_location":"\/wp-content\/plugins\/gtranslate\/flags\/"};
//# sourceURL=gt_widget_script_10468866-js-before
</script><script src="https://minecraft.vpesports.com/wp-content/plugins/gtranslate/js/float.js?ver=3.1.1" data-no-optimize="1" data-no-minify="1" data-gt-orig-url="/minecraft-version/1-9-4/page/17/" data-gt-orig-domain="minecraft.vpesports.com" data-gt-widget-id="10468866" defer></script><script id="wp-emoji-settings" type="application/json">
{"baseUrl":"https://s.w.org/images/core/emoji/17.0.2/72x72/","ext":".png","svgUrl":"https://s.w.org/images/core/emoji/17.0.2/svg/","svgExt":".svg","source":{"concatemoji":"https://minecraft.vpesports.com/wp-includes/js/wp-emoji-release.min.js?ver=7.0"}}
</script>
<script type="module">
/*! This file is auto-generated */
const a=JSON.parse(document.getElementById("wp-emoji-settings").textContent),o=(window._wpemojiSettings=a,"wpEmojiSettingsSupports"),s=["flag","emoji"];function i(e){try{var t={supportTests:e,timestamp:(new Date).valueOf()};sessionStorage.setItem(o,JSON.stringify(t))}catch(e){}}function c(e,t,n){e.clearRect(0,0,e.canvas.width,e.canvas.height),e.fillText(t,0,0);t=new Uint32Array(e.getImageData(0,0,e.canvas.width,e.canvas.height).data);e.clearRect(0,0,e.canvas.width,e.canvas.height),e.fillText(n,0,0);const a=new Uint32Array(e.getImageData(0,0,e.canvas.width,e.canvas.height).data);return t.every((e,t)=>e===a[t])}function p(e,t){e.clearRect(0,0,e.canvas.width,e.canvas.height),e.fillText(t,0,0);var n=e.getImageData(16,16,1,1);for(let e=0;e<n.data.length;e++)if(0!==n.data[e])return!1;return!0}function u(e,t,n,a){switch(t){case"flag":return n(e,"\ud83c\udff3\ufe0f\u200d\u26a7\ufe0f","\ud83c\udff3\ufe0f\u200b\u26a7\ufe0f")?!1:!n(e,"\ud83c\udde8\ud83c\uddf6","\ud83c\udde8\u200b\ud83c\uddf6")&&!n(e,"\ud83c\udff4\udb40\udc67\udb40\udc62\udb40\udc65\udb40\udc6e\udb40\udc67\udb40\udc7f","\ud83c\udff4\u200b\udb40\udc67\u200b\udb40\udc62\u200b\udb40\udc65\u200b\udb40\udc6e\u200b\udb40\udc67\u200b\udb40\udc7f");case"emoji":return!a(e,"\ud83e\u1fac8")}return!1}function f(e,t,n,a){let r;const o=(r="undefined"!=typeof WorkerGlobalScope&&self instanceof WorkerGlobalScope?new OffscreenCanvas(300,150):document.createElement("canvas")).getContext("2d",{willReadFrequently:!0}),s=(o.textBaseline="top",o.font="600 32px Arial",{});return e.forEach(e=>{s[e]=t(o,e,n,a)}),s}function r(e){var t=document.createElement("script");t.src=e,t.defer=!0,document.head.appendChild(t)}a.supports={everything:!0,everythingExceptFlag:!0},new Promise(t=>{let n=function(){try{var e=JSON.parse(sessionStorage.getItem(o));if("object"==typeof e&&"number"==typeof e.timestamp&&(new Date).valueOf()<e.timestamp+604800&&"object"==typeof e.supportTests)return e.supportTests}catch(e){}return null}();if(!n){if("undefined"!=typeof Worker&&"undefined"!=typeof OffscreenCanvas&&"undefined"!=typeof URL&&URL.createObjectURL&&"undefined"!=typeof Blob)try{var e="postMessage("+f.toString()+"("+[JSON.stringify(s),u.toString(),c.toString(),p.toString()].join(",")+"));",a=new Blob([e],{type:"text/javascript"});const r=new Worker(URL.createObjectURL(a),{name:"wpTestEmojiSupports"});return void(r.onmessage=e=>{i(n=e.data),r.terminate(),t(n)})}catch(e){}i(n=f(s,u,c,p))}t(n)}).then(e=>{for(const n in e)a.supports[n]=e[n],a.supports.everything=a.supports.everything&&a.supports[n],"flag"!==n&&(a.supports.everythingExceptFlag=a.supports.everythingExceptFlag&&a.supports[n]);var t;a.supports.everythingExceptFlag=a.supports.everythingExceptFlag&&!a.supports.flag,a.supports.everything||((t=a.source||{}).concatemoji?r(t.concatemoji):t.wpemoji&&t.twemoji&&(r(t.twemoji),r(t.wpemoji)))});
//# sourceURL=https://minecraft.vpesports.com/wp-includes/js/wp-emoji-loader.min.js
</script>
</body>
</html>