Mod Loading Screen
# Mod Loading Screen
An advanced loading screen with the loading progress of mods. It works on all Minecraft versions, as it doesn’t even require Minecraft. Its only requirement is Fabric Loader 0.12.0 or later or Quilt Loader (specific versions of Quilt support are unknown). Do note that if you run this mod on a game other than Minecraft, the loading screen may not close itself.
## Agent
Mod Loading Screen provides a Java agent, which allows opening the loading screen before even the mod loader itself loads. This feature is primarily targeted at modpack developers who want to make a seamless loading experience. The agent can be used by passing `-javaagent:mod-loading-screen-1.0.4.jar` as a JVM argument. If the agent is used, the loading screen should *not* be installed as a mod.
## API
To depend on the API, use the Modrinth Maven. The API should be JiJed, and doing so will not include Mod Loading Screen inside your mod (it will only include the API, which is only a few kilobytes). The API is designed to have both forwards and backwards binary compatibility with future Mod Loading Screen versions. An API is provided for checking which API calls will return stubs and which ones are real.
“`gradle
repositories {
exclusiveContent {
forRepository {
maven {
name = “Modrinth”
url = “https://api.modrinth.com/maven”
}
}
filter {
includeGroup(“maven.modrinth”)
}
}
}
dependencies {
// implementation, not modImplementation!
include(implementation(“maven.modrinth:mod-loading-screen:1.0.4:api”))
}
“`
The API has two top-level classes: `LoadingScreenApi` and `AvailableFeatures`. Full javadocs are available for both classes.
MiraiMC
MiraiMC
[](https://github.com/DreamVoid/MiraiMC/releases/latest)
[](https://www.codefactor.io/repository/github/dreamvoid/miraimc)
[](https://github.com/DreamVoid/MiraiMC/actions/workflows/maven.yml?query=is%3Asuccess)

—
MiraiMC is a [mirai](https://github.com/mamoe/mirai) bot for Minecraft servers
> Mirai is a high-performance multi-platform library, as well as a framework, providing protocol support for Tencent QQ.
> Mirai is designed to handle all sorts of messaging works that can be automatically done by bots in a perfect way.
> Tencent QQ: A modern messaging software used by all Chinese netizens.
## Features
* Support Bukkit/Sponge servers.
* Support BungeeCord/Velocity proxies.
* Optimized for GUI-less OS such as Linux
* Dynamically load dependent libraries to minimize file size.
## Getting Started (Server)
1. Download MiraiMC from “Featured versions” part. Then install it like installing other plugins.
2. Configure any plugins’ that depend on MiraiMC (if any) and login to your bot account
A more detailed tutorial can be found here: https://docs.miraimc.dreamvoid.me/
## Getting Started (Plugin Developer)
* It is simple to develop a new MiriMC-based plugin by using template:
– [Maven](https://github.com/MiraiMC/MiraiMC-Template)
– [Gradle KotlinDSL](https://github.com/MiraiMC/MiraiMC-Template-Gradle-KotlinDSL)
* MiraiMC javadoc here: https://jd.miraimc.dreamvoid.me
* Detailed development tutorial here: https://docs.miraimc.dreamvoid.me/
### Dependency
#### Maven
“`
io.github.dreamvoid
MiraiMC-Integration
1.9
provided
“`
#### Gradle
“`
implementation ‘io.github.dreamvoid:MiraiMC-Integration:1.9’
“`
## Commands and permissions
### Commands
| Command | Description | Permissions |
| —- | — | —- |
| /mirai | MiraiMC Robot Command | miraimc.command.mirai |
| /mirai login [protocol] | Log in to a robot (you can execute this command multiple times to log in to multiple robots) | miraimc.command.mirai.login |
| /mirai logout | Log out and close a bot | miraimc.command.mirai.logout |
| /mirai list | List currently online bots | miraimc.command.mirai.list |
| /mirai sendfriendmessage | Send a message to a specified friend | miraimc.command.mirai.sendfriendmessage |
| /mirai sendfriendnudge | Send a stamp to a specified friend | miraimc.command.mirai.sendfriendnudge |
| /mirai sendgroupmessage | Send a message to the specified group | miraimc.command.mirai.sendgroupmessage |
| /mirai checkonline | Check if the specified robot is online | miraimc.command.mirai.checkonline |
| /mirai autologin add [protocol] | Add an autologin robot account | miraimc.command.mirai.autologin |
| /mirai autologin remove | Remove an autologin bot account | miraimc.command.mirai.autologin |
| /mirai autologin list | View autologin robot account list | miraimc.command.mirai.autologin |
| /miraimc | MiraiMC Plugin Command | miraimc.command.miraimc |
| /miraimc bind add | Add binding for player and QQ number | miraimc.command.miraimc.bind |
| /miraimc bind getplayer | Get the QQ number bound to the specified player name | miraimc.command.miraimc.bind |
| /miraimc bind getqq | Get the player name bound to the specified QQ number | miraimc.command.miraimc.bind |
| /miraimc bind removeplayer | Removes a player’s bind | miraimc.command.miraimc.bind |
| /miraimc bind removeqq | Delete the binding of a QQ number | miraimc.command.miraimc.bind |
| /miraimc reload | Reload configuration file | miraimc.command.miraimc.reload |
### Permissions
| Permission Node | Description | Default |
| ——- | —- | —- |
| miraimc.command.mirai | Allow use of `/mirai` | OP |
| miraimc.command.mirai.* | Allow all subcommands of `/mirai` | OP |
| miraimc.command.mirai.login | Allow `/mirai login` | OP |
| miraimc.command.mirai.logout | Allow `/mirai logout` | OP |
| miraimc.command.mirai.list | Allow `/mirai list` | OP |
| miraimc.command.mirai.sendfriendmessage | Allow `/mirai sendfriendmessage` | OP |
| miraimc.command.mirai.sendfriendnudge | Allow `/mirai sendfriendnudge` | OP |
| miraimc.command.mirai.sendgroupmessage | Allow `/mirai sendgroupmessage` | OP |
| miraimc.command.mirai.checkonline | Allow `/mirai checkonline` | OP |
| miraimc.command.mirai.autologin | Allow `/mirai autologin` | OP |
| miraimc.command.miraimc | Allow use of `/miraimc` | OP |
| miraimc.command.miraimc.* | Allow all subcommands of `/miraimc` | OP |
| miraimc.command.miraimc.bind | Allow `/miraimc bind` and subcommands | OP |
| miraimc.command.miraimc.reload | Allow `/miraimc reload` | OP |
## LICENSE
[GNU Affero General Public License v3.0](https://github.com/DreamVoid/MiraiMC/blob/main/LICENSE)
## Acknowledgments
Thanks to the following people/teams/projects for their contributions to MiraiMC!
* [mamoe/mirai](https://github.com/mamoe/mirai): Powerful QQ robot support library, the core and foundation of MiraiMC.
* [lucko/helper](https://github.com/lucko/helper): Provide MiraiMC with a solution to dynamically load the mirai core.
* [brettwooldridge/HikariCP](https://github.com/brettwooldridge/HikariCP): An efficient SQL connection pool, providing database connection solutions for MiraiMC.
* [LT_Name](https://github.com/lt-name): Optimized a lot of Nukkit code for MiraiMC, also provided a lot of help for MiraiMC.
* You.
[DreamVoid](https://github.com/DreamVoid) and [MiraiMC](https://github.com/MiraiMC), made with ❤.
This file is a translated version of the [original file](https://github.com/DreamVoid/MiraiMC/blob/main/README.md), and some semantics may differ from the original file.
MineGIT
### Cloud sync for Minecraft worlds!
Sync and back up your worlds between multiple devices! Fully integrated into the Minecraft client for a seamless experience when loading, saving, and downloading worlds from the cloud.
## How does it work?
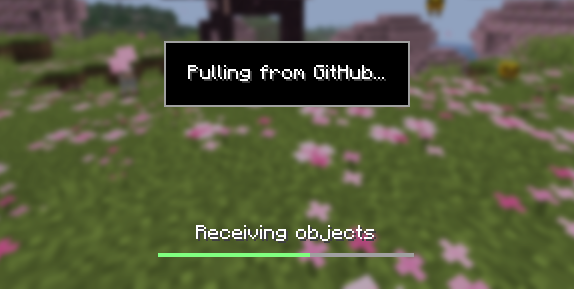
Worlds that you select are uploaded to your GitHub account as repositories. Every time you quit to the title screen, a commit of the current state of your world is created and pushed to the repository on GitHub. Whenever the world is loaded, the mod will check if any new versions of the world are available in the cloud, and if so, they will be downloaded to your device.
Since this mod uses Git internally, it also means that only the files in your world save folder that you modify will be uploaded and downloaded each time, saving storage space and internet bandwidth.
## How do I set it up?
There are several steps to setting up this mod, which include creating a personal access token for GitHub, as well as choosing the worlds you would like to enable MineGIT for.
### Video guide:
### Creating a GitHub personal access token
In order to do the first-time setup, you will need to generate a GitHub personal access token through the following steps:
1. Create an account on GitHub if you do not have one already (https://github.com)
2. Navigate to the [page to create a personal access token](https://github.com/settings/personal-access-tokens)
3. Click `Generate new token`
4. Enter any name (such as MineGIT) under `Token name`
5. Scroll to `Expiration` and set it to `No expiration` (so that you do not have to repeat this process when the token expires)
6. Under `Repository access` choose `All repositories`
7. Under `Permissions`, click `Add permissions` and select `Administration` and `Contents`
8. Set `Access` on the `Administration` and `Contents` lines to `Read and write`
9. Press `Generate token` and copy the generated token to be pasted into Minecraft later (the generated token should start with `github_pat_` and be followed by a long string of letters and numbers)
### Setting up in-game
Once the mod is installed and you are in-game, do the following steps to link your GitHub account with the mod:
1. Click on the cloud button on the bottom left corner of the world creation or world selection screen (If the button does not appear, you have already previously linked your account; see the section below entitled ‘Reconfiguring account linking’)
2. Enter your GitHub username and personal access token (PAT) that you created in the previous step on the new page that appears
3. Press the button labeled `Test credentials` to make sure you’ve entered the information properly
4. You may now exit the screen and proceed to either enable sync for a world or clone an existing one
#### Reconfiguring account linking
If you have already previously set up account linking and would like to change settings afterwards, you have a couple of options to get back to the configuration screen:
– **Configure through ModMenu:** If you have [ModMenu](https://modrinth.com/mod/mod-menu) installed, simply find the mod in the mods list and open the configuration from there
– **From the world clone screen:** There is a button in the top right corner of the world cloning screen that will open the configuration screen
– **From the world selection screen:** By holding alt and clicking on the world sync button on the bottom left of the world selection screen, you will be brought back into the configuration screen
### Enabling sync for a world
World syncing needs to be enabled individually for each world you would like to sync to your GitHub account. To enable sync for a world, do the following:
1. Select a world on the world selection screen
2. Press the cloud button in the bottom left of the screen labeled `Enable world sync`
3. Confirm your decision on the next screen
This process will create a new repository named `minegit_[world folder name]` on your GitHub account, initialize a Git repository in your world save folder, and push its current state to GitHub. From this point forward, loading the world will pull the world’s latest changes from GitHub, and exiting the world will push changes to GitHub.
You can now download this world on another device to effectively sync changes between them through the next step: cloning.
### Downloading a world on a different device (Cloning)
Cloning a world will download the exact state of the world as it was last saved to GitHub. Use the following steps to clone a world:
1. Navigate to [github.com](https://github.com) in a web browser
2. Click on your profile picture in the top right corner and then `Repositories`
3. Find the repository corresponding to the world you would like to clone and copy its name
4. Back in Minecraft, click on the button with an arrow pointing downwards labelled in the bottom left corner of either the world selection screen or world creation screen
5. Paste the name of the repository you copied earlier and press `Clone`
6. You are now able to load the world like normal and have changes be synced across your devices!
### Tips & Tricks
– If you want to exit a world without pushing it to GitHub (for example, if you wanted to restart Minecraft and load the same world without having to wait for changes to be pushed), you can hold `Alt` while clicking `Save and Quit to Title`. This will skip the ‘pushing to GitHub’ step.
– Git keeps a list of all of the worlds changes every time you exit the world. This is useful, since if you have a little knowledge of how to use the Git command line interface you can rollback your world to a previous version!
– If you want to save some storage space taken up by the size of the Git repository on your computer, or make the world quicker to clone on other devices, use the `Prune World Commits` button in the edit world menu. This will delete all of the old versions of your world, leaving only the most recent one.
## Report an issue
If you run into bugs, crashes, or simply have a suggestion on how to improve the mod, please feel free to open an issue on the mod’s [issue tracker](https://github.com/ModMonster/MineGIT/issues)!
Please include the current Minecraft version, Fabric version, mod version, and any relevant game logs when submitting an issue.
Invisible Armor for Old Minecraft
Invisible armor for old Minecraft! Just drop into your texture pack folder and enjoy!
Icon Bubbles
**This resource pack changes your hearts and hunger bar icons to be circles.**
### Features:
– Round hearts
– Round hunger bar
– Changes all types of hearts (poison, freezing, hardcore…)
– Compatible with the [AppleSkin mod](https://modrinth.com/mod/appleskin)
**♡ Make sure to follow!**
Happier Pumpkin
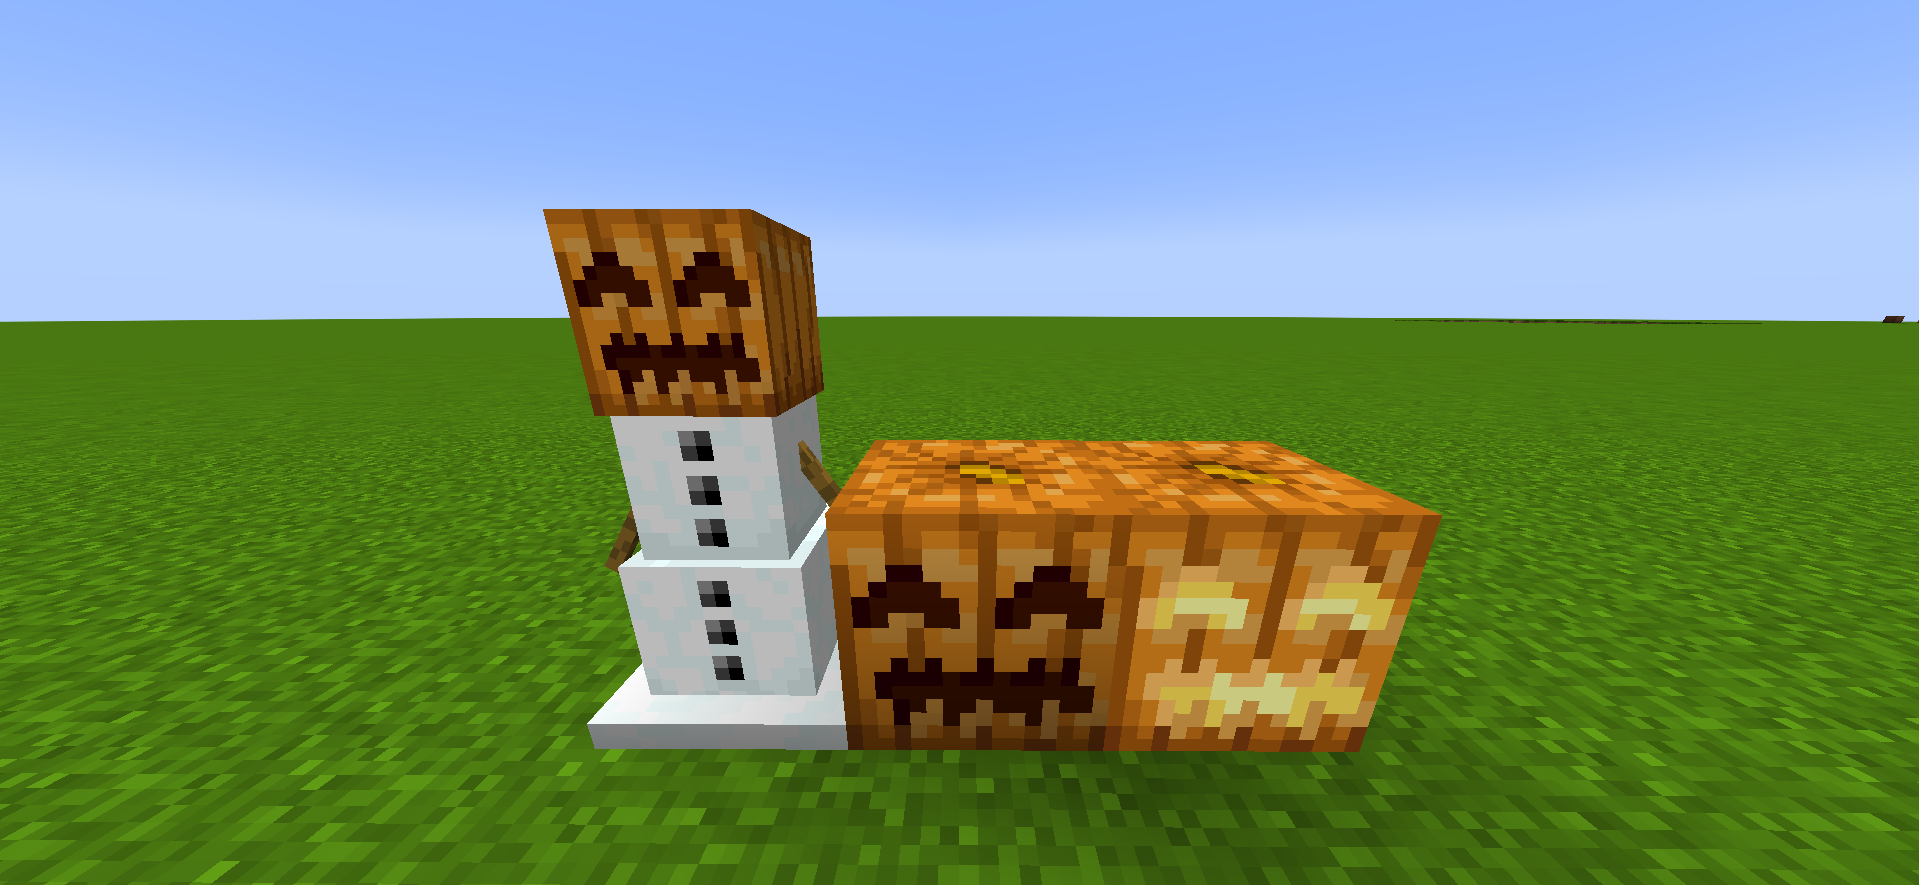
# **😊Happier Pumpkin🎃**
**Happier Pumpkin** makes pumpkins happier the **HAPPIEST** in the **PUMPKING KINGDOM**
Gerudoku Faithful

**About**:
————
This pack is a faithful continuation of the Gerudoku texture pack (by Tom Bones/Ganonline),
which was a mix of textures from Doku’s RPG, Dustycraft, and various texture artists (Credits included in zip file),
over 13 years ago I was inspired by other continuations and remixes of Gerudoku to try my hand at updating it,
I’ve tried to keep as many of the original textures as possible and maintain the style with anything new added over the years.
**Tyken132** (creator of Tydoku) contacted many of the old texture artists to collaborate on Gerudoku Genesis,
it is through this collaboration that Gerudoku Faithful is now maintained.
**Links and Other Information**
——————————
I recommend **Optifine** for full functionality of the pack.
For Fabric I’d recommend the **Fabulously Optimized** modpack for ease of use, or https://lambdaurora.dev/optifine_alternatives/ for a list of Optifine alternatives
**Optifine**
– https://www.optifine.net/downloads
**Fabulously Optimized**
– https://modrinth.com/modpack/fabulously-optimized
– https://www.curseforge.com/minecraft/modpacks/fabulously-optimized
——————————
Permission to use textures were mostly given on a case by case basis or as a blanket rule by the individual texture artists,
an example of one such blanket rule can be found on https://www.johnsmithlegacy.co.uk
and another example can be found on Tom Bones Minecraft Forum Account Bio
https://www.minecraftforum.net/members/tombones
Unfortunately finding everyone who ever contributed to the pack is nearly impossible now, as throughout the years, many have left the Minecraft community behind.
I cannot give anyone permission to use anything I did not make.
——————————
– [Gerudoku Genesis](https://www.curseforge.com/minecraft/texture-packs/gerudoku-genesis)
– [Original Gerudoku](http://www.minecraftforum.net/topic/72914-32x-14-gerudoku-31-mar-2011-outdated-see-pg100/|)
– [Gerudoku Faithful on CurseForge](https://www.curseforge.com/minecraft/texture-packs/gerudoku-faithful)
– [Gerudoku Faithful on Minecraft forums](https://www.minecraftforum.net/forums/mapping-and-modding-java-edition/resource-packs/3069369-gerudoku-faithful)
– [Doku’s RPG](https://modrinth.com/resourcepack/dokus-rpg)
Alternate Textures & add-on files
——————————
Fresh Animations Add-On
– [Gerudoku Faithful Fresh Animations Add-On](https://modrinth.com/resourcepack/gerudoku-faithful-fresh-animations-add-on)
Alternate Textures & additional add-on files available on Github:
– [Gerudoku Faithful Github](https://github.com/ShadySalesGnome/Gerudoku-Faithful)
Credits
——————————
Tom Bones/Ganonline, Richasackboy, Clyde, John Smith, Teknician, Jademalo, SMP, Vattic,
Lil_Jening, Tyken132, Emkay443, Doku, Dustyshuori, Kas, Monsieurd, Hozz, Eldrone, Visigoth, Lilyo, Shadounnet, Agentfyre, Shiny, Cng, Vilkalizer, Ganstriker, Skizot, Danscottbrown, Runesmith, Andrewdance, Coagulated, Slayvus, Dante80, Ayun, Riverc, Kingphantom, Eric The Racoon, Fish2, Azaindustries, Dancrum, Ducci, Dvan, Andenno, Rapidninja42, Krayloon, Jzus, Overwhelmed,
GameslayerX2, TDWP_FTW, Xthlon, DooDooRoonys, Equivalant, DrZhark,
EnderSlayer317, TC_Concept, zombieassasin417, MikeZilla, TBP, Ikezou, Hellmage20, Gregory24, Steve Riddett,
Bloody_Toast, PapaBleeks, Paul_Mc,
Font Tweak
Changes the look of 7, 4, w, W, and H. My first resource pack. This resource pack was made for me to test how Minecraft handles custom fonts. Feel free to use this mod without any copyright or license issues.
Font Fixer
## Summary
This mod fixes and extends the Font Renderer in Legacy versions of Minecraft by essentially backporting a newer version of the `FontRenderer` class (1.5.2 was used as the base in version 1; 1.12.2 is used as the base in version 2).
## Details
In particular, the following bugs have been fixed and features have been added:
– Fix the text width calculation and shadows when rendering non-ASCII characters
– Change Font height to 9 instead of 8
– Add support for glyphs/unicode characters
– Add missing formatting and color codes
## Installation
### As a ModLoaderMP / Forge mod
This mod needs to be installed as a **jar-mod**. That means, you have to…
1. Be sure to back up your `minecraft.jar`!
2. Extract the content of the mod zip into the `minecraft.jar` file
3. Delete the `META-INF` folder in there
4. Overwrite any existing files when doing so!
5. ???
6. Profit!
### As a Fabric mod
Just place the mod file in your mods folder 🙂
## Issues
– Some **OptiFine** versions have minor issues with Font Fixer installed (e.g., custom fonts do not work)
– ~~Some unicode characters could not be rendered~~ – this has been fixed in version **2**!
FConfigLib
# FConfigLib
**FConfigLib** is a simple JSON configuration library designed specifically for Fabric Mod Loader.
## Features
* **Version compatibility**: FConfigLib is compatible with every Minecraft version, supported by Fabric Loader. It works on **Ornithe**, **LegacyFabric**, **Babric**, and other such projects.
* **Support for other games**: This library is not dependent on Minecraft code, it can be run on any other Java game loaded through Fabric Loader.
* **Easy to use API**: FConfigLib has annotation-based value limiters and validators. It allows for safe version conversion via config fixers.
Java 8+ is required in order for this mod to work.
## For mod devs
How to add to your project
Add JitPack to your repositories list in build.gradle.
“`groovy
maven {
name “JitPack”
url “https://jitpack.io”
}
“`
Add the following line to your dependencies in build.gradle.
“`groovy
dependencies {
…
modImplementation “com.github.ForwarD-NerN:fconfiglib:1.1.0”)
}
“`
Currently, there is no documentation available, however, you can look at an example [here](https://github.com/ForwarD-NerN/fconfiglib/blob/master/src/main/java/ru/nern/fconfiglib/example/ExampleMod.java).