MineGIT
### Cloud sync for Minecraft worlds!
Sync and back up your worlds between multiple devices! Fully integrated into the Minecraft client for a seamless experience when loading, saving, and downloading worlds from the cloud.
## How does it work?
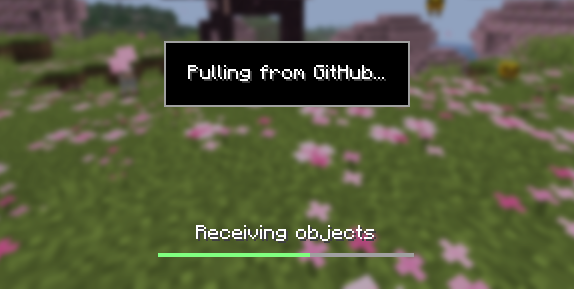
Worlds that you select are uploaded to your GitHub account as repositories. Every time you quit to the title screen, a commit of the current state of your world is created and pushed to the repository on GitHub. Whenever the world is loaded, the mod will check if any new versions of the world are available in the cloud, and if so, they will be downloaded to your device.
Since this mod uses Git internally, it also means that only the files in your world save folder that you modify will be uploaded and downloaded each time, saving storage space and internet bandwidth.
## How do I set it up?
There are several steps to setting up this mod, which include creating a personal access token for GitHub, as well as choosing the worlds you would like to enable MineGIT for.
### Video guide:
### Creating a GitHub personal access token
In order to do the first-time setup, you will need to generate a GitHub personal access token through the following steps:
1. Create an account on GitHub if you do not have one already (https://github.com)
2. Navigate to the page to create a personal access token
3. Click `Generate new token`
4. Enter any name (such as MineGIT) under `Token name`
5. Scroll to `Expiration` and set it to `No expiration` (so that you do not have to repeat this process when the token expires)
6. Under `Repository access` choose `All repositories`
7. Under `Permissions`, click `Add permissions` and select `Administration` and `Contents`
8. Set `Access` on the `Administration` and `Contents` lines to `Read and write`
9. Press `Generate token` and copy the generated token to be pasted into Minecraft later (the generated token should start with `github_pat_` and be followed by a long string of letters and numbers)
### Setting up in-game
Once the mod is installed and you are in-game, do the following steps to link your GitHub account with the mod:
1. Click on the cloud button on the bottom left corner of the world creation or world selection screen (If the button does not appear, you have already previously linked your account; see the section below entitled ‘Reconfiguring account linking’)
2. Enter your GitHub username and personal access token (PAT) that you created in the previous step on the new page that appears
3. Press the button labeled `Test credentials` to make sure you’ve entered the information properly
4. You may now exit the screen and proceed to either enable sync for a world or clone an existing one
#### Reconfiguring account linking
If you have already previously set up account linking and would like to change settings afterwards, you have a couple of options to get back to the configuration screen:
– **Configure through ModMenu:** If you have ModMenu installed, simply find the mod in the mods list and open the configuration from there
– **From the world clone screen:** There is a button in the top right corner of the world cloning screen that will open the configuration screen
– **From the world selection screen:** By holding alt and clicking on the world sync button on the bottom left of the world selection screen, you will be brought back into the configuration screen
### Enabling sync for a world
World syncing needs to be enabled individually for each world you would like to sync to your GitHub account. To enable sync for a world, do the following:
1. Select a world on the world selection screen
2. Press the cloud button in the bottom left of the screen labeled `Enable world sync`
3. Confirm your decision on the next screen
This process will create a new repository named `minegit_[world folder name]` on your GitHub account, initialize a Git repository in your world save folder, and push its current state to GitHub. From this point forward, loading the world will pull the world’s latest changes from GitHub, and exiting the world will push changes to GitHub.
You can now download this world on another device to effectively sync changes between them through the next step: cloning.
### Downloading a world on a different device (Cloning)
Cloning a world will download the exact state of the world as it was last saved to GitHub. Use the following steps to clone a world:
1. Navigate to github.com in a web browser
2. Click on your profile picture in the top right corner and then `Repositories`
3. Find the repository corresponding to the world you would like to clone and copy its name
4. Back in Minecraft, click on the button with an arrow pointing downwards labelled in the bottom left corner of either the world selection screen or world creation screen
5. Paste the name of the repository you copied earlier and press `Clone`
6. You are now able to load the world like normal and have changes be synced across your devices!
### Tips & Tricks
– If you want to exit a world without pushing it to GitHub (for example, if you wanted to restart Minecraft and load the same world without having to wait for changes to be pushed), you can hold `Alt` while clicking `Save and Quit to Title`. This will skip the ‘pushing to GitHub’ step.
– Git keeps a list of all of the worlds changes every time you exit the world. This is useful, since if you have a little knowledge of how to use the Git command line interface you can rollback your world to a previous version!
– If you want to save some storage space taken up by the size of the Git repository on your computer, or make the world quicker to clone on other devices, use the `Prune World Commits` button in the edit world menu. This will delete all of the old versions of your world, leaving only the most recent one.
## Report an issue
If you run into bugs, crashes, or simply have a suggestion on how to improve the mod, please feel free to open an issue on the mod’s issue tracker!
Please include the current Minecraft version, Fabric version, mod version, and any relevant game logs when submitting an issue.
minecraft-gpt-god-plugin
# Yous’s GPT GOD for Minecraft
## Important
If you have a newer OpenAI API account expect to get rate limited when using 4o https://platform.openai.com/docs/guides/rate-limits/usage-tiers
OpenAI has this annoying system where they limit how much newer accounts use their API so after spending about 5 dollars things should smooth out at Tier 1.
you might have issues with speech to text still but version 0.0.2 onwards you can use 4o-mini and slow down the rate in the config file to hopefully work around this.
In the video my account was Tier 2 so I didn’t experience rate limits.
Sorry if this ruins your experience, but it is out of my control.
## Overview
This Plugin Interfaces with OpenAI’s GPT-4o and Whisper models to provide the experience of having an omniscient god watching the players as featured on the BigYous Youtube Channel.
## God’s Capabilities
– God can listen to player conversations!
– God has a randomized list of liked and disliked behaviors that it will reward and punish players to make them adhere to that list!
– Experience the weird approximation of morality exhibited by LLMs!!!
## How To Install
1. download the latest version of the plugin
2. add plugin to plugins folder of your bukkit server
– I used paper mc server version 1.20.4 and Minecraft 1.20.4 in the video
3. after adding the plugin run the server to generate the plugin folder and config file
4. extract worlds.zip into `plugins/gptgodmc`
– these are the reccommended maps, you can use your own if you would like
5. open the config file
– if you want to play sandbox mode, set `startingWorld` to `island`
– if you want to play the Deathmatch mode set `gamemode` to `DEATHMATCH`
– paste in your OpenAI API key (yes, you need to give them money)
6. for voicechat to work, all players must install the voicechat mod locally
## Added Commands
`/nickname `: tells GPT what name other players call you, handy if people don’t refer to you by your user name
Minecart Filter
# MinecartFilter
Stops minecart lag by limiting how many can exist on a rail network or within a chunk.
## Setup
Drop the jar in your `plugins/` folder and restart. That’s it.
## Config
“`yaml
max-minecarts-per-rail: 10 # limit per connected rail network
max-minecarts-per-chunk: 20 # limit per chunk (checked first)
message-rail-limit: “&cToo many minecarts on this rail! Maximum is {limit}.”
message-chunk-limit: “&cToo many minecarts in this chunk! Maximum is {limit}.”
log-violations: false
“`
## Commands
`/minecartfilter` — show current limits
`/minecartfilter reload` — reload config
## Permissions
| Permission | Default |
|—|—|
| `minecartfilter.admin` | OP |
| `minecartfilter.bypass` | false |
Players with `minecartfilter.bypass` are exempt from all limits.
## Requirements
Spigot / Paper 1.20+, Java 17+
Mine Little Pony

_Ponify your Minecraft experience!_
Originally created in 2011 by Verdana, Mine Little Pony is the *original* pony mod that turns players and mobs into adorable cartoon equines.
Got any questions? Come join our Discord server!
For more options and a better experience, you’re recommended to also use HDSkins and Big Pony
Chippa256 shader
Very basic but effective shader that applies dithering and other vintage screen effects to make the iconic low-res look and feel of Minecraft seem even more low-res!
There isn’t much to say about this shader for now.
MC Server Admin Panel
**MCpanel** is a plugin that adds a web-based administration panel for your Minecraft server, accessible via a browser.
After logging in, you can send commands via the console, get a list and statistics of online players, change player settings, change server settings, plug-ins, and edit your Minecraft server files.
**The Dashboard tab** will provide you with access to server statistics with TPS graph, CPU graph, the number of online players, RAM used, server version, and player activity statistics in the form of a 24H/7days/30days graph.
Quick management functions like:
Save – Forcibly saves all changes in the world: chunks, player data, entities, inventories, achievements, etc.
Restart – to restart the Minecraft server.
Stop- to stop the Minecraft server.
A field for manually entering commands to the Minecraft server and a window for issuing information.
**The Players tab** It will allow you to view all players online, their parameters, their ping and the ability to edit their inventory, parameters and settings.
– Open the inventory of any of the players, add, delete or change items in the inventory.
– Add experience.
– Change the game mode.
– Restore health or feed.
– Teleport to another player or by coordinates.
– Kick the player.
– Give or revoke OP from player.
**The console tab** gives you access to the Minecraft server console for manual command entry with a large output window so that nothing distracts you from your tasks.
**The Management tab** provides quick access to server management
– Plugins – for viewing, deleting and installing(uploading) plugins.
– Files – Working with server files, editing, deleting, downloading and uploading .
– Settings – quick access to the server.properties file to change the server settings to the server.
– Users – Create new users with different access rights.
And additional place to save and quickly access your own links to your sites.
The plugin works via the built-in HTTP* server, does not require RCON, and opens at your server IP address in the browser.
After installing the plugin, use the configuration file to change the port, host IP address, username, and password.
*by default it will use your server IP and 8090 port.
**If you have any thoughts about what else you would like to see in the panel, share them. I will try to implement them, thank you.
MC New Textures
# MC New Textures
Backport Jappa Styles to legacy version.Or backport the unupgrade textures.Re-imagine modern textures.
Mod Compatibility ONLY have 1.7.10 version and 1.12.2 version.
Most of the texture are not mine, so you will need to check up the changelog from the last updates to know the mods, then you need find out the owner.
This is the wiki.Website.
Also include the resources, which the same in the upper version, was updated and mod resources or texture. And it also re-imagine the modern vanilia resources.
# About Project
Here is the full list of the series of MC New Textures.
From the top to the bottom is a recommended resourcepack loading order.
If this resource pack haven’t had a version that support your currently playing version, ignore this pack.
| Textures Pack | Support Version (1.X) | Link | Description | Note |
| ————————: | :——————–: | :————————————————————————: | :——————————————————–: | :—————————– |
| Base Pack | B7.3,0 – 4.7, 6 – 20.x | MC New Textures (Here) | Update textures to jappastyled textures. | |
| Blue Water | 6 – 12 | Aquatic | Fix your milky aqua. | |
| Seamless Glass | 7 – 13 | Seamless Glass & Color | Seamless glass and colorful contemporary feeling. | Optifine **Required** ! |
| Mod Addon | 7.10, 12.2 | Mod Addon | Supports of mods. | Partly Optifine **Required** ! |
| Sound | 7 – 13 | Sound Pack | Archive the sound pack for MC New Textures. | |
| Random Work | 7.10, 12.2, 17 | Random Work | Some random thinks for new textures. | Optifine **Required** ! |
| Wolfy | 6 – 13 | Wolfy | Backport modern wolf and two special dogs. (Bluey & Bingo) | Optifine **Required** ! [1.7.10: Optifine HD U E5 and above] |
| Cloudy | 0 – 21.6 | Coming soon… | Backport modern cloud and vibrant visual cloud | |
| Animal & Dye & Eggy Addon | 6 – 20 | Coming soon… | Backport modern dyes & animal & spawn eggs. | Partly Optifine **Required** ! |
# Notification
If you want more mod compatibility (ONLY 1.7.10 or 1.12.2) you can click here to have more compatibility.
After v1.5.5(For 1.7.10),I will add a pack which called as .cache-[packname], to give you the chance to create more things.
A lot of contents(e.g.:modern water color) required optifine/continuity installed. I highly recommands that you install them.
# FAQ
– **Does this resourcepack have a direct relationship to Modernity?**
In actually…NO.Because I create this resourcepack before I know about it. So it had no link to Modernity.
– **Can I use it in my video/modpack/resoursepack?**
Yeah,you can.You can use them just like you want.These are under MIT licence.
– **What about add more compatibility about (mod name)?**
If it has 1.12.2/1.7.10, I’ll do that.If not, it won’t. If you wanna, you can post some textures by yourself.
– **What about add the (vanilla content)?**
Don’t ask me about more silly things, for example, why not add recipe books in 1.7.10? (1.7.10 don’t have any recipe books)
If it was too hard for me right now, I’ll add it to the to-do-list.
– **Full meaning of this pack naming?**
[VersionType/MinecraftVersion]MCNewTextures-Type[VersionNum]
# Special Thanks! !
A very BIG thanks to Jasper “JAPPA” Boerstra.
DTFuel helps me to make out the EnderIO Ingot.
These two pack help me found some inspirations, The First Pack, The Second Pack.
Rainvay inspired me the modern bed icon.
tdstressmake the modern Immersive Engneering items.
Updated Engineering
Rainvay inspired me the modern bed icon.
Omgise helped tofind out sometexture problems.Rainvay inspired me the modern bed icon.
tdstressmake the modern Immersive Engneering items.
Updated Engineering
Rainvay inspired me the modern bed icon.
Omgise helped tofind out sometexture problems.
MC-Challenges
# Challenges
Enhance your vanilla gameplay by configuring custom challenges including custom goals. The possible combinations are endless!
Please note: This is a very early alpha release. Only a selected amount of features are implemented and any bug reports are highly appreciated. You can report bugs or give your feedback on the discord: https://discord.gg/YuSNYADznh
**The plugin itself is not configurable in Minecraft.** Instead head over to the builder website and export the challenges from there into the `/settings/` folder (create folder if not automatically created). You can find detailed configuration information as well as **examples** in the wiki
# Getting Started
### 1) Create your challenge
Head over to the challenges builder and configure your challenge. You can use the
search bar at the top to search for anything by keyword. Once you have your challenge built, click on “Modify Metadata”
at the bottom of the page and **give your challenge an individual name**. This name will be used on the server
to identify the challenge. Optionally you can set yourself as the author.
Alternatively, you can navigate to the individual rules, goals, or settings pages here and download a sample challenge
configuration.
### 2) Export your challenge
Click on “Download Settings File”. Click on “Download” to download your challenge configuration. **Put the file in the
`plugins/Challenges/settings/` folder**. Create the folder if it does not exist.
### 3) Verify your challenge
The plugin has to verify that the provided challenge ist valid. You can type `/challenges list` to get a list of all
challenges on the server. Enter `/load ` to verify and load your challenge.
### 4) [NEW] Live Challenge
Enter `/live` and click on the link.
### 5) Play your challenge
Enter `/start` to start your challenge. Have fun!
# Features
Be sure to visit the wiki to read more in-depth details about each feature.
### Rules
* NoBlockBreak
* NoBlockPlace
* NoCrafting
* NoDeath
* NoItem
* NoMobKill
All rules or each rule individually may have customizables punishments if they are violated.
### Punishments
* Cancel (The action is disallowed)
* End (The challenge run is over)
* Health
* Random Effect
* MLG
### Goals
* BlockBreakGoal
* BlockPlaceGoal
* CraftingGoal
* DeathGoal
* ItemGoal
* MobGoal
All goals may have a customizable time limit.
### Settings
* Custom Health
* Floor is Lava
* MLG
* Ultra Hardcore
MC-237017 Fix
# MC-237017 FIX
Minecraft mod to fix MC-237017 (All caves are filled with lava at and below Y value -54)
This mod is server-side only, and does not require anything on the client. Should work on all versions of Minecraft where this bug is present (1.18+, starting at snapshot 21w37a)
Maintenance Pro
### **About Maintenance Premium**
**Maintenance Premium** is a highly customizable maintenance mode plugin designed for network administrators who need total control over their server downtime.
> [!IMPORTANT]
> > **Fork Notice**: This is a maintained fork of the original Maintenance plugin. As the original owner is no longer active on Modrinth, we have taken over development to ensure compatibility with modern Minecraft versions and to add highly requested features.
—
### **New in this Version: Redis Support**
In addition to the standard MySQL support, this fork introduces **Native Redis Support**. You can now link multiple proxy instances (Velocity/Bungee) through a Redis connection, ensuring that maintenance status and whitelists are synchronized instantly across your entire network without the delay of traditional database polling.
—
### **Features**
* **Custom MOTD & Icons**: Set a specific MOTD and server icon that only appears during maintenance.
* * **MiniMessage Support**: Full support for modern Adventure MiniMessage formatting (RGB, Gradients, etc.).
* * **Advanced Timers**: Start/End timers and Scheduled maintenance window.
* * **Whitelisting**: Allow staff or developers to bypass maintenance.
* * **Join Notifications**: Get alerted when players are blocked.
* * **Proxy-Specific Features**: Per-server maintenance, Waiting/Fallback lobbies, and Redis Sync.
—
### **Configuration & Requirements**
* **Paper Users**: ProtocolLib is **required** for custom icons and playercount messages.
* * **MiniMessage**: Use the Adventure Web UI to preview your designs.
*