Mod Loading Screen
# Mod Loading Screen
An advanced loading screen with the loading progress of mods. It works on all Minecraft versions, as it doesn’t even require Minecraft. Its only requirement is Fabric Loader 0.12.0 or later or Quilt Loader (specific versions of Quilt support are unknown). Do note that if you run this mod on a game other than Minecraft, the loading screen may not close itself.
## Agent
Mod Loading Screen provides a Java agent, which allows opening the loading screen before even the mod loader itself loads. This feature is primarily targeted at modpack developers who want to make a seamless loading experience. The agent can be used by passing `-javaagent:mod-loading-screen-1.0.4.jar` as a JVM argument. If the agent is used, the loading screen should *not* be installed as a mod.
## API
To depend on the API, use the Modrinth Maven. The API should be JiJed, and doing so will not include Mod Loading Screen inside your mod (it will only include the API, which is only a few kilobytes). The API is designed to have both forwards and backwards binary compatibility with future Mod Loading Screen versions. An API is provided for checking which API calls will return stubs and which ones are real.
“`gradle
repositories {
exclusiveContent {
forRepository {
maven {
name = “Modrinth”
url = “https://api.modrinth.com/maven”
}
}
filter {
includeGroup(“maven.modrinth”)
}
}
}
dependencies {
// implementation, not modImplementation!
include(implementation(“maven.modrinth:mod-loading-screen:1.0.4:api”))
}
“`
The API has two top-level classes: `LoadingScreenApi` and `AvailableFeatures`. Full javadocs are available for both classes.
MobsToEggs

Mobs To Eggs gives your server a catchy new feature with players able to catch mobs by throwing a custom projectile (catch capsule) at them. Mobs To Eggs allows for your players to get spawn eggs legitimately.
You can define a catch chance to make it easy or difficult to catch a mobs depending on what you want on your server.
Don’t want players to be able to catch a certain mob? Just toggle the mob off in the config or give players permissions for all mobs except the one.
*MobsToEggs is a plugin that works on Paper based servers (Paper and Paper forks)*
## FEATURES:
– Catch mobs and give players spawn eggs.
– Turn mob catching on and off per mob.
– Change the projectile that catches the mob (snowball, egg, ender pearl, etc)
– Define the catch chance for each mob.
– Set an item or money cost for catching mobs.
– Works right out of the box.
– Customizable messages.
– All Minecraft mobs are supported!
– Supports Enderman catching.
– Supports catching mobs with no vanilla spawn egg (boss mobs, golems, giants).
– Allow or deny spawner changing.
– Particles and sounds when mobs are caught or failed to be caught.
– Give the mob catching capsule a custom name and/or lore.
– Save mob data to spawn eggs with a toggle to turn on/off.
– Options to punch or throw the catch capsule in order to catch the mob.
– Custom Model Data support for both catch capsule and mob spawn eggs.
– Support for WorldGuard regions and per world catching.
– Support for HEX color codes.
– Support for MiniMessages.
## USAGE:
Throw the catch capsule projectile defined in the config at the mob you want to catch, and it will have a chance to be encapsulated into the mob egg.

(alt: https://imgur.com/Tk7LKFO)
## REQUIREMENTS:
– A permission plugin (only if using permissions).
– [Vault](https://www.spigotmc.org/resources/vault.34315/) (only if using economy features).
– [NBTAPI](https://www.spigotmc.org/resources/nbt-api.7939/) (for saving [some entity data](https://gitlab.com/sugarfyi-team/public/mobstoeggs-public/-/wikis/Data-Tags)).
– Any economy plugin that works with Vault (only if using economy features).
## COMMANDS:
/mte | Show plugin information (No permission needed)
/mte help | Display the plugin help menu (No permission needed)
/mte reload | Reload plugin config file (mobstoeggs.*)
/mte give | Give a specified amount of mob catching capsules to the selected player (mobstoeggs.give)
/mte bulkupdate | Update the mobs.yml file to change either catch-chance, money-cost, or item-cost values for all mobs (mobstoeggs.*)
## PERMISSIONS:
A list of all plugin permission nodes can be found on the wiki [here](https://gitlab.com/sugarfyi-team/public/mobstoeggs-public/-/wikis/Permissions).
By default permissions are enabled and you will need to use a permissions plugin to handle these. You can turn off all mobstoeggs permission checks in the config.yml if you do not want to use a permission plugin.
## CONFIG:
You can find the plugin configs on our wiki [here](https://gitlab.com/sugarfyi-team/public/mobstoeggs-public/-/wikis/Configs).
The plugin will automatically generate the required config files when you first load the plugin. All config files are fully commented so you know what each value does.
## VIDEOS:
Spoiler
English tutorial – thanks to Zabunko:
Spanish tutorial – thanks to Ajneb97:
Mobbyy
# Mobby
Mobby is a fork of [KittenForever](https://github.com/LeMinaw/kittenforever) updated to work with newer Minecraft versions (1.20.x to 1.21.x). With Mobby, you can “mini-fy” mobs to stop them from ageing or free them to resume their natural growth. The plugin also tracks the mobs you’ve mini-fied or freed, allowing you to view their status and location at any time. All credit goes to [LeMinaw](https://www.github.com/LeMinaw) for creating the base plugin.
Grab the latest version from the [Releases Page](https://www.github.com/plushycat/mobby/releases)
—
## 🌟 Features
– **Mini-fy Mobs**: Prevent mobs from ageing using configurable items.
– **Free Mobs**: Resume mob growth when desired.
– **Mob Tracking**: Keep track of mobs you’ve mini-fied or freed, including their name, type, status, and location.
– **Periodic Updates**: Mob locations are updated every 60 seconds by default (configurable).
– **Persistent Records**: Tracked mobs are saved to disk and persist across server restarts.
– **Simple Commands**: Easily manage the plugin with `/mobby` commands.
—
## 📋 Commands
### `/mobby reload`
– **Description**: Reloads the plugin configuration.
– **Permission**: `mobby.reload`
### `/mobby list`
– **Description**: Displays a list of mobs you’ve mini-fied or freed.
– **Hover**: See the mob’s type, UUID, and current status (age-locked or not).
– **Location**: View the last known location of the mob.
– **Permission**: `mobby.list`
—
## ⚙️ Configuration
The plugin generates a `config.yml` file on first run. Below are the default settings:
“`yaml
items:
stopGrowth:
before: AMETHYST_SHARD
after: AIR
amount: 1
resumeGrowth:
before: HONEY_BOTTLE
after: GLASS_BOTTLE
amount: 1
tracking:
update-interval-seconds: 60
save-on-change: true
“`
### Key Settings
– **Items**:
– `before`: The item required to mini-fy or free a mob.
– `after`: The item given back after the action (set to `AIR` for nothing).
– `amount`: The number of items consumed per action.
– **Tracking**:
– `update-interval-seconds`: How often mob locations are updated (default: 60 seconds).
– `save-on-change`: Whether to save mob records immediately after changes.
—
## 🐾 How It Works
1. **Mini-fy a Mob**:
– Right-click a baby mob with the configured item (e.g., `AMETHYST_SHARD`).
– The mob will stop ageing, and you’ll see a particle effect.
2. **Free a Mob**:
– Right-click a mini-fied mob with the configured item (e.g., `HONEY_BOTTLE`).
– The mob will resume ageing, and you’ll see a happy particle effect.
3. **Track Your Mobs**:
– Use `/mobby list` to view all mobs you’ve mini-fied or freed.
– Hover over a mob’s name to see its type, UUID, and status.
—
MiraiMC
MiraiMC
[](https://github.com/DreamVoid/MiraiMC/releases/latest)
[](https://www.codefactor.io/repository/github/dreamvoid/miraimc)
[](https://github.com/DreamVoid/MiraiMC/actions/workflows/maven.yml?query=is%3Asuccess)

—
MiraiMC is a [mirai](https://github.com/mamoe/mirai) bot for Minecraft servers
> Mirai is a high-performance multi-platform library, as well as a framework, providing protocol support for Tencent QQ.
> Mirai is designed to handle all sorts of messaging works that can be automatically done by bots in a perfect way.
> Tencent QQ: A modern messaging software used by all Chinese netizens.
## Features
* Support Bukkit/Sponge servers.
* Support BungeeCord/Velocity proxies.
* Optimized for GUI-less OS such as Linux
* Dynamically load dependent libraries to minimize file size.
## Getting Started (Server)
1. Download MiraiMC from “Featured versions” part. Then install it like installing other plugins.
2. Configure any plugins’ that depend on MiraiMC (if any) and login to your bot account
A more detailed tutorial can be found here: https://docs.miraimc.dreamvoid.me/
## Getting Started (Plugin Developer)
* It is simple to develop a new MiriMC-based plugin by using template:
– [Maven](https://github.com/MiraiMC/MiraiMC-Template)
– [Gradle KotlinDSL](https://github.com/MiraiMC/MiraiMC-Template-Gradle-KotlinDSL)
* MiraiMC javadoc here: https://jd.miraimc.dreamvoid.me
* Detailed development tutorial here: https://docs.miraimc.dreamvoid.me/
### Dependency
#### Maven
“`
io.github.dreamvoid
MiraiMC-Integration
1.9
provided
“`
#### Gradle
“`
implementation ‘io.github.dreamvoid:MiraiMC-Integration:1.9’
“`
## Commands and permissions
### Commands
| Command | Description | Permissions |
| —- | — | —- |
| /mirai | MiraiMC Robot Command | miraimc.command.mirai |
| /mirai login [protocol] | Log in to a robot (you can execute this command multiple times to log in to multiple robots) | miraimc.command.mirai.login |
| /mirai logout | Log out and close a bot | miraimc.command.mirai.logout |
| /mirai list | List currently online bots | miraimc.command.mirai.list |
| /mirai sendfriendmessage | Send a message to a specified friend | miraimc.command.mirai.sendfriendmessage |
| /mirai sendfriendnudge | Send a stamp to a specified friend | miraimc.command.mirai.sendfriendnudge |
| /mirai sendgroupmessage | Send a message to the specified group | miraimc.command.mirai.sendgroupmessage |
| /mirai checkonline | Check if the specified robot is online | miraimc.command.mirai.checkonline |
| /mirai autologin add [protocol] | Add an autologin robot account | miraimc.command.mirai.autologin |
| /mirai autologin remove | Remove an autologin bot account | miraimc.command.mirai.autologin |
| /mirai autologin list | View autologin robot account list | miraimc.command.mirai.autologin |
| /miraimc | MiraiMC Plugin Command | miraimc.command.miraimc |
| /miraimc bind add | Add binding for player and QQ number | miraimc.command.miraimc.bind |
| /miraimc bind getplayer | Get the QQ number bound to the specified player name | miraimc.command.miraimc.bind |
| /miraimc bind getqq | Get the player name bound to the specified QQ number | miraimc.command.miraimc.bind |
| /miraimc bind removeplayer | Removes a player’s bind | miraimc.command.miraimc.bind |
| /miraimc bind removeqq | Delete the binding of a QQ number | miraimc.command.miraimc.bind |
| /miraimc reload | Reload configuration file | miraimc.command.miraimc.reload |
### Permissions
| Permission Node | Description | Default |
| ——- | —- | —- |
| miraimc.command.mirai | Allow use of `/mirai` | OP |
| miraimc.command.mirai.* | Allow all subcommands of `/mirai` | OP |
| miraimc.command.mirai.login | Allow `/mirai login` | OP |
| miraimc.command.mirai.logout | Allow `/mirai logout` | OP |
| miraimc.command.mirai.list | Allow `/mirai list` | OP |
| miraimc.command.mirai.sendfriendmessage | Allow `/mirai sendfriendmessage` | OP |
| miraimc.command.mirai.sendfriendnudge | Allow `/mirai sendfriendnudge` | OP |
| miraimc.command.mirai.sendgroupmessage | Allow `/mirai sendgroupmessage` | OP |
| miraimc.command.mirai.checkonline | Allow `/mirai checkonline` | OP |
| miraimc.command.mirai.autologin | Allow `/mirai autologin` | OP |
| miraimc.command.miraimc | Allow use of `/miraimc` | OP |
| miraimc.command.miraimc.* | Allow all subcommands of `/miraimc` | OP |
| miraimc.command.miraimc.bind | Allow `/miraimc bind` and subcommands | OP |
| miraimc.command.miraimc.reload | Allow `/miraimc reload` | OP |
## LICENSE
[GNU Affero General Public License v3.0](https://github.com/DreamVoid/MiraiMC/blob/main/LICENSE)
## Acknowledgments
Thanks to the following people/teams/projects for their contributions to MiraiMC!
* [mamoe/mirai](https://github.com/mamoe/mirai): Powerful QQ robot support library, the core and foundation of MiraiMC.
* [lucko/helper](https://github.com/lucko/helper): Provide MiraiMC with a solution to dynamically load the mirai core.
* [brettwooldridge/HikariCP](https://github.com/brettwooldridge/HikariCP): An efficient SQL connection pool, providing database connection solutions for MiraiMC.
* [LT_Name](https://github.com/lt-name): Optimized a lot of Nukkit code for MiraiMC, also provided a lot of help for MiraiMC.
* You.
[DreamVoid](https://github.com/DreamVoid) and [MiraiMC](https://github.com/MiraiMC), made with ❤.
This file is a translated version of the [original file](https://github.com/DreamVoid/MiraiMC/blob/main/README.md), and some semantics may differ from the original file.
Minimalist Crosshair
# Minimalist Crosshair
Replace the default ugly vanilla crosshair with a better modern minimalist unobstructive one.
Crosshair Showcase on different 1080p GUI Scale:
GUI Scale 1
![Crosshair Showcase [GUI Scale 1] [1920×1080]](https://i.imgur.com/A93USzq.png)
GUI Scale 2
![Crosshair Showcase [GUI Scale 2] [1920×1080]](https://i.imgur.com/GsKTo8e.png)
GUI Scale 3
![Crosshair Showcase [GUI Scale 3] [1920×1080]](https://i.imgur.com/sKI6zsn.png)
GUI Scale 4
![Crosshair Showcase [GUI Scale 4] [1920×1080]](https://i.imgur.com/PZXQriM.png)
MineLua
Tired of compiling Java plugins? MineLua allows you to write server logic using Lua — a fast, lightweight, and easy-to-learn scripting language.
Just edit your scripts, type /minelua reload, and see changes instantly. No server restarts required.
**⚠️ WARNING:** UNSTABLE BUILD
This is a Proof of Concept (v0.1).
Due to hosting limitations, some features (like the Player API) are experimental and might contain bugs. Use this on test servers only!
## 🔥 Features
– Hot Reloading: Change code on the fly without restarting the server.
– Simple API: We wrapper Bukkit methods into a simple Lua syntax.
– Event Driven: Handle onPlayerJoin, onBlockBreak, onChat easily.
– Standard Lua: Powered by LuaJ, supports loops, math, and variables.
## 🛠 Installation
1. Download the .jar and drop it into your /plugins/ folder.
2. Restart the server once to generate the config.
3. Go to plugins/MineLua/scripts/ and create your .lua files.
4. Type /minelua reload to apply changes.
MineGIT
### Cloud sync for Minecraft worlds!
Sync and back up your worlds between multiple devices! Fully integrated into the Minecraft client for a seamless experience when loading, saving, and downloading worlds from the cloud.
## How does it work?
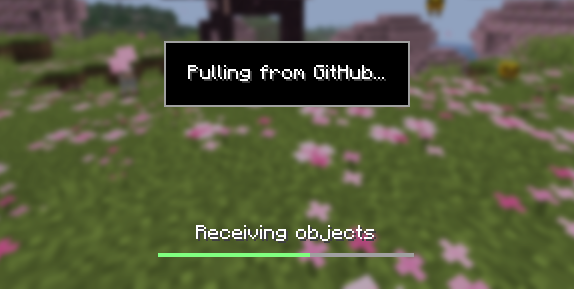
Worlds that you select are uploaded to your GitHub account as repositories. Every time you quit to the title screen, a commit of the current state of your world is created and pushed to the repository on GitHub. Whenever the world is loaded, the mod will check if any new versions of the world are available in the cloud, and if so, they will be downloaded to your device.
Since this mod uses Git internally, it also means that only the files in your world save folder that you modify will be uploaded and downloaded each time, saving storage space and internet bandwidth.
## How do I set it up?
There are several steps to setting up this mod, which include creating a personal access token for GitHub, as well as choosing the worlds you would like to enable MineGIT for.
### Video guide:
### Creating a GitHub personal access token
In order to do the first-time setup, you will need to generate a GitHub personal access token through the following steps:
1. Create an account on GitHub if you do not have one already (https://github.com)
2. Navigate to the [page to create a personal access token](https://github.com/settings/personal-access-tokens)
3. Click `Generate new token`
4. Enter any name (such as MineGIT) under `Token name`
5. Scroll to `Expiration` and set it to `No expiration` (so that you do not have to repeat this process when the token expires)
6. Under `Repository access` choose `All repositories`
7. Under `Permissions`, click `Add permissions` and select `Administration` and `Contents`
8. Set `Access` on the `Administration` and `Contents` lines to `Read and write`
9. Press `Generate token` and copy the generated token to be pasted into Minecraft later (the generated token should start with `github_pat_` and be followed by a long string of letters and numbers)
### Setting up in-game
Once the mod is installed and you are in-game, do the following steps to link your GitHub account with the mod:
1. Click on the cloud button on the bottom left corner of the world creation or world selection screen (If the button does not appear, you have already previously linked your account; see the section below entitled ‘Reconfiguring account linking’)
2. Enter your GitHub username and personal access token (PAT) that you created in the previous step on the new page that appears
3. Press the button labeled `Test credentials` to make sure you’ve entered the information properly
4. You may now exit the screen and proceed to either enable sync for a world or clone an existing one
#### Reconfiguring account linking
If you have already previously set up account linking and would like to change settings afterwards, you have a couple of options to get back to the configuration screen:
– **Configure through ModMenu:** If you have [ModMenu](https://modrinth.com/mod/mod-menu) installed, simply find the mod in the mods list and open the configuration from there
– **From the world clone screen:** There is a button in the top right corner of the world cloning screen that will open the configuration screen
– **From the world selection screen:** By holding alt and clicking on the world sync button on the bottom left of the world selection screen, you will be brought back into the configuration screen
### Enabling sync for a world
World syncing needs to be enabled individually for each world you would like to sync to your GitHub account. To enable sync for a world, do the following:
1. Select a world on the world selection screen
2. Press the cloud button in the bottom left of the screen labeled `Enable world sync`
3. Confirm your decision on the next screen
This process will create a new repository named `minegit_[world folder name]` on your GitHub account, initialize a Git repository in your world save folder, and push its current state to GitHub. From this point forward, loading the world will pull the world’s latest changes from GitHub, and exiting the world will push changes to GitHub.
You can now download this world on another device to effectively sync changes between them through the next step: cloning.
### Downloading a world on a different device (Cloning)
Cloning a world will download the exact state of the world as it was last saved to GitHub. Use the following steps to clone a world:
1. Navigate to [github.com](https://github.com) in a web browser
2. Click on your profile picture in the top right corner and then `Repositories`
3. Find the repository corresponding to the world you would like to clone and copy its name
4. Back in Minecraft, click on the button with an arrow pointing downwards labelled in the bottom left corner of either the world selection screen or world creation screen
5. Paste the name of the repository you copied earlier and press `Clone`
6. You are now able to load the world like normal and have changes be synced across your devices!
### Tips & Tricks
– If you want to exit a world without pushing it to GitHub (for example, if you wanted to restart Minecraft and load the same world without having to wait for changes to be pushed), you can hold `Alt` while clicking `Save and Quit to Title`. This will skip the ‘pushing to GitHub’ step.
– Git keeps a list of all of the worlds changes every time you exit the world. This is useful, since if you have a little knowledge of how to use the Git command line interface you can rollback your world to a previous version!
– If you want to save some storage space taken up by the size of the Git repository on your computer, or make the world quicker to clone on other devices, use the `Prune World Commits` button in the edit world menu. This will delete all of the old versions of your world, leaving only the most recent one.
## Report an issue
If you run into bugs, crashes, or simply have a suggestion on how to improve the mod, please feel free to open an issue on the mod’s [issue tracker](https://github.com/ModMonster/MineGIT/issues)!
Please include the current Minecraft version, Fabric version, mod version, and any relevant game logs when submitting an issue.
minecraft-gpt-god-plugin
# Yous’s GPT GOD for Minecraft
## Important
If you have a newer OpenAI API account expect to get rate limited when using 4o https://platform.openai.com/docs/guides/rate-limits/usage-tiers
OpenAI has this annoying system where they limit how much newer accounts use their API so after spending about 5 dollars things should smooth out at Tier 1.
you might have issues with speech to text still but version 0.0.2 onwards you can use 4o-mini and slow down the rate in the config file to hopefully work around this.
In the video my account was Tier 2 so I didn’t experience rate limits.
Sorry if this ruins your experience, but it is out of my control.
## Overview
This Plugin Interfaces with OpenAI’s GPT-4o and Whisper models to provide the experience of having an omniscient god watching the players as featured on the BigYous Youtube Channel.
## God’s Capabilities
– God can listen to player conversations!
– God has a randomized list of liked and disliked behaviors that it will reward and punish players to make them adhere to that list!
– Experience the weird approximation of morality exhibited by LLMs!!!
## How To Install
1. download the latest version of the plugin
2. add plugin to plugins folder of your bukkit server
– I used [paper mc server version 1.20.4](https://papermc.io/downloads/paper) and Minecraft 1.20.4 in the video
3. after adding the plugin run the server to generate the plugin folder and config file
4. extract [worlds.zip](https://legacy.curseforge.com/minecraft/worlds/bigyous-minegpt-worlds/files) into `plugins/gptgodmc`
– these are the reccommended maps, you can use your own if you would like
5. open the config file
– if you want to play sandbox mode, set `startingWorld` to `island`
– if you want to play the Deathmatch mode set `gamemode` to `DEATHMATCH`
– paste in your OpenAI API key (yes, you need to give them money)
6. for voicechat to work, all players must install the voicechat mod locally
## Added Commands
`/nickname `: tells GPT what name other players call you, handy if people don’t refer to you by your user name
Minecart Filter
# MinecartFilter
Stops minecart lag by limiting how many can exist on a rail network or within a chunk.
## Setup
Drop the jar in your `plugins/` folder and restart. That’s it.
## Config
“`yaml
max-minecarts-per-rail: 10 # limit per connected rail network
max-minecarts-per-chunk: 20 # limit per chunk (checked first)
message-rail-limit: “&cToo many minecarts on this rail! Maximum is {limit}.”
message-chunk-limit: “&cToo many minecarts in this chunk! Maximum is {limit}.”
log-violations: false
“`
## Commands
`/minecartfilter` — show current limits
`/minecartfilter reload` — reload config
## Permissions
| Permission | Default |
|—|—|
| `minecartfilter.admin` | OP |
| `minecartfilter.bypass` | false |
Players with `minecartfilter.bypass` are exempt from all limits.
## Requirements
Spigot / Paper 1.20+, Java 17+
Chippa256 shader
Very basic but effective shader that applies dithering and other vintage screen effects to make the iconic low-res look and feel of Minecraft seem even more low-res!
There isn’t much to say about this shader for now.