Basalt Crusher
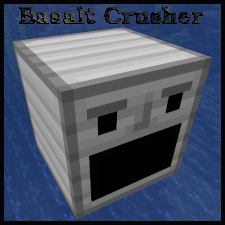
# Basalt Crusher
Vanilla friendly fabric mod to make basalt great again.
## Once Upon a Time in IRC…
<@jyasu> It’s possible they don’t spawn in basalt deltas and in the quadrant I’m exploring, I keep hitting an awful lot of basalt deltas. A lot more than we’ve seen in survival2.
<@jacob> Ugh, basalt
<@jyasu> So, I don’t use it for anything except the pillars in my nether tunnels.
<@jyasu>And honestly the only reason I use it there is I had to do *something* with the stuff and the aesthetic kinda works there.
<@jacob> Time for a new mod: Basalt Crusher, which just grinds basalt and outputs gravel!
<@jacob> … actually that’d be really easy to make
<@jyasu> Hardest part is the graphics.
The Basalt Crusher does just one thing. You feed it consumable jaw liners
and any kind of basalt and it gives you back sweet, sweet gravel. Its
friend the Grizzly does what a grizzly does: it sorts out bigger stuff from
smaller stuff. Placed beneath the Basalt crusher, it will turn 1/4 of your
gravel into sand. Fed coarse dirt, it will sift the gravel back out of the
coarse dirt for you. The Gravel Mill uses rods (called Mill Rod Charge) to
crush gravel into sand.
I wanted this mod to fit in with a fairly minimalist Vanilla aesthetic.
The Basalt Crusher provides a nice use for the ugly[^1] basalt blocks, and
it does so in what I think is a pretty Vanilla way. If you want a lot of
gravel you are going to need an iron farm. The iron jaw liner will crush
250 basalt blocks at a cost of 31 iron ingots (but late game, there are
options to increase the output quite a bit). The Gravel Mill also uses a
fair amount of iron for its consumable mill rods.
## Terrestria integration!
If you play with Terrestria installed,
Basalt Crusher adds some extras based on Terrestria’s Volcanic Island biome.
You can crush Volcanic Rock into Black Gravel and from there to Black Sand.
Black Gravel yields Obsidian Shards in the same manner Gravel yields Flint.
And Obsidian Shards have several convenient uses…
## How do the jaw liner slots work?
Since 0.2.0, the mod allows the user to input a stack of jaw liners to the
left slot and have them move one at a time to the right slots where they get
damaged. Minecraft does not admit it is possible to stack things that can
be damaged or enchanted and jaw liners are both. This means you may see
slightly strange behavior in your inventory related to this feature. I
think overall it’s worth the convenience, though.
[^1]: Opinions may vary because some folks are wrong. I’ve even met people
who don’t like the look of acacia wood! =)
Bare Bones – Stained Glass Fix
This resource pack changes the stained glass blocks and pains from the Bare Bones pack by RobotPants to make them more vanilla-like, by adding borders and decreasing their opacity.
Bare Bones Borders
Bare Bones Borders adds borders to important blonks like ores and powdered snow in the style of Bare Bones.
Also supports emissive textures with the use of Continuity or ~~Optifine~~.
I’m open to suggestions for more blocks or mod support.
Balanced Recall
# Balanced Recall
*Mirrors and a mat*
This mod requires Fabric and the Fabric API.
## Features
**Magic Mirror**

Using the magic mirror will teleport you to your spawnpoint from anywhere in the same dimension. It has 256 charges, and can be recharged at a smithing table with an ender pearl. If it runs out of charges, rather than breaking, it will simply cease to function until recharged.
—
**Dimensional Mirror**

The dimensional mirror is identical to the magic mirror, except it has twice the charges and can travel between dimensions.
—
**Sleeping Mat**

The sleeping mat allows you to skip the night without setting your spawn. Be warned, though, sleeping on this rough straw-padded bamboo mat is not enough to ward off phantoms. The sleeping mat has 128 uses and cannot be repaired.
—
## Planned features
– **Config Options**
– Toggle taking damage interrupting recall
– Toggle taking damage putting mirrors on cooldown
– Toggle ability to recall when monsters are nearby
– Set magic mirror use time
– Set magic mirror cooldown time
– Set dimensional mirror use time
– Set dimensional mirror cooldown time
– Toggle sleeping mat resetting phantom timer
Back to the PIT
# Back to the PIT
### formerly known as LRRgh
This resource pack replaces the default Minecraft bell sound with “Back to the PIT”
This can be useful if, for example, you wanted to dig a 16×16 hole down to bedrock, and ring a bell each time you intend to return to that hole.
## CREDITS
“Back to the PIT” sound voiced by the late Wayne June for Darkest Dungeon by Red Hook Studios
— https://www.darkestdungeon.com/darkest-dungeon/
resource pack icon taken from famous youtuber James Turner’s jlrrPit emote
— https://twitch.tv/James_LRR
art made by Taylor “TQ” Quinn
— https://linktr.ee/WitchyTQ
resource pack haphazardly hacked together by MungoDude
— https://kind.social/@mungodude
— https://bsky.app/profile/mungodude.bsky.social
AutoSwitch


# AutoSwitch
**AutoSwitch** is a Minecraft mod (for Fabric / NeoForge) that automatically swaps the held item based on what you’re
about to do – mining, attacking, interacting, or when specific stats change and what is available on your hotbar
(i.e. you hit a stone block with your fist, it will switch to a pickaxe).
It’s rule-driven and highly configurable via a HOCON config file `autoswitch.conf`,
located in the `config` folder which is next to the resource pack folder.
A quick way to navigate there is by going to `Options > Resource Packs > navigate up one folder`.
The mod can be toggled on/off dynamically in game by pressing `R`.
—
## Configuration
> This section only applies to AutoSwitch 12+. Earlier versions used a different config format.
There are four sections in the config file – three for defining selectors and targets when various actions occur,
and one for general feature configuration:
* `attack-action` – rules used when **attacking** (entities or blocks).
* `interact-action` – rules used when **interacting** (right-click-like actions).
* `stat-change-action` – rules triggered by stat events (e.g., using a totem of undying).
* `feature-config` – Controls the overall behaviour of the mod.
Each rule contains:
* `priority` – integer; higher values are given precedence what multiple targets match.
* `target` – what this rule matches (types: `BLOCK`, `ENTITY`, `STAT`, or an `EXPRESSION` allowing the combination of other targets).
Targets can reference tags or specific explicit IDs (`minecraft:ender_chest`, `sugar_cane`).
* `tools` – ordered array of candidates to switch to. Each must be an `ITEM` or an `EXPRESSION` of `ITEM`s,
or be an empty list (to disable switching for that target).
`EXPRESSION`s can have as many elements or as much depth as you wish, allowing for a great deal of control.
The default config covers a wide range of cases and should serve as a great basis for expanding.
Tools and targets can have an optional `data` field to control things like enchantments or blockstates that should be matched.
### Live edits
Simply resave the config file when ingame for it to be automatically reloaded.
### The Gritty Details
#### Expressions
Expressions can be nested to any depth you desire.
Expressions support the following operations:
* `OR` – Match any one of its children
* `AND` – Match all of its children
* `NOT` – Match none of its children
* `XOR` – Match only one of its children
#### Data
Currently, the following data types are supported:
* `BlockState` – The block state to match
* `Component` – Currently only supports `POTION_CONTENTS` on items
* `Enchantment` – The enchantments an item has
* `EntityEquipment` – The equipment an entity is wearing, such as a pig with a saddle
#### Selection Priority
**Decision order (first thing that differs wins):**
1. **Target Priority** – rules with higher priority are preferred.
2. **Target Rating (multi-level)** – compare rating level 0 – n up to the configured maximum.
At each level compare, in order:
* `isGroup` (prefer non-groups)
* `hasData` (prefer those with data)
* `typeRating` (higher preferred, e.g. weapon DPS or mining level)
* `dataRating` (higher preferred, e.g. normalized enchantment level)
3. **Tool Priority** – prefer tools that are intrinsically prioritized higher.
4. **Tool Rating (multi-level)** – same multi-level comparison logic as Target Rating (isGroup → hasData → typeRating → dataRating).
5. **Is the slot currently selected?** – prefer the currently held slot if tied so far.
6. **Smallest slot index** – final tie-breaker: lowest (leftmost) inventory slot wins.
##### Text-based Flowchart
“`
START: candidate inventory slots (all slots that matched a selector)
|
v
Compare Target Priority
|– if different –> choose highest Target Priority –> END
|
v (same)
Compare Target Rating (levels 0..N)
For each level:
– compare: isGroup? (non-group preferred)
– compare: hasData? (with data preferred)
– compare: typeRating (higher wins)
– compare: dataRating (higher wins)
|– if difference found –> choose winner –> END
|
v (no difference)
Compare Tool Priority
|– if different –> choose highest Tool Priority –> END
|
v (same)
Compare Tool Rating (levels 0..N)
(same per-level rules as Target Rating)
|– if difference found –> choose winner –> END
|
v (still tied)
Prefer currently selected slot?
|– Yes –> choose currently selected –> END
|– No –> choose smallest (leftmost) slot –> END
“`
AutoAFKFish
# AutoAFKFish
A fairly simple fabric mod for all versions of Minecraft that support fabric prior to 1.21.9 with v1.1.2, and 1.21.9+
with v1.1.3, making it so that when you press the F12 Key, it will start acting as if you are holding down the right
mouse button. It will keep acting like that even if you open your inventory, open chat, pause on a multiplayer server,
and any other action that does not stop the integrated server if you are on a client world, or any action regardless on
a server world. You can toggle it off by pressing the F12 Key again (there is a 1.5 second cooldown). Must be used in
conjunction with a afk fishing farm.
Thanks for the French Translation, Calvineries!
Thanks for the Simplified Chinese Translation, Wudji!
Also available on CurseForge.
AquaHUD/Flat
# AquaHUD/Flat
A simplistic, modern UI resource pack designed to match Sodium’s UI.
## What makes AquaHUD/Flat different from normal AquaHUD?
AquaHUD Flat is AquaHUD but with:
* no grids
* no hard exterior outlines
* more seperation between elements
## About
Upon installing sodium, I immediately found it rather annoying that it’s user interface was completely different from the rest of Minecraft’s. So, I took it upon myself to create a resource pack that attempts to complement Sodium’s user interface in a way that makes every screen feel consistent and like it was meant to look that way. This has been in development for quite a while, so there may be some inconsistencies with some UIs.
## Permissions
do whatever, i dont care
## Requirements
The only requirement is my TranslucencyFix mod.
## Recommendations
Ready for the cool stuff? Me too.
* Sodium: https://modrinth.com/mod/sodium
* Sodium Extra: https://modrinth.com/mod/sodium-extra
* Blur: https://modrinth.com/mod/blur-fabric
* ‘Slight’ Gui Modifications: https://modrinth.com/mod/slight-gui-modifications
* OneBar: https://modrinth.com/mod/onebar
* Using Optifabric? Custom Background Color instead of Blur: https://modrinth.com/mod/r1ifqLkv/version/XQhFC2Zk
Special instructions:
* Blur
* set Fade Time to 0
* set Blur Radius to 32
* set Gradient Start Color to 75999999
* set Gradient End Color to 75555555
* ‘Slight Gui Modifications
* Enable Tooltip Modifications
* set Background color to A0000000
* set Outline Top Color to 00000000
* set Outline Bottom Color to 00000000
* LibGUI (Open Mods menu -> Filter -> Libraries -> Shown)
* Enable Dark mode.
* Why? Because LibGUI hardcodes damn near half of it’s GUIs and I can’t do anything about it.
* OneBar
* Set background color to A0000000
* Custom Background Color
* Alpha on both start and end: 117
* Red, Green, and Blue on start: 153
* Red, Green, and Blue on end: 85
AquaHUD
# AquaHUD
A simplistic, modern UI resource pack designed to complement Sodium’s UI.
## About
Upon installing sodium, I immediately found it rather annoying that it’s user interface was completely different from the rest of Minecraft’s. So, I took it upon myself to create a resource pack that attempts to complement Sodium’s user interface in a way that makes every screen feel consistent and like it was meant to look that way. This has been in development for quite a while, so there may be some inconsistencies with some UIs.
## Want something more faithful to sodium’s style?
AquaHUD Flat is AquaHUD but with:
* no grids
* no hard exterior outlines
* more seperation between elements
## Permissions
do whatever, i dont care
## Requirements
The only requirement is my TranslucencyFix mod.
## Recommendations
Ready for the cool stuff? Me too.
* Sodium: https://modrinth.com/mod/sodium
* Sodium Extra: https://modrinth.com/mod/sodium-extra
* Blur: https://modrinth.com/mod/blur-fabric
* ‘Slight’ Gui Modifications: https://modrinth.com/mod/slight-gui-modifications
* OneBar: https://modrinth.com/mod/onebar
* Using Optifabric? Custom Background Color instead of Blur: https://modrinth.com/mod/r1ifqLkv/version/XQhFC2Zk
Special instructions:
* Blur
* set Fade Time to 0
* set Blur Radius to 32
* set Gradient Start Color to 75999999
* set Gradient End Color to 75555555
* ‘Slight Gui Modifications
* Enable Tooltip Modifications
* set Background color to A0000000
* set Outline Top Color to 00000000
* set Outline Bottom Color to 00000000
* LibGUI (Open Mods menu -> Filter -> Libraries -> Shown)
* Enable Dark mode.
* Why? Because LibGUI hardcodes damn near half of it’s GUIs and I can’t do anything about it.
* OneBar
* Set background color to A0000000
* Custom Background Color
* Alpha on both start and end: 117
* Red, Green, and Blue on start: 153
* Red, Green, and Blue on end: 85
Apothecary Diaries Maomao Title Background
Change the main menu background to Maomao from The Apothecary Diaries.