MiraiMC
MiraiMC
[](https://github.com/DreamVoid/MiraiMC/releases/latest)
[](https://www.codefactor.io/repository/github/dreamvoid/miraimc)
[](https://github.com/DreamVoid/MiraiMC/actions/workflows/maven.yml?query=is%3Asuccess)

—
MiraiMC is a [mirai](https://github.com/mamoe/mirai) bot for Minecraft servers
> Mirai is a high-performance multi-platform library, as well as a framework, providing protocol support for Tencent QQ.
> Mirai is designed to handle all sorts of messaging works that can be automatically done by bots in a perfect way.
> Tencent QQ: A modern messaging software used by all Chinese netizens.
## Features
* Support Bukkit/Sponge servers.
* Support BungeeCord/Velocity proxies.
* Optimized for GUI-less OS such as Linux
* Dynamically load dependent libraries to minimize file size.
## Getting Started (Server)
1. Download MiraiMC from “Featured versions” part. Then install it like installing other plugins.
2. Configure any plugins’ that depend on MiraiMC (if any) and login to your bot account
A more detailed tutorial can be found here: https://docs.miraimc.dreamvoid.me/
## Getting Started (Plugin Developer)
* It is simple to develop a new MiriMC-based plugin by using template:
– [Maven](https://github.com/MiraiMC/MiraiMC-Template)
– [Gradle KotlinDSL](https://github.com/MiraiMC/MiraiMC-Template-Gradle-KotlinDSL)
* MiraiMC javadoc here: https://jd.miraimc.dreamvoid.me
* Detailed development tutorial here: https://docs.miraimc.dreamvoid.me/
### Dependency
#### Maven
“`
io.github.dreamvoid
MiraiMC-Integration
1.9
provided
“`
#### Gradle
“`
implementation ‘io.github.dreamvoid:MiraiMC-Integration:1.9’
“`
## Commands and permissions
### Commands
| Command | Description | Permissions |
| —- | — | —- |
| /mirai | MiraiMC Robot Command | miraimc.command.mirai |
| /mirai login [protocol] | Log in to a robot (you can execute this command multiple times to log in to multiple robots) | miraimc.command.mirai.login |
| /mirai logout | Log out and close a bot | miraimc.command.mirai.logout |
| /mirai list | List currently online bots | miraimc.command.mirai.list |
| /mirai sendfriendmessage | Send a message to a specified friend | miraimc.command.mirai.sendfriendmessage |
| /mirai sendfriendnudge | Send a stamp to a specified friend | miraimc.command.mirai.sendfriendnudge |
| /mirai sendgroupmessage | Send a message to the specified group | miraimc.command.mirai.sendgroupmessage |
| /mirai checkonline | Check if the specified robot is online | miraimc.command.mirai.checkonline |
| /mirai autologin add [protocol] | Add an autologin robot account | miraimc.command.mirai.autologin |
| /mirai autologin remove | Remove an autologin bot account | miraimc.command.mirai.autologin |
| /mirai autologin list | View autologin robot account list | miraimc.command.mirai.autologin |
| /miraimc | MiraiMC Plugin Command | miraimc.command.miraimc |
| /miraimc bind add | Add binding for player and QQ number | miraimc.command.miraimc.bind |
| /miraimc bind getplayer | Get the QQ number bound to the specified player name | miraimc.command.miraimc.bind |
| /miraimc bind getqq | Get the player name bound to the specified QQ number | miraimc.command.miraimc.bind |
| /miraimc bind removeplayer | Removes a player’s bind | miraimc.command.miraimc.bind |
| /miraimc bind removeqq | Delete the binding of a QQ number | miraimc.command.miraimc.bind |
| /miraimc reload | Reload configuration file | miraimc.command.miraimc.reload |
### Permissions
| Permission Node | Description | Default |
| ——- | —- | —- |
| miraimc.command.mirai | Allow use of `/mirai` | OP |
| miraimc.command.mirai.* | Allow all subcommands of `/mirai` | OP |
| miraimc.command.mirai.login | Allow `/mirai login` | OP |
| miraimc.command.mirai.logout | Allow `/mirai logout` | OP |
| miraimc.command.mirai.list | Allow `/mirai list` | OP |
| miraimc.command.mirai.sendfriendmessage | Allow `/mirai sendfriendmessage` | OP |
| miraimc.command.mirai.sendfriendnudge | Allow `/mirai sendfriendnudge` | OP |
| miraimc.command.mirai.sendgroupmessage | Allow `/mirai sendgroupmessage` | OP |
| miraimc.command.mirai.checkonline | Allow `/mirai checkonline` | OP |
| miraimc.command.mirai.autologin | Allow `/mirai autologin` | OP |
| miraimc.command.miraimc | Allow use of `/miraimc` | OP |
| miraimc.command.miraimc.* | Allow all subcommands of `/miraimc` | OP |
| miraimc.command.miraimc.bind | Allow `/miraimc bind` and subcommands | OP |
| miraimc.command.miraimc.reload | Allow `/miraimc reload` | OP |
## LICENSE
[GNU Affero General Public License v3.0](https://github.com/DreamVoid/MiraiMC/blob/main/LICENSE)
## Acknowledgments
Thanks to the following people/teams/projects for their contributions to MiraiMC!
* [mamoe/mirai](https://github.com/mamoe/mirai): Powerful QQ robot support library, the core and foundation of MiraiMC.
* [lucko/helper](https://github.com/lucko/helper): Provide MiraiMC with a solution to dynamically load the mirai core.
* [brettwooldridge/HikariCP](https://github.com/brettwooldridge/HikariCP): An efficient SQL connection pool, providing database connection solutions for MiraiMC.
* [LT_Name](https://github.com/lt-name): Optimized a lot of Nukkit code for MiraiMC, also provided a lot of help for MiraiMC.
* You.
[DreamVoid](https://github.com/DreamVoid) and [MiraiMC](https://github.com/MiraiMC), made with ❤.
This file is a translated version of the [original file](https://github.com/DreamVoid/MiraiMC/blob/main/README.md), and some semantics may differ from the original file.
Minimalist Crosshair
# Minimalist Crosshair
Replace the default ugly vanilla crosshair with a better modern minimalist unobstructive one.
Crosshair Showcase on different 1080p GUI Scale:
GUI Scale 1
![Crosshair Showcase [GUI Scale 1] [1920×1080]](https://i.imgur.com/A93USzq.png)
GUI Scale 2
![Crosshair Showcase [GUI Scale 2] [1920×1080]](https://i.imgur.com/GsKTo8e.png)
GUI Scale 3
![Crosshair Showcase [GUI Scale 3] [1920×1080]](https://i.imgur.com/sKI6zsn.png)
GUI Scale 4
![Crosshair Showcase [GUI Scale 4] [1920×1080]](https://i.imgur.com/PZXQriM.png)
MineGIT
### Cloud sync for Minecraft worlds!
Sync and back up your worlds between multiple devices! Fully integrated into the Minecraft client for a seamless experience when loading, saving, and downloading worlds from the cloud.
## How does it work?
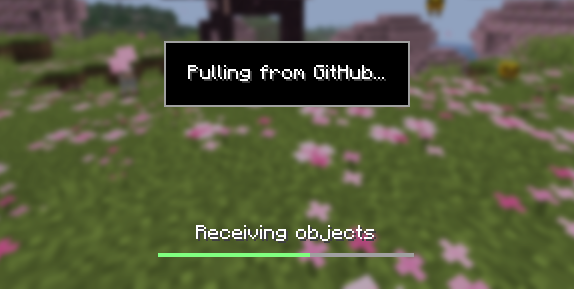
Worlds that you select are uploaded to your GitHub account as repositories. Every time you quit to the title screen, a commit of the current state of your world is created and pushed to the repository on GitHub. Whenever the world is loaded, the mod will check if any new versions of the world are available in the cloud, and if so, they will be downloaded to your device.
Since this mod uses Git internally, it also means that only the files in your world save folder that you modify will be uploaded and downloaded each time, saving storage space and internet bandwidth.
## How do I set it up?
There are several steps to setting up this mod, which include creating a personal access token for GitHub, as well as choosing the worlds you would like to enable MineGIT for.
### Video guide:
### Creating a GitHub personal access token
In order to do the first-time setup, you will need to generate a GitHub personal access token through the following steps:
1. Create an account on GitHub if you do not have one already (https://github.com)
2. Navigate to the [page to create a personal access token](https://github.com/settings/personal-access-tokens)
3. Click `Generate new token`
4. Enter any name (such as MineGIT) under `Token name`
5. Scroll to `Expiration` and set it to `No expiration` (so that you do not have to repeat this process when the token expires)
6. Under `Repository access` choose `All repositories`
7. Under `Permissions`, click `Add permissions` and select `Administration` and `Contents`
8. Set `Access` on the `Administration` and `Contents` lines to `Read and write`
9. Press `Generate token` and copy the generated token to be pasted into Minecraft later (the generated token should start with `github_pat_` and be followed by a long string of letters and numbers)
### Setting up in-game
Once the mod is installed and you are in-game, do the following steps to link your GitHub account with the mod:
1. Click on the cloud button on the bottom left corner of the world creation or world selection screen (If the button does not appear, you have already previously linked your account; see the section below entitled ‘Reconfiguring account linking’)
2. Enter your GitHub username and personal access token (PAT) that you created in the previous step on the new page that appears
3. Press the button labeled `Test credentials` to make sure you’ve entered the information properly
4. You may now exit the screen and proceed to either enable sync for a world or clone an existing one
#### Reconfiguring account linking
If you have already previously set up account linking and would like to change settings afterwards, you have a couple of options to get back to the configuration screen:
– **Configure through ModMenu:** If you have [ModMenu](https://modrinth.com/mod/mod-menu) installed, simply find the mod in the mods list and open the configuration from there
– **From the world clone screen:** There is a button in the top right corner of the world cloning screen that will open the configuration screen
– **From the world selection screen:** By holding alt and clicking on the world sync button on the bottom left of the world selection screen, you will be brought back into the configuration screen
### Enabling sync for a world
World syncing needs to be enabled individually for each world you would like to sync to your GitHub account. To enable sync for a world, do the following:
1. Select a world on the world selection screen
2. Press the cloud button in the bottom left of the screen labeled `Enable world sync`
3. Confirm your decision on the next screen
This process will create a new repository named `minegit_[world folder name]` on your GitHub account, initialize a Git repository in your world save folder, and push its current state to GitHub. From this point forward, loading the world will pull the world’s latest changes from GitHub, and exiting the world will push changes to GitHub.
You can now download this world on another device to effectively sync changes between them through the next step: cloning.
### Downloading a world on a different device (Cloning)
Cloning a world will download the exact state of the world as it was last saved to GitHub. Use the following steps to clone a world:
1. Navigate to [github.com](https://github.com) in a web browser
2. Click on your profile picture in the top right corner and then `Repositories`
3. Find the repository corresponding to the world you would like to clone and copy its name
4. Back in Minecraft, click on the button with an arrow pointing downwards labelled in the bottom left corner of either the world selection screen or world creation screen
5. Paste the name of the repository you copied earlier and press `Clone`
6. You are now able to load the world like normal and have changes be synced across your devices!
### Tips & Tricks
– If you want to exit a world without pushing it to GitHub (for example, if you wanted to restart Minecraft and load the same world without having to wait for changes to be pushed), you can hold `Alt` while clicking `Save and Quit to Title`. This will skip the ‘pushing to GitHub’ step.
– Git keeps a list of all of the worlds changes every time you exit the world. This is useful, since if you have a little knowledge of how to use the Git command line interface you can rollback your world to a previous version!
– If you want to save some storage space taken up by the size of the Git repository on your computer, or make the world quicker to clone on other devices, use the `Prune World Commits` button in the edit world menu. This will delete all of the old versions of your world, leaving only the most recent one.
## Report an issue
If you run into bugs, crashes, or simply have a suggestion on how to improve the mod, please feel free to open an issue on the mod’s [issue tracker](https://github.com/ModMonster/MineGIT/issues)!
Please include the current Minecraft version, Fabric version, mod version, and any relevant game logs when submitting an issue.
Chippa256 shader
Very basic but effective shader that applies dithering and other vintage screen effects to make the iconic low-res look and feel of Minecraft seem even more low-res!
There isn’t much to say about this shader for now.
Minecolonies/Farmer’s Delight Compatibility Patch
This is a patch that adds in crafting compatibility to Minecolonies for Farmer’s Delight as well as a workaround for the broken tomato growing at Minecolonies’s Farms.
### Early Access Disclaimer
This datapack is under development and not feature complete. Some advertised functionality is planned, but may not yet be implemented.
As development continuous, new features might be added to for game balancing or to accomplish the overall goal: all food recipies in Farmer’s Delight to be fully automatable in Minecolonies. Planned features may be dropped if discovered to be unfeasible.
MC New Textures
# MC New Textures
Backport Jappa Styles to legacy version.Or backport the unupgrade textures.Re-imagine modern textures.
Mod Compatibility ONLY have 1.7.10 version and 1.12.2 version.
Most of the texture are not mine, so you will need to check up the changelog from the last updates to know the mods, then you need find out the owner.
This is the wiki.[Website](https://minecraft.wiki/w/Texture_Update).
Also include the resources, which the same in the upper version, was updated and mod resources or texture. And it also re-imagine the modern vanilia resources.
# About Project
Here is the full list of the series of MC New Textures.
From the top to the bottom is a recommended resourcepack loading order.
If this resource pack haven’t had a version that support your currently playing version, ignore this pack.
| Textures Pack | Support Version (1.X) | Link | Description | Note |
| ————————: | :——————–: | :————————————————————————: | :——————————————————–: | :—————————– |
| Base Pack | B7.3,0 – 4.7, 6 – 20.x | MC New Textures (Here) | Update textures to jappastyled textures. | |
| Blue Water | 6 – 12 | [Aquatic](https://modrinth.com/resourcepack/mcnt-aqua) | Fix your milky aqua. | |
| Seamless Glass | 7 – 13 | [Seamless Glass & Color](https://modrinth.com/resourcepack/mcnt-tintverre) | Seamless glass and colorful contemporary feeling. | Optifine **Required** ! |
| Mod Addon | 7.10, 12.2 | [Mod Addon](https://modrinth.com/resourcepack/mcnt-mod) | Supports of mods. | Partly Optifine **Required** ! |
| Sound | 7 – 13 | [Sound Pack](https://modrinth.com/resourcepack/mcnt-sound) | Archive the sound pack for MC New Textures. | |
| Random Work | 7.10, 12.2, 17 | [Random Work](https://modrinth.com/resourcepack/mcnt-randomwork) | Some random thinks for new textures. | Optifine **Required** ! |
| Wolfy | 6 – 13 | [Wolfy](https://modrinth.com/resourcepack/mcnt-wolfy) | Backport modern wolf and two special dogs. (Bluey & Bingo) | Optifine **Required** ! [1.7.10: Optifine HD U E5 and above] |
| Cloudy | 0 – 21.6 | Coming soon… | Backport modern cloud and vibrant visual cloud | |
| Animal & Dye & Eggy Addon | 6 – 20 | Coming soon… | Backport modern dyes & animal & spawn eggs. | Partly Optifine **Required** ! |
# Notification
If you want more mod compatibility (ONLY 1.7.10 or 1.12.2) you can click [here](https://github.com/song682/MC-New-Textures/issues) to have more compatibility.
After v1.5.5(For 1.7.10),I will add a pack which called as .cache-[packname], to give you the chance to create more things.
A lot of contents(e.g.:modern water color) required optifine/continuity installed. I highly recommands that you install them.
# FAQ
– **Does this resourcepack have a direct relationship to [Modernity](https://modrinth.com/resourcepack/modernity)?**
In actually…NO.Because I create this resourcepack before I know about it. So it had no link to Modernity.
– **Can I use it in my video/modpack/resoursepack?**
Yeah,you can.You can use them just like you want.These are under MIT licence.
– **What about add more compatibility about (mod name)?**
If it has 1.12.2/1.7.10, I’ll do that.If not, it won’t. If you wanna, you can post some textures by yourself.
– **What about add the (vanilla content)?**
Don’t ask me about more silly things, for example, why not add recipe books in 1.7.10? (1.7.10 don’t have any recipe books)
If it was too hard for me right now, I’ll add it to the to-do-list.
– **Full meaning of this pack naming?**
[VersionType/MinecraftVersion]MCNewTextures-Type[VersionNum]
# Special Thanks! !
A very BIG thanks to [Jasper “JAPPA” Boerstra](https://twitter.com/JasperBoerstra).
[DTFuel](https://center.mcmod.cn/209068/) helps me to make out the EnderIO Ingot.
These two pack help me found some inspirations, [The First Pack](https://www.curseforge.com/minecraft/texture-packs/new-textures), [The Second Pack](https://www.curseforge.com/minecraft/texture-packs/ingots-template).
[Rainvay](https://mcprofile.net/profile/9ae83379-6681-4071-8f1f-89e50e364411/) inspired me the modern bed icon.
[tdstress](https://www.curseforge.com/members/tdstress)make the modern Immersive Engneering items.
[Updated Engineering](https://www.curseforge.com/minecraft/texture-packs/updated-engineering)
[Rainvay](https://mcprofile.net/profile/9ae83379-6681-4071-8f1f-89e50e364411/) inspired me the modern bed icon.
[Omgise](https://github.com/Omgise) helped tofind out sometexture problems.[Rainvay](https://mcprofile.net/profile/9ae83379-6681-4071-8f1f-89e50e364411/) inspired me the modern bed icon.
[tdstress](https://www.curseforge.com/members/tdstress)make the modern Immersive Engneering items.
[Updated Engineering](https://www.curseforge.com/minecraft/texture-packs/updated-engineering)
[Rainvay](https://mcprofile.net/profile/9ae83379-6681-4071-8f1f-89e50e364411/) inspired me the modern bed icon.
[Omgise](https://github.com/Omgise) helped tofind out sometexture problems.
MC-237017 Fix
# MC-237017 FIX
Minecraft mod to fix [MC-237017](https://bugs.mojang.com/browse/MC-237017) (All caves are filled with lava at and below Y value -54)
This mod is server-side only, and does not require anything on the client. Should work on all versions of Minecraft where this bug is present (1.18+, starting at snapshot 21w37a)
Lunar Staff
## ***REQUIRES DEPENDENCY, CHECK BELOW***
# Lunar Staff Mod Plugin
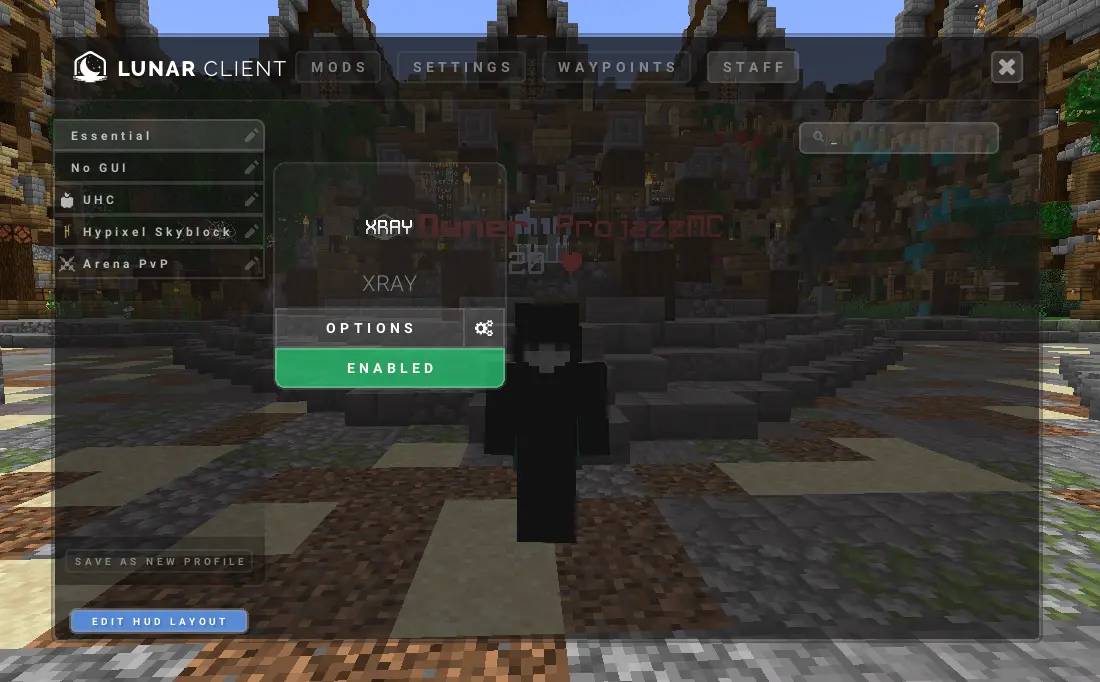
A Simple Plugin that enables the staff mod (Xray) for specified player using Lunar Client,
This plugin requires **Apollo**, See below to download.
This plugin is aimed to improve staff moderation in servers.
## Spigot Commands
– /lunarstaff
## Spigot Permissions
– lunarstaff.command.enable
– lunarstaff.command.disable
## Velocity Commands
– /lsv
– /lsv transfer
## Velocity Permissions
– lunarstaffvelocity.command.enable
– lunarstaffvelocity.command.disable
– lunarstaffvelocity.command.transfer
## Screenshot
## _REQUIREMENTS_
1. Java 21+ is required.
2. Spigot version 1.20+ is required.
3. Apollo plugin is required: https://modrinth.com/plugin/lunar-client-apollo
low fire 32×32
[**eng**]
The Low Fire 32×32 resource pack for Minecraft actually reduces the size and intensity of the displayed fire. This allows players to have a cleaner and less intrusive view of the playing field, especially during battles and PvP battles. Reduced fire can also help improve game performance, especially on weak computers or devices with limited resources.
[**ru**]
Ресурспак Low Fire 32×32 для Minecraft фактически уменьшает размер и интенсивность отображаемого огня. Это позволяет игрокам иметь более чистый и менее мешающий взгляд на игровое поле, особенно во время сражений и PvP-сражений. Уменьшенный огонь также может помочь улучшить производительность игры, особенно на слабых компьютерах или устройствах с ограниченными ресурсами.
Lime Food
Makes some foods a nice lime green color (i like lime green)