Night Mode (Blue light filter)
### Description
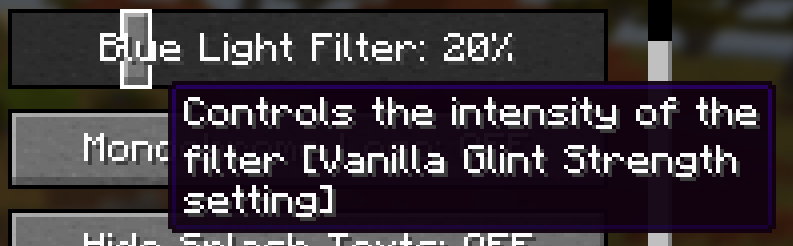
Adds a customizable orange filter to the game environment (not the GUI or items, only things in the world like blocks and mobs). This setting can be changed using a slider found in **Accessibility Settings**.
The filter is only active when graphics are set to **Fabulous!** and the slider is **above 0%**.
The slider replaces the Enchantment Glint strength, and the value will stay when disabling or enabling the pack. The glint strength is set to its default (75%) while the pack is active.
### Versions
Supports Minecraft **Java Edition 1.21.5**. Other versions may work.
### Compatibility
Incompatible with packs that edit the transparency post-effect shader (including to display custom shaders) or some other specific shaders and a custom one. Incompatible with any other use of the glint strength slider in accessibility settings, including modifying the name in the en_us lang file.
### Disclaimer
Blue light filters may not actually have a positive effect, according to some studies. It is advisable to do your own research if you want to know what is best. This project was mainly intended as practice making shaders. It is up to the user whether or not they feel there is a benefit to using this pack.
### Patreon
Join my new Patreon to support my projects!
MagicShader
Magic Shaders- By ArubikU [SodaStudio]
This texture pack requires you to apply modifications to your skin by adding an extra layer. Presets are included.
How to get the capes
Go to the folder MagicShaders/capes// .png
and paste it in your skin
How to get the wings
Go to the folder MagicShaders/wings/.png
and paste it in your skin
How to get the Player Modifications
Go to the folder MagicShaders/player_modifications/.png
and paste it in your skin
now put the resourcepack without MagicShaders/capes , MagicShaders/wings and MagicShaders/player_modifications.
*Only use capes or wings dont both at the same time
*Modifications can use free, without take care of wings or capes
|Capes| | | | |
|–|–|–|–|–|
| amatis cape | bee cape | blaze cape | rabit cape | classic mojang cape |
| coblat cape | glow cape | gold cape | magma cube cape | migrator cape |
| minecon 2019 cape | minecon 2016 cape | mojang studios cape | mojiro cape | netherite cape |
| 8 bits cape | pride cape | slime cape | trans cape | cherry blosoom cape
| ender cape | swords cape| smooth creeper cape | golden creeper cape |
| diamond creeper cape| pancake cape | prismarine cape | scrools cape | spade cape |
| traslator | japanese cape | birthday cape | | |
|Wings| | | | |
|–|–|–|–|–|
| Angel Wings | Phoenix Wings | Nether Wings | Magmatic Wings | Ender Wings |
| Red Mechanical Wings | Silver Mechanical Wings | Mosquitoes Wings | | |
Player Modifications
Female Chest
|Player Modifications| | | | |
|–|–|–|–|–|
| Female Chest | | | | |
* You can see a preview of capes from torrezx in
https://www.planetminecraft.com/texture-pack/torrezx-cape-collection/
RoadMap
– Hats
– ????
– ????
– ????
Finished
– Wings [8/15]
– Capes [FULL]
– PlayerModifications [3/15]
Support:
– ✔️Optifine?
– ✔️Sodium
– ✔️Vanilla
– 🚫Iris Shaders
CREDITS:
Capes made by Torrezx ft. ShadowsCrow
Angel Wings made by JuanT_
Logo icon made by JuanT_
Cem base system by DartCat25 (https://github.com/DartCat25/CEM-S)
NO OPTIFINE NEEDED 🚫
Lower Clouds
This resourcepack/vanilla shader lowers the clouds back to 128 blocks, or even lower.
Premade versions are available for height 128 and height 96.
If you want a custom height, you can make a custom version here: [Shader Configurator](https://vanillashadereditor.web.app/Lower%20Clouds)
Lightmap Fixer
all this pack does is put 25w33a’s “`core/lightmap“` shader into a resource pack so that it works in later versions, fixing the strangely warm lighting.
I have no idea if this’ll break anything visually. maybe the end flashes? they’re why the shader was changed in the first place. I dunno.
Javier’s improved fog
Javier’s Improved Fog – Minecraft Java Shader
Javier’s Improved Fog replaces Minecraft’s default fog system with a custom density curve for a more realistic and immersive visual experience.
Unlike vanilla fog, which can appear too close or fade abruptly, this shader delivers a smooth, natural transition.

Main Features:
Distant & soft fog – starts farther from the player, giving clear visibility nearby and gradual haze in the distance.
Custom progressive curve – almost linear at first, then smoothly blending into full fog, avoiding sharp cutoffs.
Enhanced realism – perfect for exploration and scenic builds.
Fully compatible with vanilla shaders and resource packs that don’t modify the fog core shader.
Recommended settings:
Set your render distance to 32 chunks for the best experience.
Installation:
Download the .zip file of Javier’s Improved Fog.
Place it in your resourcepacks folder.
Enable it from Minecraft’s Resource Pack settings.
Enjoy a smooth and immersive fog effect.
Want to edit it?
I’ll leave a YouTube video link so you can customize it yourself.
Javier’s Improved Fog – Shader para Minecraft Java
Javier’s Improved Fog reemplaza el sistema de niebla predeterminado de Minecraft por una curva de densidad personalizada para una experiencia visual más realista e inmersiva.
A diferencia de la niebla vanilla, que puede aparecer demasiado cerca o desvanecerse bruscamente, este shader logra una transición suave y natural.
Características principales:
Niebla lejana y suave – comienza más lejos del jugador, manteniendo la visibilidad clara cerca y un velo gradual en la distancia.
Curva progresiva personalizada – casi lineal al inicio y suavizada hacia el final, evitando cortes bruscos.
Mayor realismo – ideal para exploración y construcciones panorámicas.
Totalmente compatible con shaders vanilla y packs de recursos que no modifiquen el shader base fog.
Ajustes recomendados:
Configura tu distancia de renderizado a 32 chunks para la mejor experiencia.
Instalación:
Descarga el archivo .zip de Javier’s Improved Fog.
Colócalo en tu carpeta resourcepacks.
Actívalo desde el menú de Paquetes de Recursos de Minecraft.
Disfruta de un efecto de niebla suave e inmersivo.
¿Quieres editarlo?
Te dejaré un enlace a un video de YouTube para que puedas personalizarlo a tu gusto.
Itemed arrows
Pack changes arrows model to item-like model.
Optifine or any mods not required. #noptifine (optifine even can’t change arrows model, muhahaha. >:) )
This is first approach of CEM-S: [Custom Entity Model Shader]([https://github.com/DartCat25/CEM-S](https://github.com/DartCat25/CEM-S)).
Wanted bugs.
Visible Invisibility
## Showcase
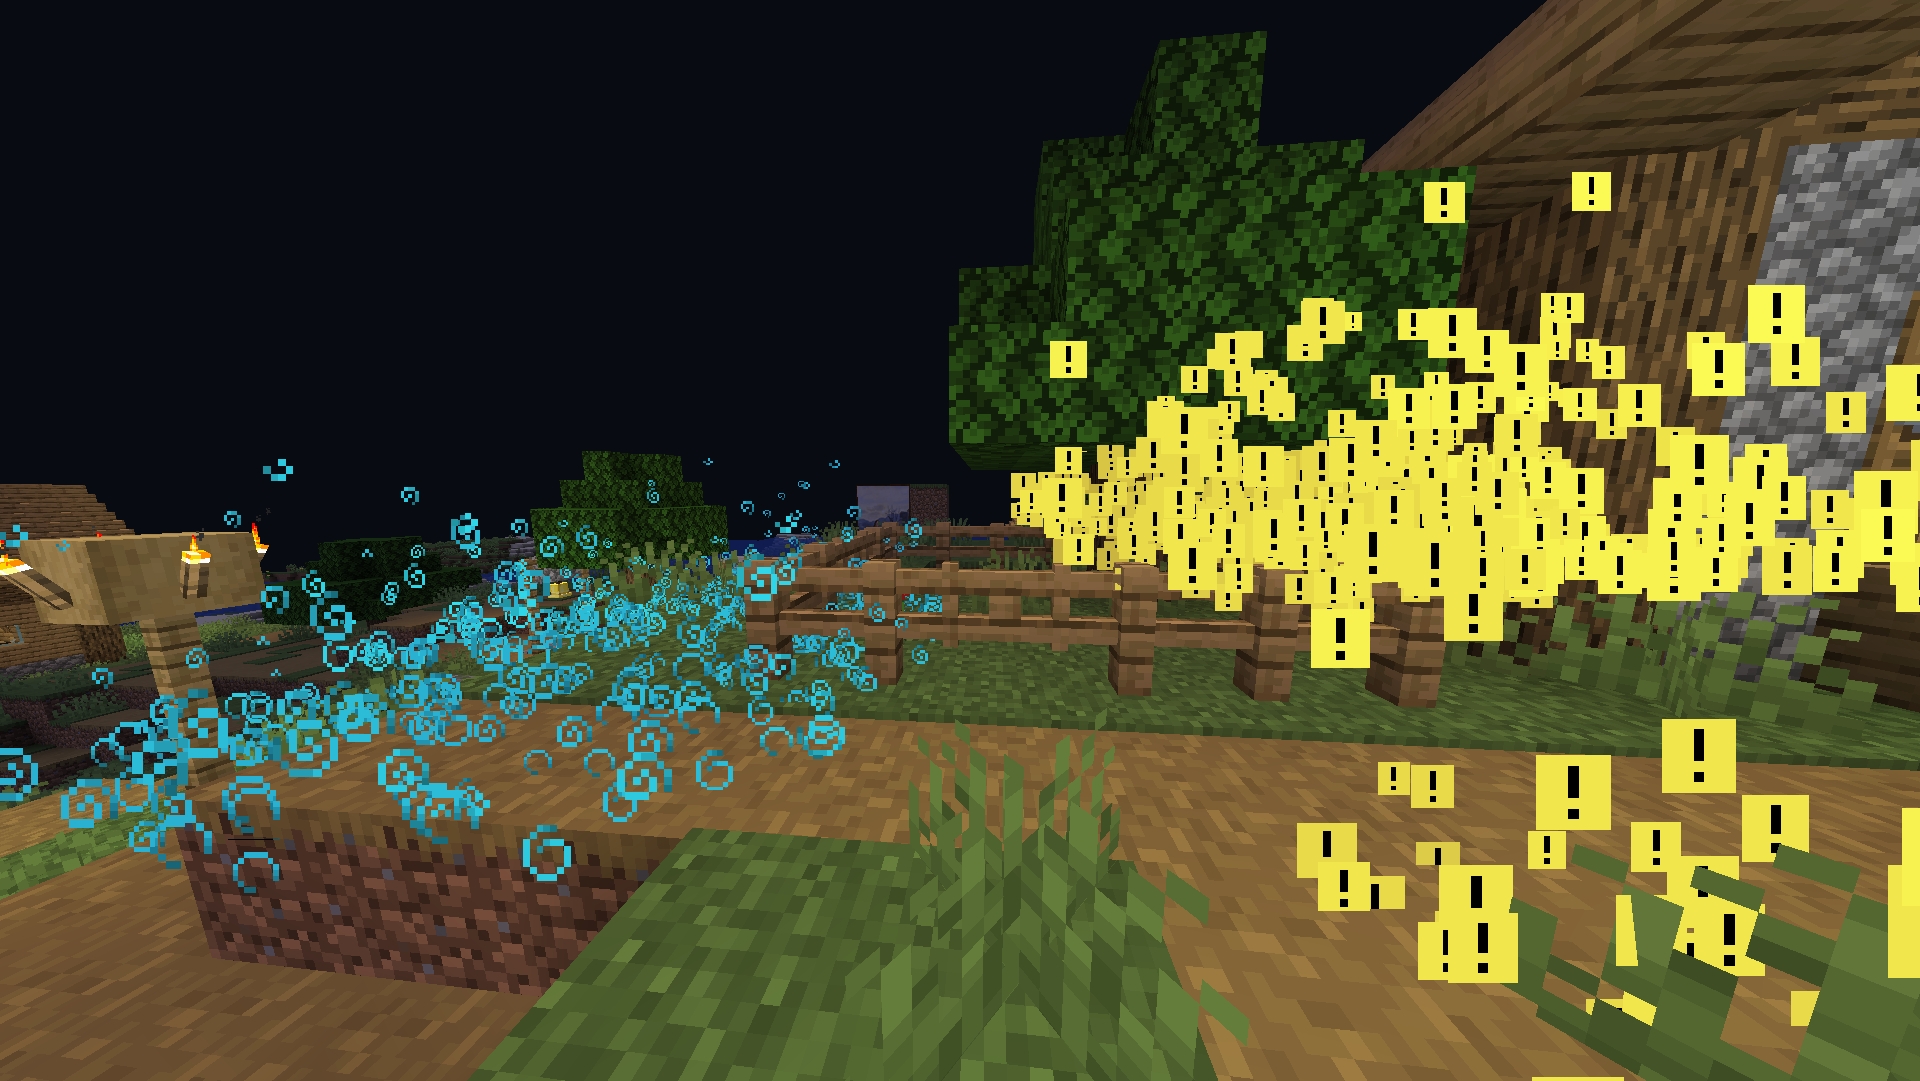
The image above shows many speed particles on the left and many invisibility particles on the right. As you can see, only invisibility particles are affected by the pack. For more example images, head to [the gallery](https://modrinth.com/resourcepack/invis/gallery)
## Description
This pack uses vanilla’s core shaders in order to change the texture of invisibility particles. No other particle is changed, making it the perfect pack if you just want to make people who are invisible stand out to you.
Until now, no pack has been able to only change the invisibility particles. This is the only pack as of the time of creation that makes use of this technique. If you install another similar pack, it would be changing particles for speed, strength, etc. Additionally, it would have a weird tint for every particle. However, this pack removed the tint leaving the bright yellow color to stand out to you.
If you want to know more about how this works, or have questions about other vanilla shader related things, you can join my discord and ask in there 🙂
## For Pack Creators
If you would like to upload your own custom texture for the invisibility particle or normal particles, then follow these directions. Keep in mind this only works on versions 2.0.0 and higher.
1. Create the textures as normal. The invisibility particle should be the lower half of the texture, and all other particles will use the top texture.
2. Make the transparency of *all* the colored pixels equal to 0.75, as in 75/100 transparency or around 191.25/255 (if your transparency value is out of 255, then just use 191)
3. Make *all* the background pixels black, and make their transparency equal to 0.25, as in 25/100 transparency or around 63.75/255 (if your transparency value is out of 255, then just use 64)
4. If you have any trouble while creating the pack, refer to the support section at the bottom of the page.
After completing your texture, it should look something like this (this is the default effect_3 for the pack):
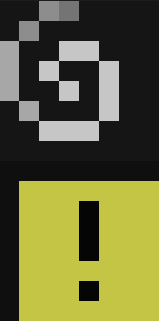
For reference, each of the colored pixels you see in the image above (the [!] and @ texture) both have transparency values of 191/255, while all the background colors have a transparency of 64/255
Here are some things to keep in mind when creating textures for this pack:
1. If you would like to post a different version of this pack, you must credit me and link back to this page. If instead you want to make a texture for this pack specifically, you can join my discord or dm me and I can add it to the project and then add you to the project.
2. All your textures will become 100% opaque after the shader is done doing its stuff. This is because otherwise everything would be slightly transparent, as you know from the steps above.
3. You most likely cannot make them HD textures.
4. With this pack, the only texture you can change individually is the invisibility particle. If you would like the ability to change the texture of all particles, then please check out the [Unique Particle Effects](https://modrinth.com/resourcepack/particle) texture pack.
## Support
**Join [My Discord](https://discord.gg/gymTft2GbV)**
– Report bugs
– Create suggestions
– Vote on future packs
– Interact with the community
– Ask for help with texture packs
– This is the place to ask if you can use this pack in your own pack
**Check out [The Repository](https://github.com/AlphaLeoli/Texture-Packs)**
– Report bugs
– Create suggestions
– Contribute by creating a pull request
https://www.alphaleo.li/resourcepacks
👻Ghost Shader RP
This respack creates crafts from **all player ghosts**. All players become transparent, and the closer they are to the light, the more visible they are. Depending on the light level, they can be almost invisible. **All players also become black and white**.

This resource pack uses vanilla shaders, which **conflict with mods and versions like OptiFine and Iris**. Therefore, it can only be used with pure vanilla shaders.
Forceskin Lib
## Showcase
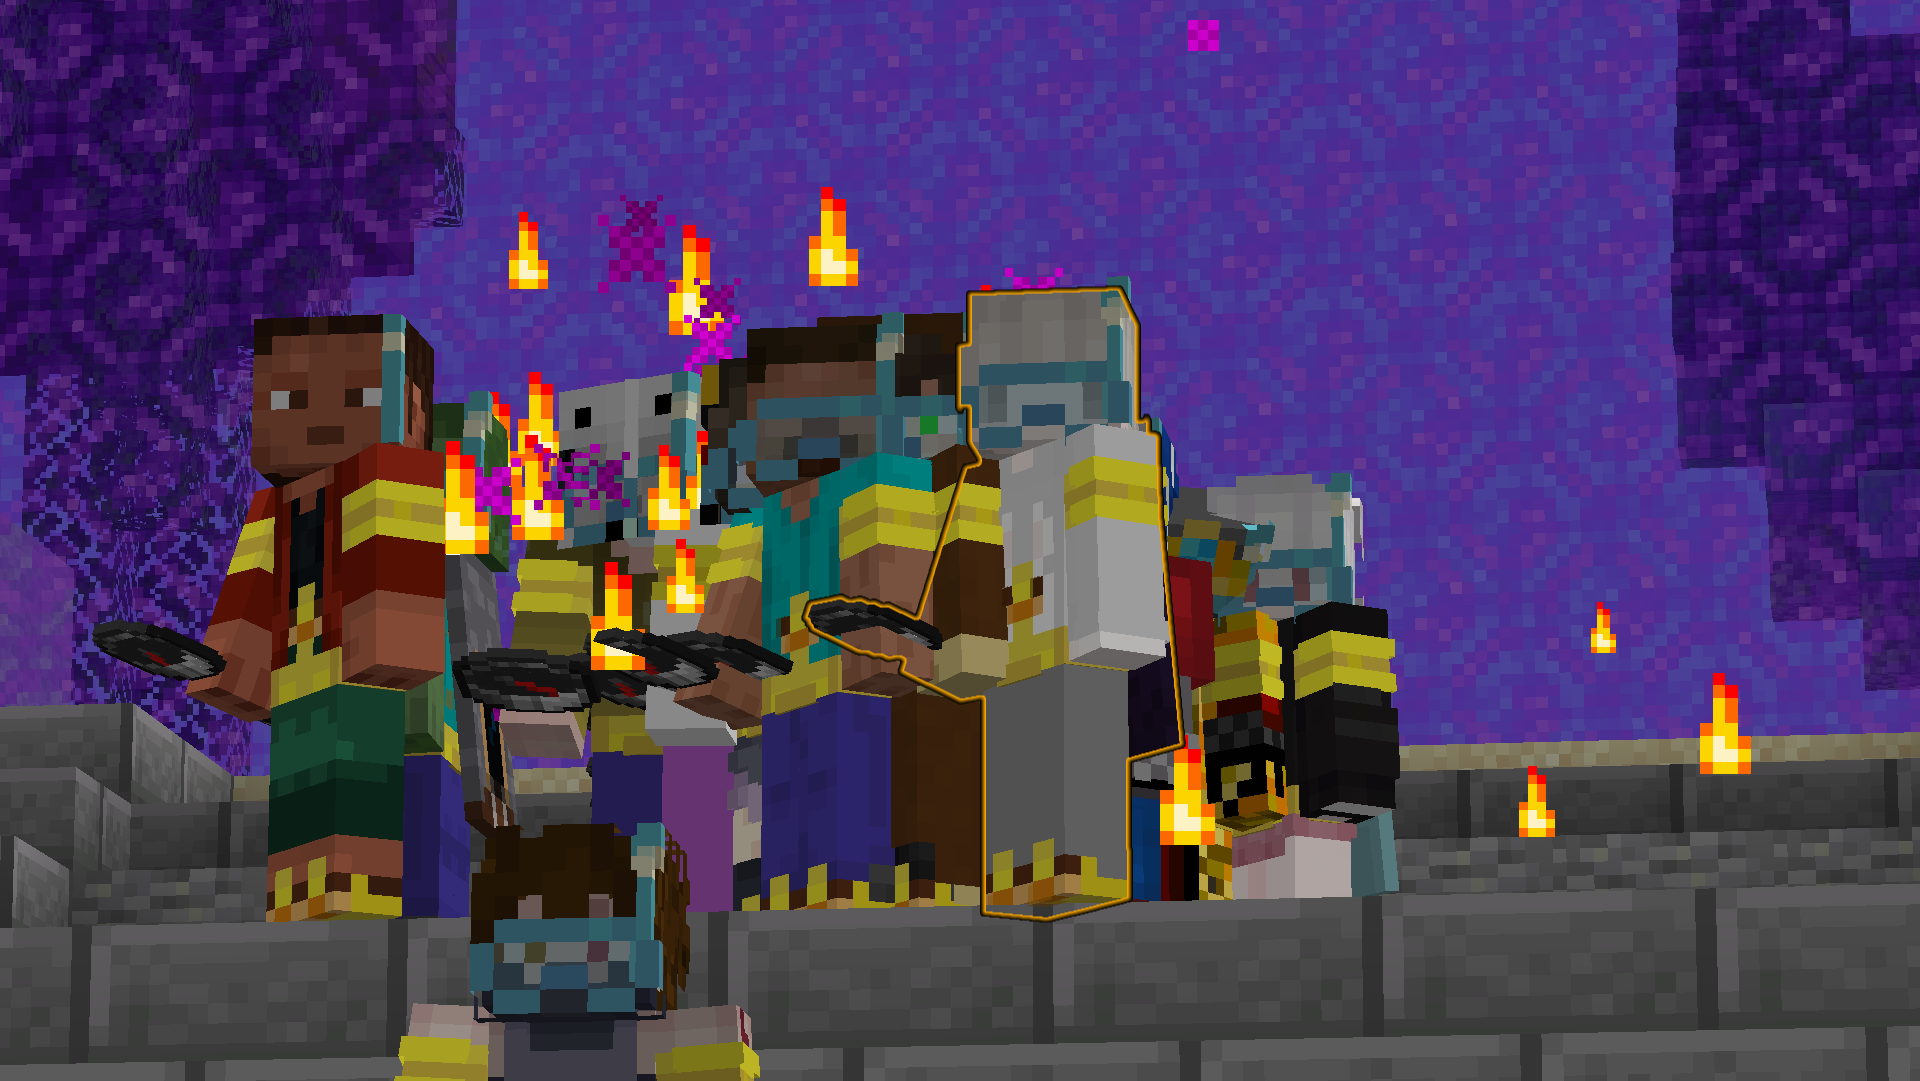
As you can see, every player has the floatie on. This is all possible in Vanilla Minecraft, and is very easy to put on. For more previews of what the forced skin looks like on other players, make sure to check out [the gallery](https://modrinth.com/resourcepack/chowder/gallery)
## Description
What this pack does is it makes it so that everyone has a specific skin. You can’t change the skin that everyone is using, and I may add more skins to the pack in the future (or turn this into an API to allow other people to create their own addons). Right now, it gives everyone a cute duck floatie, which was made by [girlthatbites](https://www.planetminecraft.com/member/girlthatbites/) specifically for this pack (as you may be able to tell, we wanted to get this pack out in the peak of summer, but we were a bit late on that…) The icon of the pack was also made by her.
I first made this texture pack almost a year ago. However, it was basically just made by chaining a lot of if statements together. The if statement checked what coordinate it was on the current entity, and then just set it to a specific color. It was extremely horrible for loading the texture pack, and made it take a lot longer than usual. Another thing was that it also did it for a lot of other entities. These two factors made it so that I didn’t upload the pack.
The pack is now made up of a big switch statement. I cannot use SSBOs, VBOs, an uploaded texture, or an array. It has to be either a switch or chained if statements in order for this to work. Due to this, it still may take a little bit longer than usual to load. However, the switch statement is very fairly optimized, so it shouldn’t add too much time to the loading.
## How to Use
1. It’s very simple, just apply the pack as normal. No need to unzip, just put it in your resourcepacks folder or drag it into the resourcepacks screen.
2. If the pack doesn’t show up, it’s most likely because you have recursive resources, and you need to click “Folder View” in the bottom left and then search for the pack (the pack is called “Summer ForceSkin”)
## For Pack Creators (v2.0.0+)
First, you must create your skin you want people to be forced to wear.
1. This should be created as any normal skin
2. If there is a part of the skin that you would like to be forced to be transparent (rather than just overlaying on their skin), then make the color of that pixel set to rgba(189, 89, 221, 89). An example of when you would want this is if the player’s hair is covering a mask you are trying to force the players to have.
Next, you need to modify the pack.
1. For this, you need to make sure you have [python](https://www.python.org/downloads/) installed. If you do not, then install it.
2. Download and install the pack as normal if you have not already. Then, head to your files where it is installed and unzip the pack.
3. Open the folder you unziped, and move the skin you created into it.
4. In the same directory you placed your skin, there should be a `Change Skin.py` python script. Open it, and it will prompt you to enter the name of your skin (including the .png at the end). After this, you can apply the texture pack ingame and you will see your skin forced on everyone.
Note that in order to post your newly made pack, you MUST give me credit and link back to the page, as well as making sure to follow the license (of which you can find to the right, only on the original Modrinth page)
## Support
**Join [My Discord](https://discord.gg/gymTft2GbV)**
– Report bugs
– Create suggestions
– Vote on future packs
– Interact with the community
– Ask for help with texture packs
– This is the place to ask if you can use this pack in your own pack
**Check out [The Repository](https://github.com/AlphaLeoli/Texture-Packs)**
– Report bugs
– Create suggestions
– Contribute by creating a pull request
https://www.alphaleo.li/resourcepacks
Fluffy Fancy Clouds

I’ve personally always found clouds in Minecraft to be incredibly boring and non-whimsical, so I tried to fix that! Introducing: **Fluffy Fancy Clouds**.

This resource pack aims to improve the visual fidelity of minecraft clouds through vanilla core shaders. It uses a simple gradient and blurring technique to hopefully achieve much softer, denser, and of course fluffier looking clouds.

_Requires Fancy Clouds to be enabled!_
_(Optional) Enable Improved Transparency for full effect._
#

This pack will likely be incompatible with Iris Shaderpacks, as well as any resource packs that alter vanilla clouds or transparency.fsh.
Modified Files
rendertype_clouds.vsh
rendertype_clouds.fsh
transparency.fsh
Added Files
cloudblur.fsh
#

I’m currently trying to work on downporting this pack for older versions as well, so be on the lookout if you’re still in the past! 🙂
> Created by Water_puddle