## What is SkinsRestorer?
SkinsRestorer is a plugin that restores skins for offline mode servers & networks that gives the players ability to change their skins by typing a single command.
We have spent much of our time working on SkinsRestorer, we made it free, so that any server could enjoy it.
Please consider [donating to us](https://skinsrestorer.net/donate) if you would like to thank us. This allows us to continue working on this project.
### ✨ Are you looking for an advanced administration panel for your server?
EnderDash allows you to manage your existing Minecraft servers using an advanced dashboard by installing a single plugin, batteries included. Run commands (with tab completion), read logs, manage files, invite your whole team, manage players, Ocelot (AI Assistant), works with your existing Infrastructure/Panels and much more.
Check it out: [https://enderdash.com](https://enderdash.com/?utm_source=modrinth&utm_medium=description&utm_campaign=skinsrestorer)
—
end, no seriously just give us a star already ^w^.
## **Skcrew** – A [**Skript**](https://github.com/SkriptLang/Skript) addon, expanding the capabilities of the language.
Skcrew partially includes the following third-party code:
> [**skript-db** fork by Govindas](https://git.limework.net/Limework/skript-db)
> [**skript-gui**](https://github.com/APickledWalrus/skript-gui) | Modified
> [**bitshift**](https://github.com/Pesekjak/Bitshift)
—
Addon usage highlights:
– Working with files and folders
– Bitwise and logical operations with numbers
– Sending and creating gui forms through [**floodgate** ](https://github.com/GeyserMC/Floodgate)
– Simplified creation of in-game GUIs
– Parsing and executing code from text
– Drawing on maps
– Managing player permissions
– Forcing a player to execute commands with operator permissions
– [**InventoryDragEvent** ](https://hub.spigotmc.org/javadocs/bukkit/org/bukkit/event/inventory/InventoryDragEvent.html) and its related expressions
– Asynchronous/synchronous web requests
– Retrieving the server’s hardware information
– Interaction with SQL-like databases
– Manipulating strings using RegEx (Regular Expression)
– Retrieving the player’s version via [**ViaVersion** ](https://github.com/ViaVersion/ViaVersion)
– World management: create, upload, copy, delete
– Proxy communication between servers ( [**Velocity** ](https://github.com/PaperMC/Velocity), [**BungeeCord** ](https://github.com/SpigotMC/BungeeCord) )
– Packet handling: creating, sending, receiving, editing
# SimpleWhitelist
**SimpleWhitelist** is an *essential plugin* for your private server.
### Why should you choose this plugin?
* No hassles, players in the white list are stored by their nicknames;
* There is support for the most used server cores (proxy & not);
* Fully customizable messages;
* Easy to use.
### How to start using plugin?
1. Disable Minecraft’s whitelist in `server.properties` (`white-list=false`);
2. Put plugin in `plugins` folder (or in `mods` for mod loaders);
3. Start your server;
4. Enable whitelist using `/swl enable`;
5. Add yourself to whitelist using `/swl add ` command.
### Commands:
* `/swl add/remove ` – add or remove player from whitelist (case-sensitive if set);
* `/swl list` – show list of whitelisted players;
* `/swl enable/disable` – enable or disable plugin;
* `/swl reload` – reload plugin.
### Permission:
`simplewhitelist.command` – for all commands
SimpleStaffChat


– Fully customizable, meaning you can change the messages and settings of the plugin inside the configuration files.
– Light and efficient, won’t cause any sort of lag towards your server!
– Staff join and quit messages.
– Automatic Config Updates. No need to manually update file properties.
– Supports multiple platforms: Spigot, Velocity and Folia.
– Discord Logging using webhooks support in discord.yml
– [MiniMessage](https://docs.advntr.dev/minimessage/format.html) support (Using non-strict mode, automatically converts legacy & color codes)
Note: This plugin does not and will never give support to cracked servers.

Commands
/staffchat(/sc) – Send messages to your staff privately
/staffchattoggle(/sctoggle) – Toggle sending messages to your staff privately
/staffchatreload(/screload) – Reload your config files
/adminchat(/ac) – Send messages to your admins privately
/devchat(/dc) – Send messages to your developers privately
/adminchattoggle(/actoggle) – Toggle sending messages to your admins privately
/devchattoggle(/dctoggle) – Toggle sending messages to your developers privately
/chat – Toggle sending messages to a chat
/schide – Allows you to mute/hide messages from either one or all staff chats.
Permissions
simplestaffchat.command.help – Allows you to see the help page
simplestaffchat.command.staffchat – Allows you to use /staffchat
simplestaffchat.command.toggle – Allows you to use /staffchattoggle
simplestaffchat.command.reload – Allows you to use /staffchatreload
simplestaffchat.command.adminchat – Allows you to use /adminchat
simplestaffchat.command.adminchat.toggle – Allows you to use /adminchattoggle
simplestaffchat.command.devchat – Allows you to use /devchat
simplestaffchat.command.devchat.toggle – Allows you to use /devchattoggle
simplestaffchat.command.hide – Allows you to use /schide
simplestaffchat.command.chat – Allows you to use /chat
simplestaffchat.staffchat.see – Allows you to see all staffchat messages
simplestaffchat.staffchat.symbol – Allows you to use the symbol to use staffchat
simplestaffchat.adminchat.see – Allows you to see all adminchat messages
simplestaffchat.adminchat.symbol – Allows you to use the symbol to use adminchat
simplestaffchat.devchat.see – Allows you to see all devchat messages
simplestaffchat.devchat.symbol – Allows you to use the symbol to use devchat
simplestaffchat.join – Sends a join message when a staff member joins
simplestaffchat.switch – Sends a switch message when a staff member switches to a different server on the network (BungeeCord/Velocity only)
simplestaffchat.quit – Sends a join message when a staff member leaves the server
All commands are customizable from the commands.yml file. (Available in version 3.0 or higher)
### Placeholders
– %player% – Get the player name
– %displayname% – Get the player display name
– %server% – Get the player server
– %message% – Get the message
– %arrow% – Get an arrow for a message
– %arrow_2% – Get alt arrow for a message
– %star% – Get a star for a message
– %circle% – Get a circle for a message
– %luckperms_prefix% – Get the player’s luckperms prefix
– %luckperms_suffix% – Get the player’s luckperms suffix
# SimpleServerSwitcher
SimpleServerSwitcher is a command-based server switcher plugin.
Created for a commission.
Listed servers are definable in the plugin’s config and can be made accessible with a list of commands, as well as restricted to a specific permission required to join the server.
We don’t overwrite the default bungeecord `/server` command.
When changes were made to the config, either restart the server or use `/ssreload` to apply the changes.
A configuration could look something like this
“`yaml
servers:
admin-server:
commands: # The commands to join the server
– joinadminserver
– sendmetotheadminserver
restricted: true # If this server is restricted. If yes, the permission specified below is required.
permission: my.admin.permission # The permission needed to join this server, if restricted. Otherwise, you can just remove this line.
minigames:
commands:
– minigames
– games
– play
restricted: false
“`
SimpleProxyChat
This is a Bungeecord Chat Sync, Velocity Chat Sync, and Proxy Chat Sync plugin. It is a simple plugin to allow globalcross-server communication and messaging with support for PlaceholderAPI, LuckPerms, LiteBans, AdvancedBan, NetworkManager, and Discord.
—
### With PlaceholderAPI
1) You **must** use the *helper plugin* which you can download [here](https://www.spigotmc.org/resources/116966/).
1) Drag the helper plugin to each **Spigot/Paper/Bukkit** server that you want PlaceholderAPI support on.
* You do not need any additional configuration on the Spigot/Paper/Bukkit server as long as you have PlaceholderAPI installed.
1) Set `use-helper` to `true` in the `config.yml` for the proxy configuration. This will be in your **BungeeCord/Velocity** server.
1) Restart or reload the plugin! `/spc-reload`
> For **PlaceholderAPI** support, the helper plugin is required. Additionally, **PlaceholderAPI placeholders** can only be used for **Minecraft chat messages**. It will **not work** for join/leave messages.
### Without Discord
1) Simply place the plugin in your `plugins` folder on **BungeeCord/Waterfall/Velocity** and restart your proxy!
### With Discord
1) Go to discord.com/developers and select **New Application**. You can select *any* name you want.
1) Go to the **OAuth2** section.
1) Go to the **OAuth2 URL Generator** and give it the **bot** scope.
1) Under **bot permissions** select;
– Manage Channels (**REQUIRED**: General Permissions)
– Send Messages (**REQUIRED**: Text Permissions)
– Manage Messages (**REQUIRED**: Text Permissions)
– Read Message History (**REQUIRED**: Text Permissions)
– *+ Any others that you want to add…*
1) Copy the **Generated URL** at the bottom.
1) Paste the generated URL into a web browser.
1) Invite the bot to your server.
1) Go back to discord.com/developers.
1) Select your bot.
1) Click on **bot**.
1) Click **Reset Token** and copy the token somewhere safe.
1) Scroll down to **Privileged Gateway Intents**.
1) Select **SERVER MEMBER INTENT** and **MESSAGE CONTENT INTENT**.
1) Place the plugin in the `plugins` folder on **BungeeCord/Velocity**.
1) Start your server once *fully*, then stop it. There *will* be errors, this is normal.
1) In the generated `ProxyChat/config.yml` file, paste your **Bot Token** and choose the appropriate channel you want messages being sent to.
1) Restart your proxy!
**config.yml**
“`YAML
# ==========================================================
# INFORMATION
# HEX Values are Supported
# Example: <#FFFFFF>Some text this is a message!
# Supports Mini-Message/Legacy Color Codes
# ==========================================================
# True if you will be using Discord. The reload command does not work with this.
use-discord: false
# The amount of seconds to check if a server is online/offline.
# Smaller numbers can cause errors. Beware.
server-update-interval: 3
# Use this if you want to change the default aliases.
# It MUST be the same name you have in your bungee/velocity config.
# Simply set it to disabled: disabled to disable it.
aliases:
ServerInConfigExample: ServerAliasExample
hub: Hub1
smp: smp1
# Whether to use the permission system.
# Some permissions (denoted with ➕) are always active even if this is false.
# simpleproxychat.read.chat – Read chat messages.
# simpleproxychat.read.join – Read join messages.
# simpleproxychat.read.leave – Read leave messages.
# simpleproxychat.read.fake – Read the fake join/leave messages. Players must also have the REAL join/leave permission.
# simpleproxychat.read.switch – Read switch messages.
# simpleproxychat.read.update – Read update messages. ➕
# simpleproxychat.toggle.chat – Toggle proxy chat for a single server. ➕
# simpleproxychat.toggle.chat.all – Toggle proxy chat for all servers. ➕
# simpleproxychat.reload – Reload the config. ➕
# simpleproxychat.ban – Ban a player from the proxy. ➕
# simpleproxychat.unban – Unban a player from the proxy. ➕
# simpleproxychat.whisper – Whisper to another player on the proxy. ➕
# simpleproxychat.broadcast – Broadcast a message to everyone on the server. ➕
use-permissions: false
# Only messages that start with this character will be sent through the plugin.
# Set to ” to disable.
# Example: If it is set to ‘$’, then when a player sends $hello, it will be sent through the proxy.
proxy-message-prefix: ”
# Whether to send if the statuses of the servers connected to the proxy when the proxy starts up.
# THIS IS FOR DISCORD MESSAGES ONLY.
use-initial-server-status: true
# Whether to send a fake join/leave message when vanishing/unvanishing.
use-fake-messages: true
# Format: https://docs.oracle.com/javase/8/docs/api/java/time/format/DateTimeFormatter.html
# Timezone: https://www.joda.org/joda-time/timezones.html
timestamp:
# If your server is prone to getting off-sync on the time you can use an API.
# WARNING: Using the API will make messages somewhat longer to send.
# Additionally, the maximum accuracy will only be up to 1 minute, rather than seconds.
use-api: false
format: “hh:mm a”
timezone: “America/Los_Angeles”
# True if you will be using the helper plugin.
use-helper: false
update-notifications: true
# It is HIGHLY recommended to use a more robust proxy-wide banning system such as LiteBans or AdvancedBan.
# However, if you would rather a light-weight, simple, banning system. You can enable it here.
# A FULL PROXY RESTART IS REQUIRED TO USE THIS.
use-simple-proxy-chat-banning-system: false
# This will store and re-send the last few chat messages when a player switches servers.
# This is here because sometimes Velocity/Bungee does not keep the previous messages when switching.
# This WILL retain old formatting if you change the formatting prior to reloading.
send-previous-messages-on-switch:
enabled: false
amount: 15
# These require a restart in order to take place.
commands:
reload-aliases:
– “spcreload”
chat-toggle-aliases:
– “chattoggle”
ban-aliases:
– “spcban”
unban-aliases:
– “spcunban”
whisper-aliases:
– “spc-msg”
reply-aliases:
– “spc-r”
broadcast-aliases:
– “spc-bc”
– “broadcast”
# Disable servers from sending/receiving proxy messages.
disabled-servers:
– example1
# DO NOT TOUCH THIS
file-version: 15
“`
**messages.yml**
“`YAML
# ==========================================================
# INFORMATION
# HEX Values are Supported
# Example: <#FFFFFF>Some text this is a message!
# Supports Mini-Message/Legacy Color Codes
# ==========================================================
# Prefix for the plugin. %plugin-prefix% usable anywhere.
plugin-prefix: “&8[SimpleProxyChat&r&8]”
# Minecraft Stuff
minecraft:
join:
enabled: true
message: “&e%player% &ahas joined the network. (%server%)”
leave:
enabled: true
message: “&e%player% &chas left the network. (%server%)”
chat:
enabled: true
message: “&8[&3%server%&8] &e%player% &9» &7%message%”
vanished: “&cYou cannot send proxy messages while vanished. Your message must end with a ‘&e/&c’ to speak.”
switch:
enabled: true
default: “&e%player% &7moved from &c%from% &7to &a%to%&7.”
no-from: “&e%player% &7moved &7to &a%to%&7.”
whisper:
send: “&8[&dyou&8] &f⇒ &8[&d%receiver%&8] &9» &e%message%”
receive: “&8[&d%sender%&8] &f⇒ &8[&dyou&8] &9» &e%message%”
error: “&c/spc-whisper (user) (message)”
discord:
enabled: true
message: “**%server%** %player% » %message%”
embed:
use: false
title: “[%server%] %player%”
message: “%message%”
color: “#FFC0CB”
use-timestamp: true
command:
no-permission: “%plugin-prefix% &cSorry, you do not have permission to run this command.”
unknown: “%plugin-prefix% &cUnknown command.”
must-be-player: “%plugin-prefix% &cYou must be a player to run this command.”
reload: “%plugin-prefix% &aThe plugin has been successfully reloaded!”
chat-lock:
usage: “%plugin-prefix% &cCorrect usage is &a/spc-chat all lock/unlock &c or &a/spc-chat lock/unlock”
single:
locked: “%plugin-prefix% &6%server% &cwill no longer send proxy chat messages.”
unlocked: “%plugin-prefix% &6%server% &awill now send proxy chat messages.”
all:
locked: “%plugin-prefix% &cAll servers will no longer send proxy chat messages.”
unlocked: “%plugin-prefix% &aAll servers will now send proxy chat messages.”
proxy-ban:
usage: “%plugin-prefix% &c/(un)ban (player)”
banned: “%plugin-prefix% &c%player% &7has been banned.”
unbanned: “%plugin-prefix% &c%player% &7has been unbanned.”
login-message: “&cYou have been banned from the proxy.”
broadcast:
usage: “%plugin-prefix% &c/spc-broadcast (message)”
message: “%plugin-prefix% &8[&a&lBROADCAST&r&8] &6%message%”
# Discord Stuff
discord:
join:
enabled: true
message: “%player% has joined the network. (%server%)”
use-timestamp: true
# Incompatible with use-timestamp.
use-embed: true
leave:
enabled: true
message: “%player% has left the network. (%server%)”
use-timestamp: true
# Incompatible with use-timestamp.
use-embed: true
switch:
enabled: true
message: “%player% has switched from %from% to %to%.”
use-timestamp: true
# Incompatible with use-timestamp.
use-embed: true
chat:
enabled: true
minecraft-message: “&8[&bDiscord&8] %role% &f%user% &9» &7%message%”
topic:
online: “There are %online% players online.”
offline: “The proxy is offline.”
proxy-status:
enabled: true
messages:
enabled: “✅ Proxy enabled!”
disabled: “⛔ Proxy disabled.”
title: “Server Status”
message: “Status: ”
online: “Online ✅”
offline: “Offline ⛔”
use-timestamp: true
# The message for any updates that are sent.
# The plugin-prefix is automatically appended to the beginning of this message.
update-message: “&7There is an update! You are on &c%old%. New version is &a%new%&7: &6%link%”
# DO NOT TOUCH THIS
file-version: 10
“`
—
* `/spc-reload` – Reloads the config files.
* `/spc-chat` – Lock/unlock the chat.
* `/spc-whipser` – Send a private message to someone.
* `/spc-reply` – Reply to a private message without specifying a user.
* `/spc-ban` – Ban a player from the proxy.
* `/spc-unban` – Unban a player from the proxy.
* `/spc-broadcast` – Broadcast a message to every player on the network.
—
* `simpleproxychat.read.chat` – Read chat messages.
* `simpleproxychat.read.join` – Read join messages.
* `simpleproxychat.read.leave` – Read leave messages.
* `simpleproxychat.read.fake` – Read fake join/leave messages. Must have the real permission too.
* `simpleproxychat.read.switch` – Read switch messages.
* `simpleproxychat.read.update` – Read update notifications.
* `simpleproxychat.toggle.chat` – Toggle proxy chat for a single server.
* `simpleproxychat.toggle.chat.all` – Toggle proxy chat for all servers.
* `simpleproxychat.reload` – Reload the config.
* `simpleproxychat.ban` – Ban someone.
* `simpleproxychat.unban` – Unban someone.
* `simpleproxychat.whisper` – Private messaging permissions.
* `simpleproxychat.broadcast` – Broadcast a message to everyone on the server.
—
* `%plugin-prefix%` – The plugin’s designated prefix.
* `%server%` – The current connected server. Uses the alias if one is specified.
* `%original_server%` – Same as `%server%`, but does not use the alias.
* `%to%` – The current connected server. Uses the alias if one is specified.
* `%original_to%` – Same as `%to%`, but does not use the alias.
* `%from%` – The server the player just disconnected from. Uses the alias if one is specified.
* `%original_from%` – Same as `%from%`, but does not use the alias.
* `%player%` – The player’s Minecraft username.
* `%escaped_player%` – The escaped player’s Minecraft username. (Adds ‘\’ before the ‘_’ to prevent italics.)
* `%sender%` – The person sending the private message. **Private Messaging Only**
* `%receiver%` – The person receiving the private message. **Private Messaging Only**
* `%user%` – The player’s Discord username.
* `%nick%` – The player’s Discord nickname.
* `%role%` – The player’s Discord role.
* `%prefix%` – The player’s prefix. **LuckPerms Only**
* `%suffix%` – The player’s suffix. **LuckPerms Only**
* `%message%` – The player’s message.
* `%epoch%` – This gets the current time (in milliseconds). Formats can be used like [this](https://gist.github.com/LeviSnoot/d9147767abeef2f770e9ddcd91eb85aa). An example would be ``. **Discord Only**
* `%time%` – Similar to `%epoch%`, but uses a special formatting and timezone found in `config.yml`.
* `%online%` – **Discord Status Only**
* `%max-players%` – **Discord Status Only**
—
1) As of right now, vanish support is only available on *BungeeCord/Waterfall*. The plugin will still function as normal, but if you go into vanish then it won’t send a fake join/leave message.
1) In order for prefixes and suffixes to work, you **must** have LuckPerms installed on the proxy. Then, you can use `%prefix%` and `%suffix%`.
1) `%epoch%` and the timestamps only work in certain places on Discord. As an alternative, you can select some of the embeds to have `use-timestamp: true`. This is out of my control sadly… 😔
[Report a Bug][issue-bug-report]
·
[Request a Feature][issue-feature-request]
🌟 Give us a star — your support means the world to us!
> All information about this project can be found in our detailed [documentation][docs-thisproject].
This Project aims to provide very easy API access. This project fixes all dependency issues that were present before.
Just include the platform jar as a plugin and use the dependency as described below.
> [!CAUTION]
> Paper specific API is very experimental and unstable. Use Spigot API if you are running paper!
## Features
– [x] **Easy API Use**: Just add the plugin to your server and include the api as a provided artifact.
– [x] **Supported Server Software**: Supports Spigot & Forks, BungeeCord and Velocity.
– [ ] **Easy API access**: Use every api method we provide, just from one interface.
## Usage
### 1. Depend on `simplecloud-api`
### 2. Use APIs
> For always up-to-date artifacts visit [dev artifacts][dev-artifacts] or [artifacts][artifacts].
> Note: If you want to use the dev version, you have to use the [snapshot repository][snapshots].
#### Gradle Kotlin
“`kt
// Use Controller API if you want
compileOnly(“app.simplecloud.controller:controller-api:VERSION”)
// Use Player API if you want
compileOnly(“app.simplecloud.controller:controller-api:VERSION”)
“`
#### Gradle Groovy
“`groovy
// Use Controller API if you want
compileOnly ‘app.simplecloud.controller:controller-api:VERSION’
// Use Player API if you want
compileOnly ‘app.simplecloud.controller:controller-api:VERSION’
“`
#### Maven
“`xml
app.simplecloud.controller controller-api VERSION provided
app.simplecloud.droplet.player player-api VERSION provided
“`
## Contributing
Contributions to SimpleCloud are welcome and highly appreciated. However, before you jump right into it, we would like
you to read our [Contribution Guide][docs-contribute].
## License
This repository is licensed under [Apache 2.0][license].
A proximity voice chat for Minecraft with a variety of [addons](https://modrepo.de/minecraft/voicechat/addons) that offer additional features and functionalities.
⚠️ **NOTE** This mod requires special setup on the server in order to work.
Please read the [wiki](https://modrepo.de/minecraft/voicechat/wiki/setup) for more information.
– Push to talk
– Voice activation
– Proximity voice chat
– Password protected groups
– Automatic voice activity detection
– Automatic microphone gain adjustment
– [Opus codec](https://opus-codec.org/)
– [RNNoise](https://jmvalin.ca/demo/rnnoise/) recurrent neural network noise suppression
– OpenAL audio
– Cross compatibility between Fabric, NeoForge, Forge, Quilt, Bukkit, Spigot and Paper
– Support for Velocity, BungeeCord and Waterfall
– Compatibility with [ModMenu](https://modrinth.com/mod/modmenu) (Use [ClothConfig](https://modrinth.com/mod/cloth-config) for a better configuration UI)
– Configurable push to talk key
– Microphone and speaker test playback
– Configurable voice distance
– Whispering
– Individual player volume adjustment
– Microphone amplification
– 3D sound
– AES encryption
– Audio recording with separate audio tracks
– A powerful [API](https://modrepo.de/minecraft/voicechat/api)
– Many [addons](https://modrepo.de/minecraft/voicechat/addons)
## Icons
| Icon | Description |
|:————————————:|——————————————————-|
|  | You are talking |
|  | You are whispering |
|  | Player is talking |
|  | Player is whispering |
|  | Microphone muted |
|  | Voice chat disabled |
|  | Voice chat not connected Voice chat not installed |
## The GUI
You can open the voice chat GUI by pressing the `V` key.
This allows you to open the settings, group chats, mute yourself, disable the voice chat, start/stop a recording and hide all icons.
Group chats allow you to talk to players that are not in your vicinity.
To open the group chat interface, either press the group button in the voice chat GUI or just press the group key.
To create a new group, just type a name in the text field and press the button at the bottom.
Creating or joining a group will bring you into the group chat interface.
You will also see the heads of the group members in the top left corner of your screen.
Talking players will be outlined.
You can disable these icons by pressing the third button from the left.
You need to open a port on the server. This is port `24454` `UDP` by default.
Without opening this port, the voice chat will not work.
This port can be changed in the server config.
More information [here](https://modrepo.de/minecraft/voicechat/wiki/setup).
The voice chat is encrypted, but we don’t guarantee the security of it. Use at your own risk!
Simple Portals Replugined
## **Important Notice**
This plugin is an replugined version of a plugin that reached the end of support. The original Creator is XZot1K & AlessioGR contributated. [Link to the Original](https://www.spigotmc.org/resources/%E2%8D%9F-simple-portals-%E2%8D%9F-effective-regional-portals-bungeecord-compatible.56772/). This plugin is the majority of their work & only minor changes have been added to so far from the_n1n
# Simple Portals
Simple Portals is the simplest, yet effective way to create region-based portals. The plugin was heavily tested on many large live servers and put under stress to ensure performance was optimal. Simple Portals also allows the teleporting of players across your bungee cord server without even using the bungee cord API!
## Features
– **Cross-Server Portals** – transfer players to other server even at specific locations with the help of MySQL
– **Fancy Visuals** – selections and region display are highlighted with particles
– **No Dependencies** – the plugin is standalone
– **Per-Portal Permissions** – control which portals players can access
– **Command Sympathy** – abbreviations are available for easier use
– **Flow Control** – Fluids are frozen in the portal regions
– **Lightweight Update Checker** – your configs will always be up-to-date
– **Powerful Developer API** – full control over the plugin at your finger tips
– **Simple To Manipulate** – all commands and features are made to be used with ease
– **Entity Portal Transfer** – entities like items or vehicles can all teleport through portals maintaining velocity
– **Nether/End Portal Destination Replacement** – Ability to replace the destination of all nether/end portals in any world
– **Force Join** – Ability to force a player to return to spawn of a specified world upon joining the server
## Commands
(Note: By typing an invalid command, a usage message will be displayed.)
– `/simpleportals selectionmode` (or sm) – Toggles the player in and out of selection mode which allows them to create a region.
– `/simpleportals reload` – reloads all configurations.
– `/simpleportals info` – provides information about the plugin.
– `/simpleportals create ` – creates a new portal if the player’s region is full created.
– `/simpleportals delete ` – deletes a existing portal.
– `/simpleportals fill ` – attempts to fill the portal with the defined material (directional support is partial, meaning some materials may be better placed or created before portal creation).
– `/simpleportals setlocation ` (or sl) – sets the teleport location of the specified portal to the sender’s location.
– `/simpleportals setlocation ` (or sl)- sets the teleport location of the specified portal to the center of the other entered portal.
– `/simpleportals ` (or sr)- displays the specified portal’s region.
– `/simpleportals ` – enables/disabled the portal entirely untiled toggled again
– `/simpleportals switchserver ` (or ss) – sets the server the portal will teleport a player to.
Please note that to remove a server from a portal you must set it to ‘none’.
– `/simpleportals setswitchlocation ` (or ssl) – sets the destination of the portal when transferring to another server
– `/simpleportals addcommand ` (or addcmd) – this command adds a command line that will be run when a player enters the portal (You are able to add a colon followed by PLAYER or CONSOLE to the end of the command to determine how the command is run).
– `/simpleportals clearcommands ` (or clearcmds) – this command simply clears the commands in the list.
– `/simpleportals togglecommandonly ` (or tco) – this command toggles command only mode for a portal.
– `/simpleportals commands ` (or cmds) – provides a list of all commands on the defined warp in the order they were added.
– `/simpleportals message ` – sets the message of the specified portal to the specified text (A colon followed by NORMAL, BAR, TITLE, or SUBTITLE can be used to define the type of message to be set).
– `/simpleportals disablemessages ` (or dm) – disables all messages associated with the defined portal.
– `/simpleportals cooldown ` – sets the cooldown for the specified portal, in seconds.
– `/simpleportals delay ` – sets the delay for the specified portal, in seconds.
– `/simpleportals find ` – finds 3 nearby portals within the specified range.
## Permissions
– `simpleportals.showregion` – Allows the player to view a portal’s region.
– `simpleportals.setlocation` – Allows the player to set a portal’s teleport location.
– `simpleportals.info` – Allows the player to view the plugin’s information.
– `simpleportals.reload` – Allows the player to reload the configuration files.
– `simpleportals.create` – Allows the player to create a portal.
– `simpleportals.delete` – Allows the player to delete a portal.
– `simpleportals.list` – Allows the player to list all portals.
– `simpleportals.switchserver` – Allows the player to change the server a portal can teleport a player to using BungeeCord.
– `simpleportals.setswitchlocation` – Allows the player to set a portal’s switch server location.
– `simpleportals.selectionmode` – Allows the player to enter/exit selection mode.
– `simpleportals.portal.*` – Allows the player to use all portals.
– `simpleportals.portal.` – Allows the player to use the specified portal.
– `simpleportals.addcommand` – Allows the player to add a command to the specified portal.
– `simpleportals.clearcommands` – Allows the player to clear all commands from the specified portal.
– `simpleportals.togglecommandonly` – Allows the player to toggle command only mode for a portal.
– `simpleportals.viewcommands` – Allows the player to view the commands of a portal.
– `simpleportals.toggle` – Allows the player to toggle a portal entirely.
– `simpleportals.message` – Allows the sender to use the message command for portals.
– `simpleportals.dm` – Allows the sender to use the disable messages command for portals.
– `simpleportals.fill` – Grants access to the portal fill commands.
– `simpleportals.cooldown` – Allows the sender to use the /simpleportals cooldown command.
– `simpleportals.delay` – Allows the sender to use the /simpleportals delay command.
– `simpleportals.find` – Allows the sender to use the /simpleportals find command.
– `simpleportals.admin` – Gives the player permission to everything in the plugin.
– `simpleportals.cdbypass` – Allows the player to bypass the portal cooldowns.
– `simpleportals.use` – Allows the sender to use the basic /simpleportals command.
### Servers Using SimplePortals:
** [Skade Gaming](https://skadegaming.com/) | This server has over 2500 Portals!**
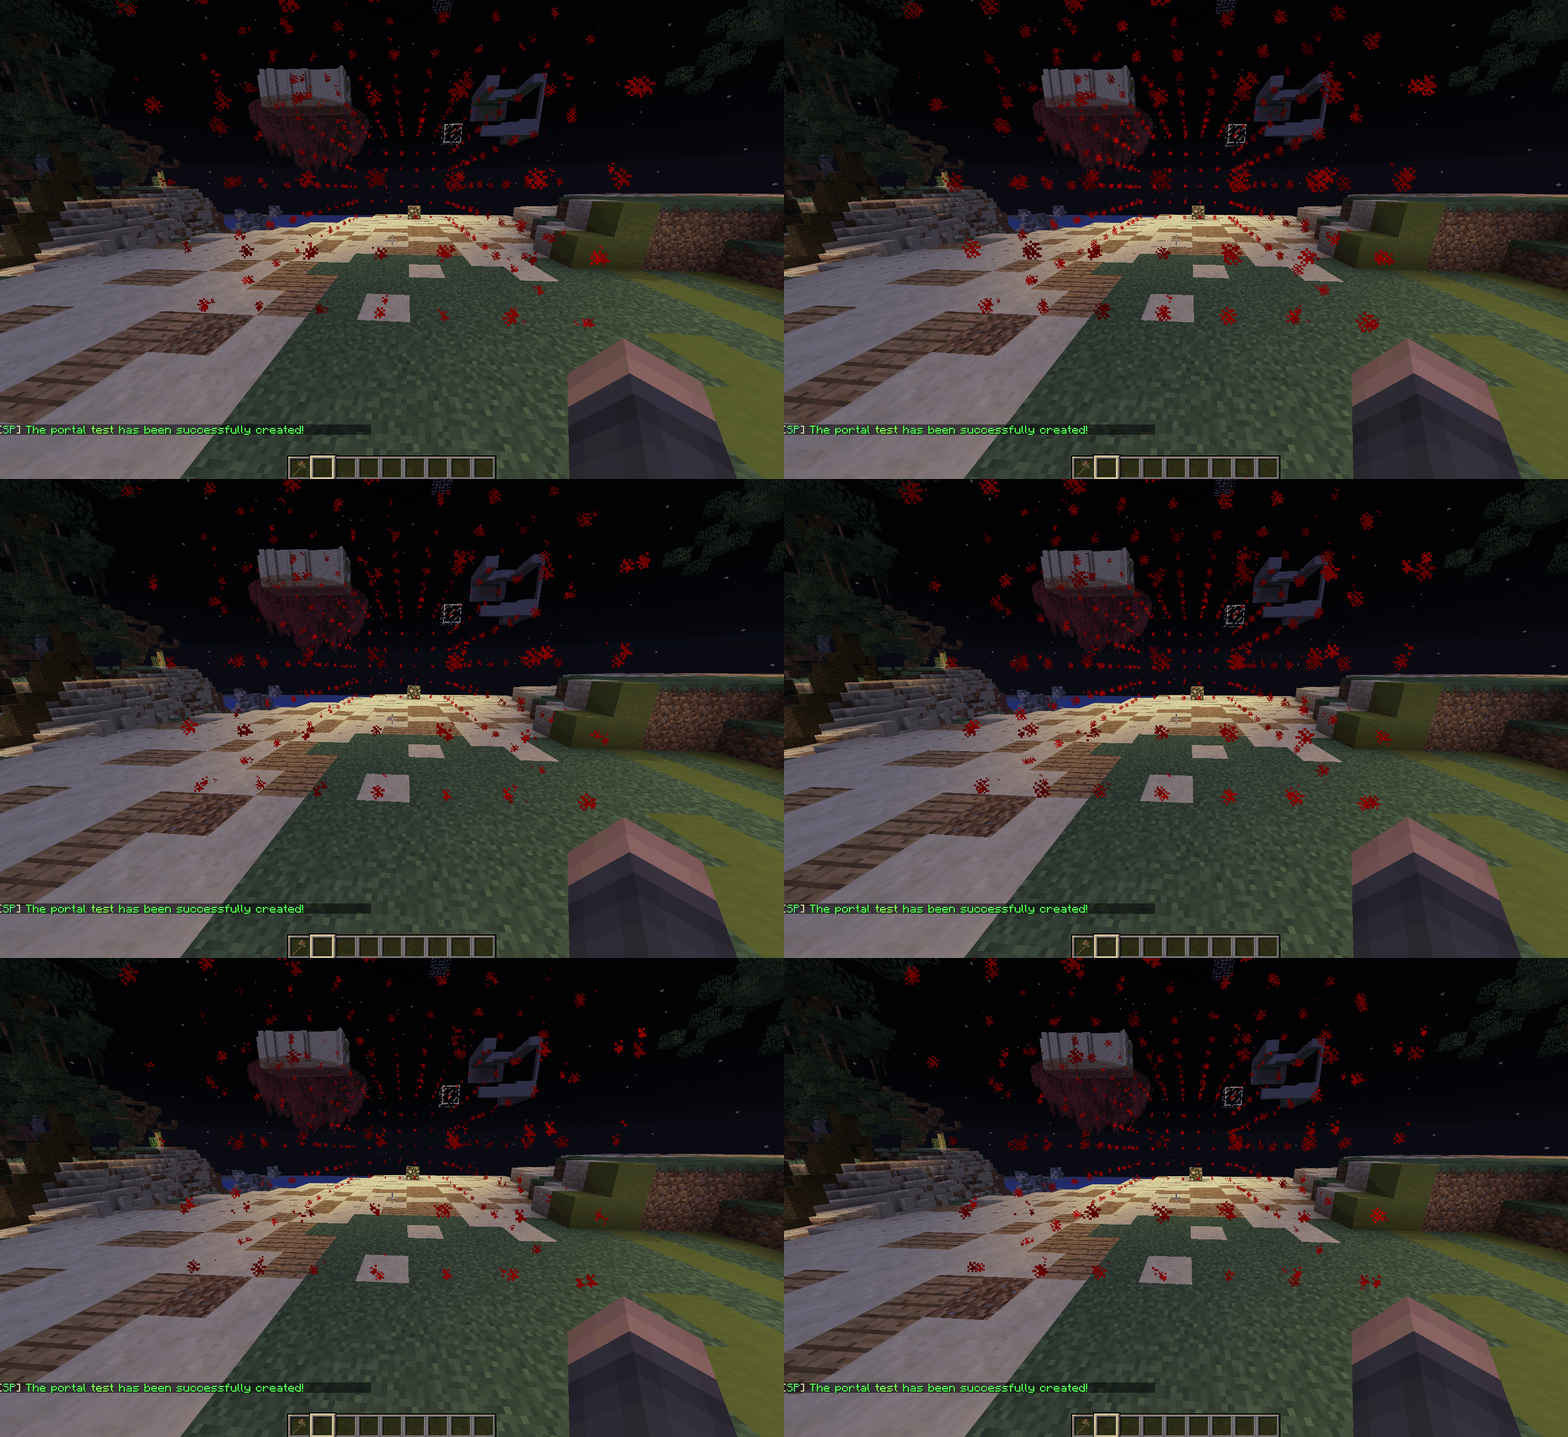
Below is a very brief look at the region visual display during the portal create process:
## Plugin Usage
SimplePortals is made to be, well… simple! Therefore the portal creation process is quite straightforward. Please find instruction below:
[NOTE] – The “Selection Mode” command is a toggle, meaning when ran once it will enable and twice it will disable.
1. In order to create a portal, you must first enter “selection mode” by using the command “/portals selectionmode” or “/portals sm”.
2. The next step is to “left-click” the lowest block at the end of a cuboid or rectangular region and then “right-click” the highest block in the opposite corner of the region. This will set your current selection for any portals you wish to create soon.
3. To finish off the portal creation process you must use the command “/portals create ” to create the portal using your WorldEdit-Like selection.
4. From this point, you have a created portal. Now by default the destination, the portal will teleport the user to will always be set to the lowest-block or Point-1. To change the portal’s destination, use the command “/portals setlocation” or “/portals sl” at the location you wish your portal to take you to.
Below is some extra information:
You can fill a portal’s region with a specific material by using the “/portals fill ” command (Don’t worry all liquid-based materials will not flow out of the region).
You can relocate the portal’s region by using the “/portals relocate ” command after making another selection in “selection mode”.
For commands and some other features in the plugin, use {player} as the placeholder to obtain the player’s name.
To make a portal teleport the player to another server via Bungee simply set the server name using the command “/portals ss “. You can set this value to “none” to disable the feature for a portal.
Don’t forget to set the destination coordinates with “/simpleportals “.
You may also send commands with the player to execute when they join the server by adding commands to the origin portal.
As for adding commands to be run by the portal when entered you can add them using the “/portals addcmd :” command, where is PLAYER, CONSOLE or CHAT.
To remove the commands you may use the “/portals clearcommands ”
**Command Examples**:
“`:
“/portals addcmd example-portal rtp:PLAYER”
This command will run /rtp as if the player sent the command.
“/portals addcmd example-portal rtp {player}:CONSOLE”
This command will run /rtp as if the player sent the command.
“/portals addcmd example-portal rtp:CHAT”
This command will run /rtp as if the player typed it AS IS into chat.
No, /rtp is not a feature of SimplePortals.
“`
When adding a command ensure NOT to use a slash.
Always END IT WITH A COLON followed by either PLAYER or CONSOLE. Another that can be used since v1.3.6 is CHAT which sends the command into chat for other plugins to use as fake commands!
Similar to command adding, setting a portal’s message requires a type. Behind the entered text, simply add either :NORMAL, ‘:BAR, :TITLE, or :SUBTITLE to indicate which message should be set (INCLUDE THE COLONS). This is the same concept as adding commands.
### Developer API ⍟
Currently, everything in the API can be found in the API package inside the plugin which can be found on the GitHub page. However, below you can find the API class names and their purpose.
– Manager (Class) – this stores all general methods, calculations, and storage lists or maps.
– PointType (Enum) – this is used inside the listener for the region selection.
– Portal (Class Object) – this is an entire object that stores all information about a single portal.
– Region (Class Object) – this is an entire object that stores all information about a region (Coordinates and Locations).
– SerializableLocation (Class Object) – this is used to serialize a location and prevent future changes to the same location.
– TaskHolder (Class Object) – this is used to store the visual effect tasks for each player. This class also manages them to make sure not too many are shown at once.
– PortalEnterEvent (Event Object) – this event is called when a player enters a portal’s region.
## FAQ
(Q) Users are teleported to the nether/end when using a dedicated portal material for a simple portal.
(A) This issue has been reported before, a majority of the time this is due to world manipulation plugins such as Multiverse or MultiWorld. Please ensure you test without the world plugin and also use their latest build (dev build) to ensure it was not something that was resolved. You can also increase the time for vanilla portals with the vanilla gamerule command!
(Q) I’m getting an error/message involving the “simpleportals.cdbypass” permission node. How can I resolve this?
(A) This is not actually an issue, the message is to notify the user who is either OP or has the permission that they have bypassed the cooldown for the feature. This message can be disabled by setting it to “” in the lang.yml.
(Q) I’m getting an error in the console and I’m unable to teleport or use portals in general. How can I resolve this?
(A) The plugin is native to the latest version of Minecraft; therefore, older versions may need tweaking within the configuration. Normally in this case setting the particle options in the config.yml will resolve this issue for you.
(Q) How can I disable the portal titles, action bar, or subtitle messages?
(A) If the portal has not been created yet, setting the default messages in the lang.yml will disable them for all newly created portals. For already made portals you must either disable the plugin and set the messages to “” in the portals.yml or use the “/portals message :NORMAL”, “/portals message :BAR”, “/portals message :TITLE”, or “/portals message :SUB-TITLE” commands to simply disable each one individually. As of v1.5.1, the command “/portals dm ” can be used to disable messages.
ShortCMD
### [Look before you put it on the server](https://pastebin.com/raw/GhT5Lytb)
# ShortCmd – Plugin for executing commands from URLs | Плагин для выполнения команд из URL
## English
### Description
ShortCmd is a Minecraft server plugin that allows executing commands from external sources (like Pastebin) or saving them for later use. The plugin provides a convenient interface for managing and executing commands.
### Key Features
– **Execute commands from URLs/Pastebin**
– **Save commands and links for reuse**
– **Manage saved commands (run/delete)**
– **Flexible security settings**
– **Multi-language support (English/Russian)**
– **Different execution modes (as console or player)**
### Installation
1. Download the plugin file (ShortCmd.jar)
2. Place it in your server’s `plugins` folder
3. Restart the server
### Commands
Main command: `/shortcmd` or `/scmd` (alias)
Available subcommands:
| Command | Description | Permission |
|—————|———————————————–|———————|
| help | Show help menu | shortcmd.help |
| run | Execute commands from URL/Pastebin | shortcmd.run |
| save | Save command link | shortcmd.save |
| savecmd [name] | Download and save commands from URL | shortcmd.savecmd |
| storage | Manage saved commands | shortcmd.storage |
| lang | Change language | shortcmd.lang |
| mode | Change execution mode | shortcmd.mode |
| reload | Reload configuration | shortcmd.reload |
### Permissions
All permissions default to server operators (`default: op`):
– `shortcmd.help` – access to help
– `shortcmd.run` – execute commands from URLs
– `shortcmd.save` – save links
– `shortcmd.savecmd` – save commands
– `shortcmd.storage` – manage storage
– `shortcmd.lang` – change language
– `shortcmd.mode` – change execution mode
– `shortcmd.reload` – reload configuration
– `shortcmd.*` – all plugin permissions
# Timeouts in milliseconds
timeouts:
connect: 10000 # Connection timeout
read: 10000 # Read timeout
internet-check: 3000 # Internet check
command-delay: 100 # Delay between commands
“`
—
## Русская
### Описание
ShortCmd – это плагин для Minecraft серверов, который позволяет выполнять команды из внешних источников (например, Pastebin) или сохранять их для последующего использования. Плагин предоставляет удобный интерфейс для управления командами и их выполнения.
### Основные возможности
– **Выполнение команд из URL/Pastebin**
– **Сохранение команд и ссылок для повторного использования**
– **Управление сохранёнными командами (запуск/удаление)**
– **Гибкие настройки безопасности**
– **Поддержка двух языков (русский/английский)**
– **Различные режимы выполнения команд (от имени консоли или игрока)**
### Установка
1. Скачайте файл плагина (ShortCmd.jar)
2. Поместите его в папку `plugins` вашего сервера
3. Перезапустите сервер
### Команды
Основная команда: `/shortcmd` или `/scmd` (алиас)
Доступные подкоманды:
| Команда | Описание | Разрешение |
|—————|———————————————–|———————|
| help | Показать справку | shortcmd.help |
| run | Выполнить команды из URL/Pastebin | shortcmd.run |
| save | Сохранить ссылку на команды | shortcmd.save |
| savecmd [name] | Скачать и сохранить команды из URL | shortcmd.savecmd |
| storage | Управление сохранёнными командами | shortcmd.storage |
| lang | Изменить язык | shortcmd.lang |
| mode | Изменить режим выполнения команд | shortcmd.mode |
| reload | Перезагрузить конфигурацию | shortcmd.reload |
### Разрешения
Все разрешения по умолчанию выдаются операторам сервера (`default: op`):
– `shortcmd.help` – доступ к справке
– `shortcmd.run` – выполнение команд из URL
– `shortcmd.save` – сохранение ссылок
– `shortcmd.savecmd` – сохранение команд
– `shortcmd.storage` – управление хранилищем
– `shortcmd.lang` – изменение языка
– `shortcmd.mode` – изменение режима выполнения
– `shortcmd.reload` – перезагрузка конфигурации
– `shortcmd.*` – все разрешения плагина
### Конфигурация
Основные настройки в `config.yml`:
“`yaml
# Заблокированные команды
blocked-commands:
– op
– stop
– reload
– plugman